1. 概述
在本教程中,我們將演示如何使用 Swagger 註解來使我們的文檔更具描述性。首先,我們將學習如何為不同的 API 部分(如方法、參數和錯誤代碼)添加描述。然後,我們將看到如何添加請求/響應示例。
2. 項目設置我們將創建一個簡單的 Products API,它提供創建和獲取產品的各種方法。
要從頭創建一個 REST API,我們可以按照 Spring Docs 提供的教程進行 使用 Spring Boot 創建一個 RESTful Web 服務。
下一步將是設置項目的依賴項和配置。 我們可以按照這篇文章中的步驟設置 Swagger 2 與 Spring REST API。
3. 創建 API
讓我們創建我們的 Products API 並查看生成的文檔。
3.1. 模型
讓我們定義我們的 Product 類:
public class Product implements Serializable {
    private long id;
    private String name;
    private String price;

    // constructor and getter/setters
}
3.2. 控制器
讓我們定義兩個 API 方法:
@RestController
@Tag(name = "Products API")
public class ProductController {

    @PostMapping("/products")
    public ResponseEntity<Void> createProduct(@RequestBody Product product) {
        //creation logic
        return new ResponseEntity<>(HttpStatus.CREATED);
    }

    @GetMapping("/products/{id}")
    public ResponseEntity<Product> getProduct(@PathVariable Long id) {
        //retrieval logic
        return ResponseEntity.ok(new Product(1, "Product 1", "$21.99"));
    }
}
當我們運行項目時,庫將讀取所有暴露的路徑並創建相應的文檔。
讓我們在默認 URL http://localhost:8080/swagger-ui/index.html 中查看文檔:
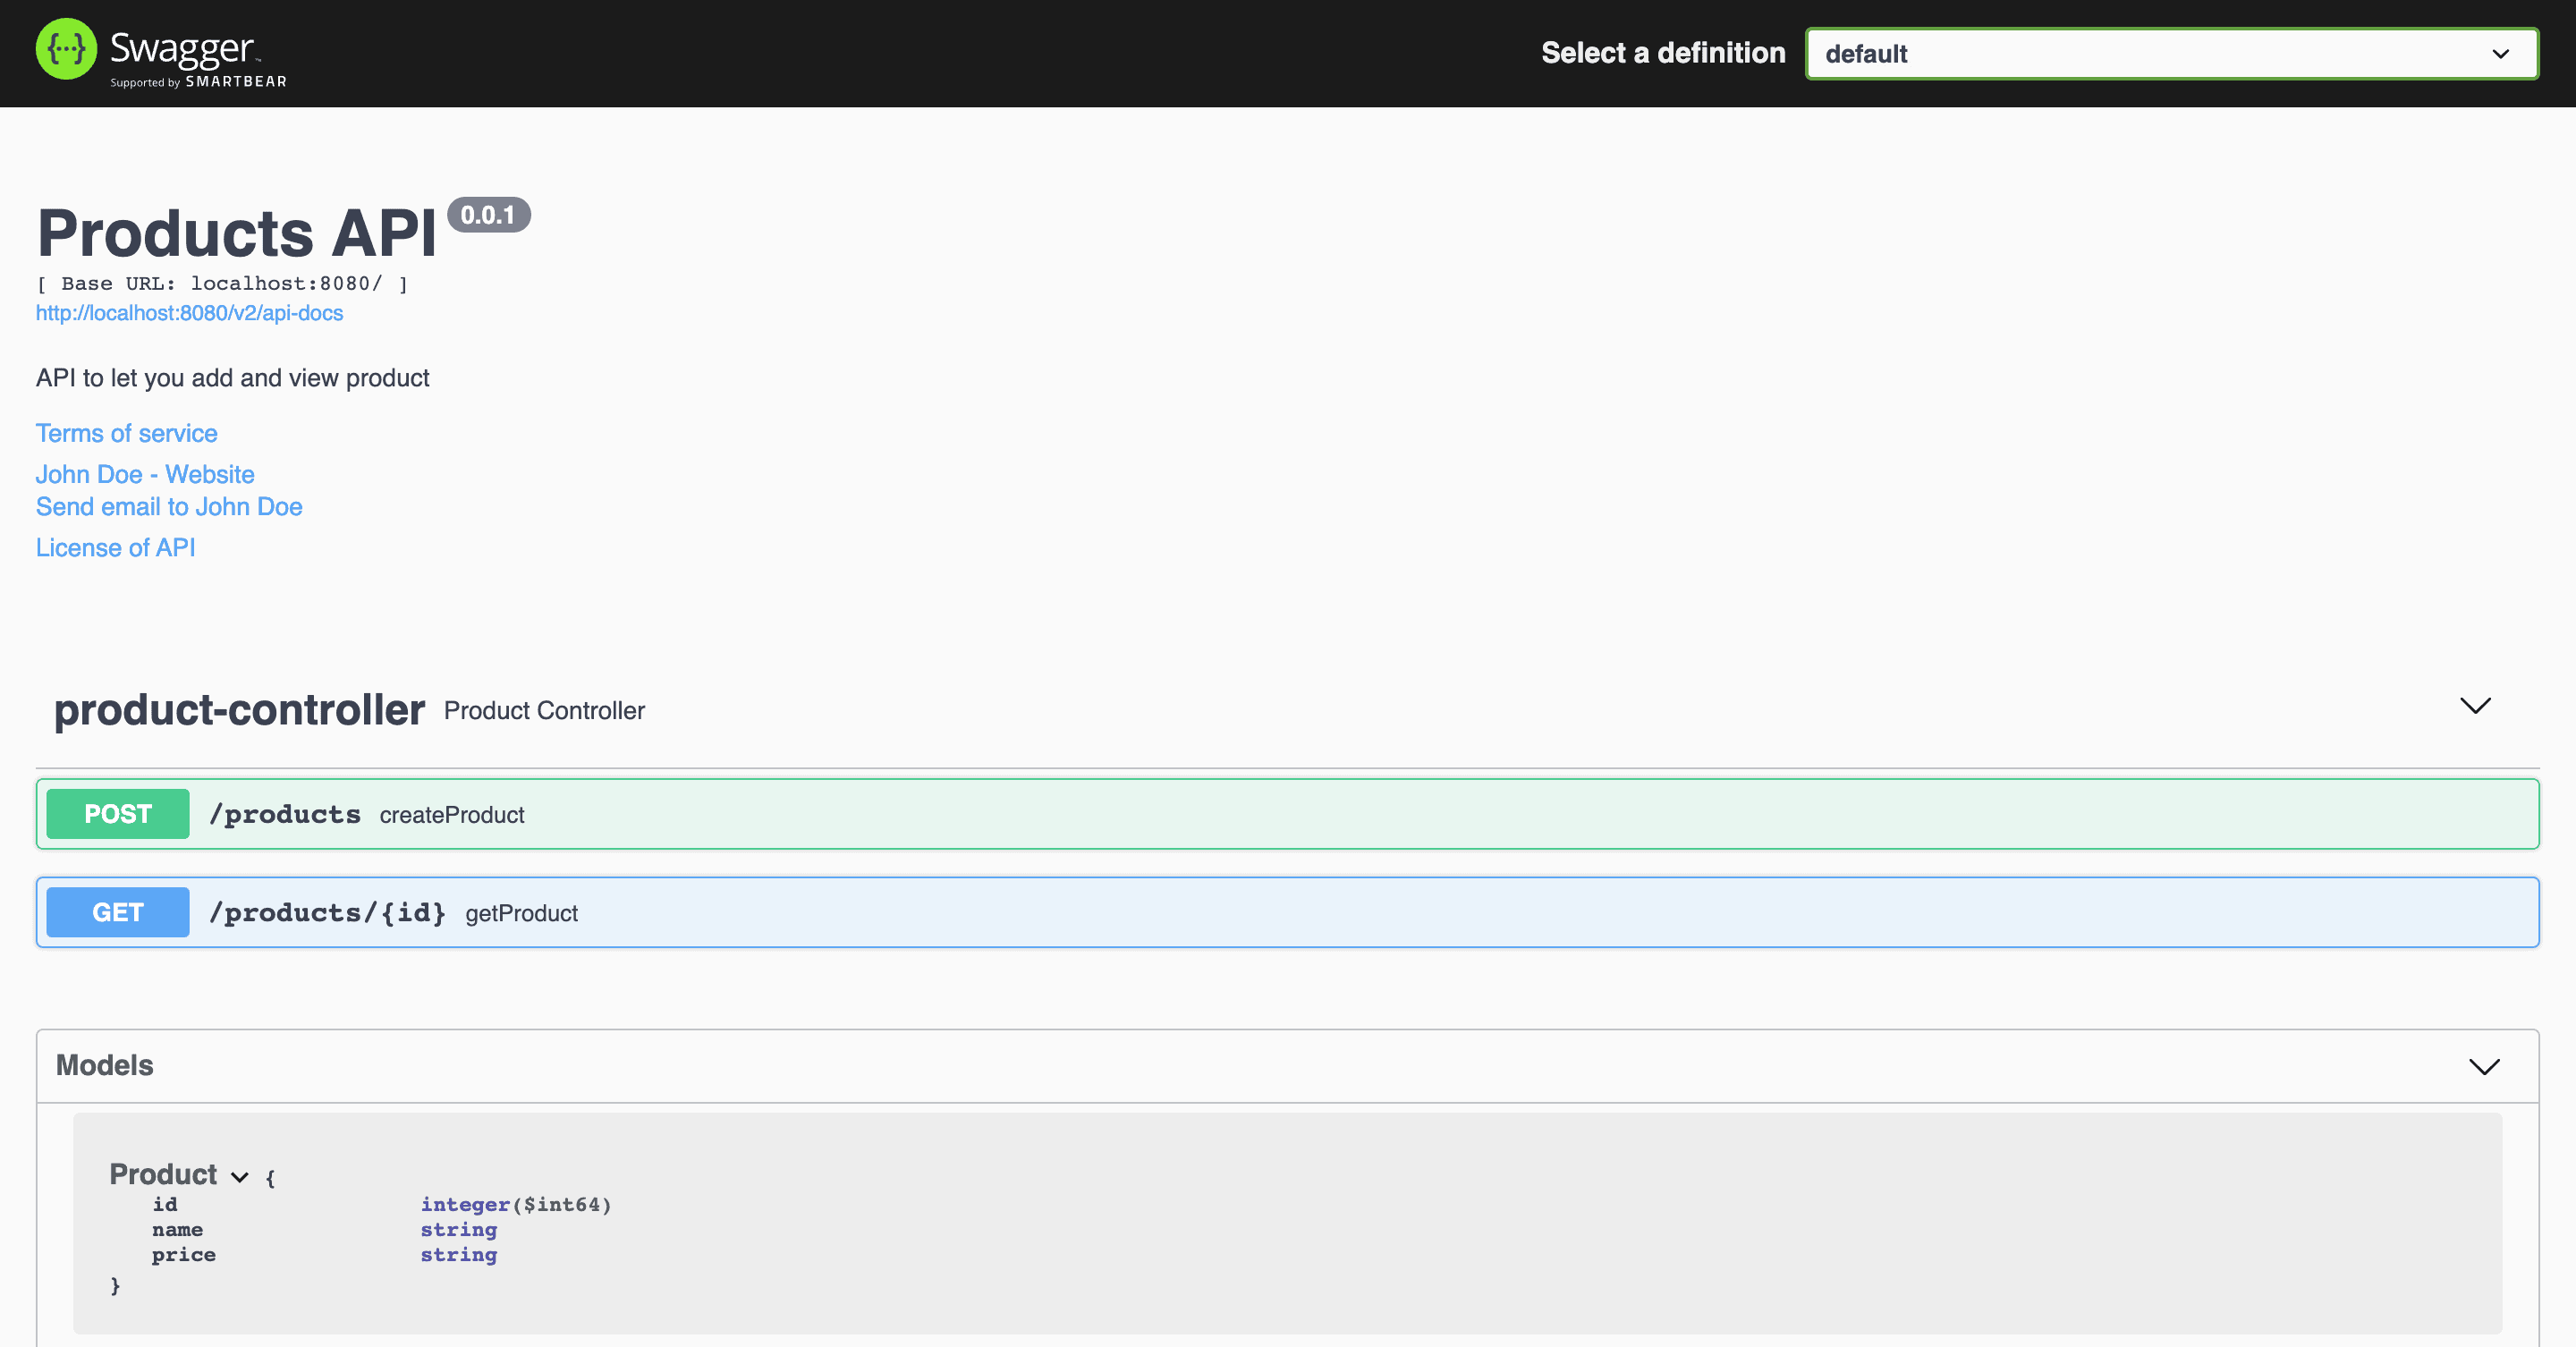
我們可以進一步擴展控制器方法以查看它們的相應文檔。接下來,我們將仔細研究它們。
4. Making Our Documentation Descriptive
現在讓我們通過向不同方法的各個部分添加描述來使我們的文檔更具描述性。
4.1. Add Description to Methods and Parameters
讓我們看看如何使方法更具描述性。我們將向方法、參數和響應代碼添加描述。讓我們從 getProduct() 方法開始:
@Operation(summary = "Get a product by id", description = "Returns a product as per the id")
@ApiResponses(value = {
        @ApiResponse(responseCode = "200", description = "Successfully retrieved"),
        @ApiResponse(responseCode = "404", description = "Not found - The product was not found")
    })
@GetMapping("/products/{id}")
public ResponseEntity<Product> getProduct(@PathVariable("id") @Parameter(name = "id", description = "Product id", example = "1") Long id) {
    //retrieval logic
    return ResponseEntity.ok(new Product(1, "Product 1", "$21.99"));
}
@Operation 定義了 API 方法的屬性。我們使用 value 屬性為操作命名,並使用 notes 屬性添加描述。
@ApiResponses 用於覆蓋響應代碼的默認消息。對於我們想要更改的每個響應消息,我們都需要添加一個 @ApiResponse 對象。
例如,如果產品未找到,並且我們的 API 在此場景中返回 HTTP 404 狀態,如果沒有添加自定義消息,原始消息“未找到”可能難以理解。調用者可能會將其解釋為 URL 不正確。但是,添加描述“產品未找到”會使其更清晰。
@Parameter定義了方法參數的屬性。它可以與路徑、查詢、標題和表單參數一起使用。我們為“id”參數添加了名稱、值(描述)和示例。如果沒有添加自定義設置,庫將僅拾取參數的名稱和類型,如第一個圖像所示。
讓我們看看這如何改變文檔:
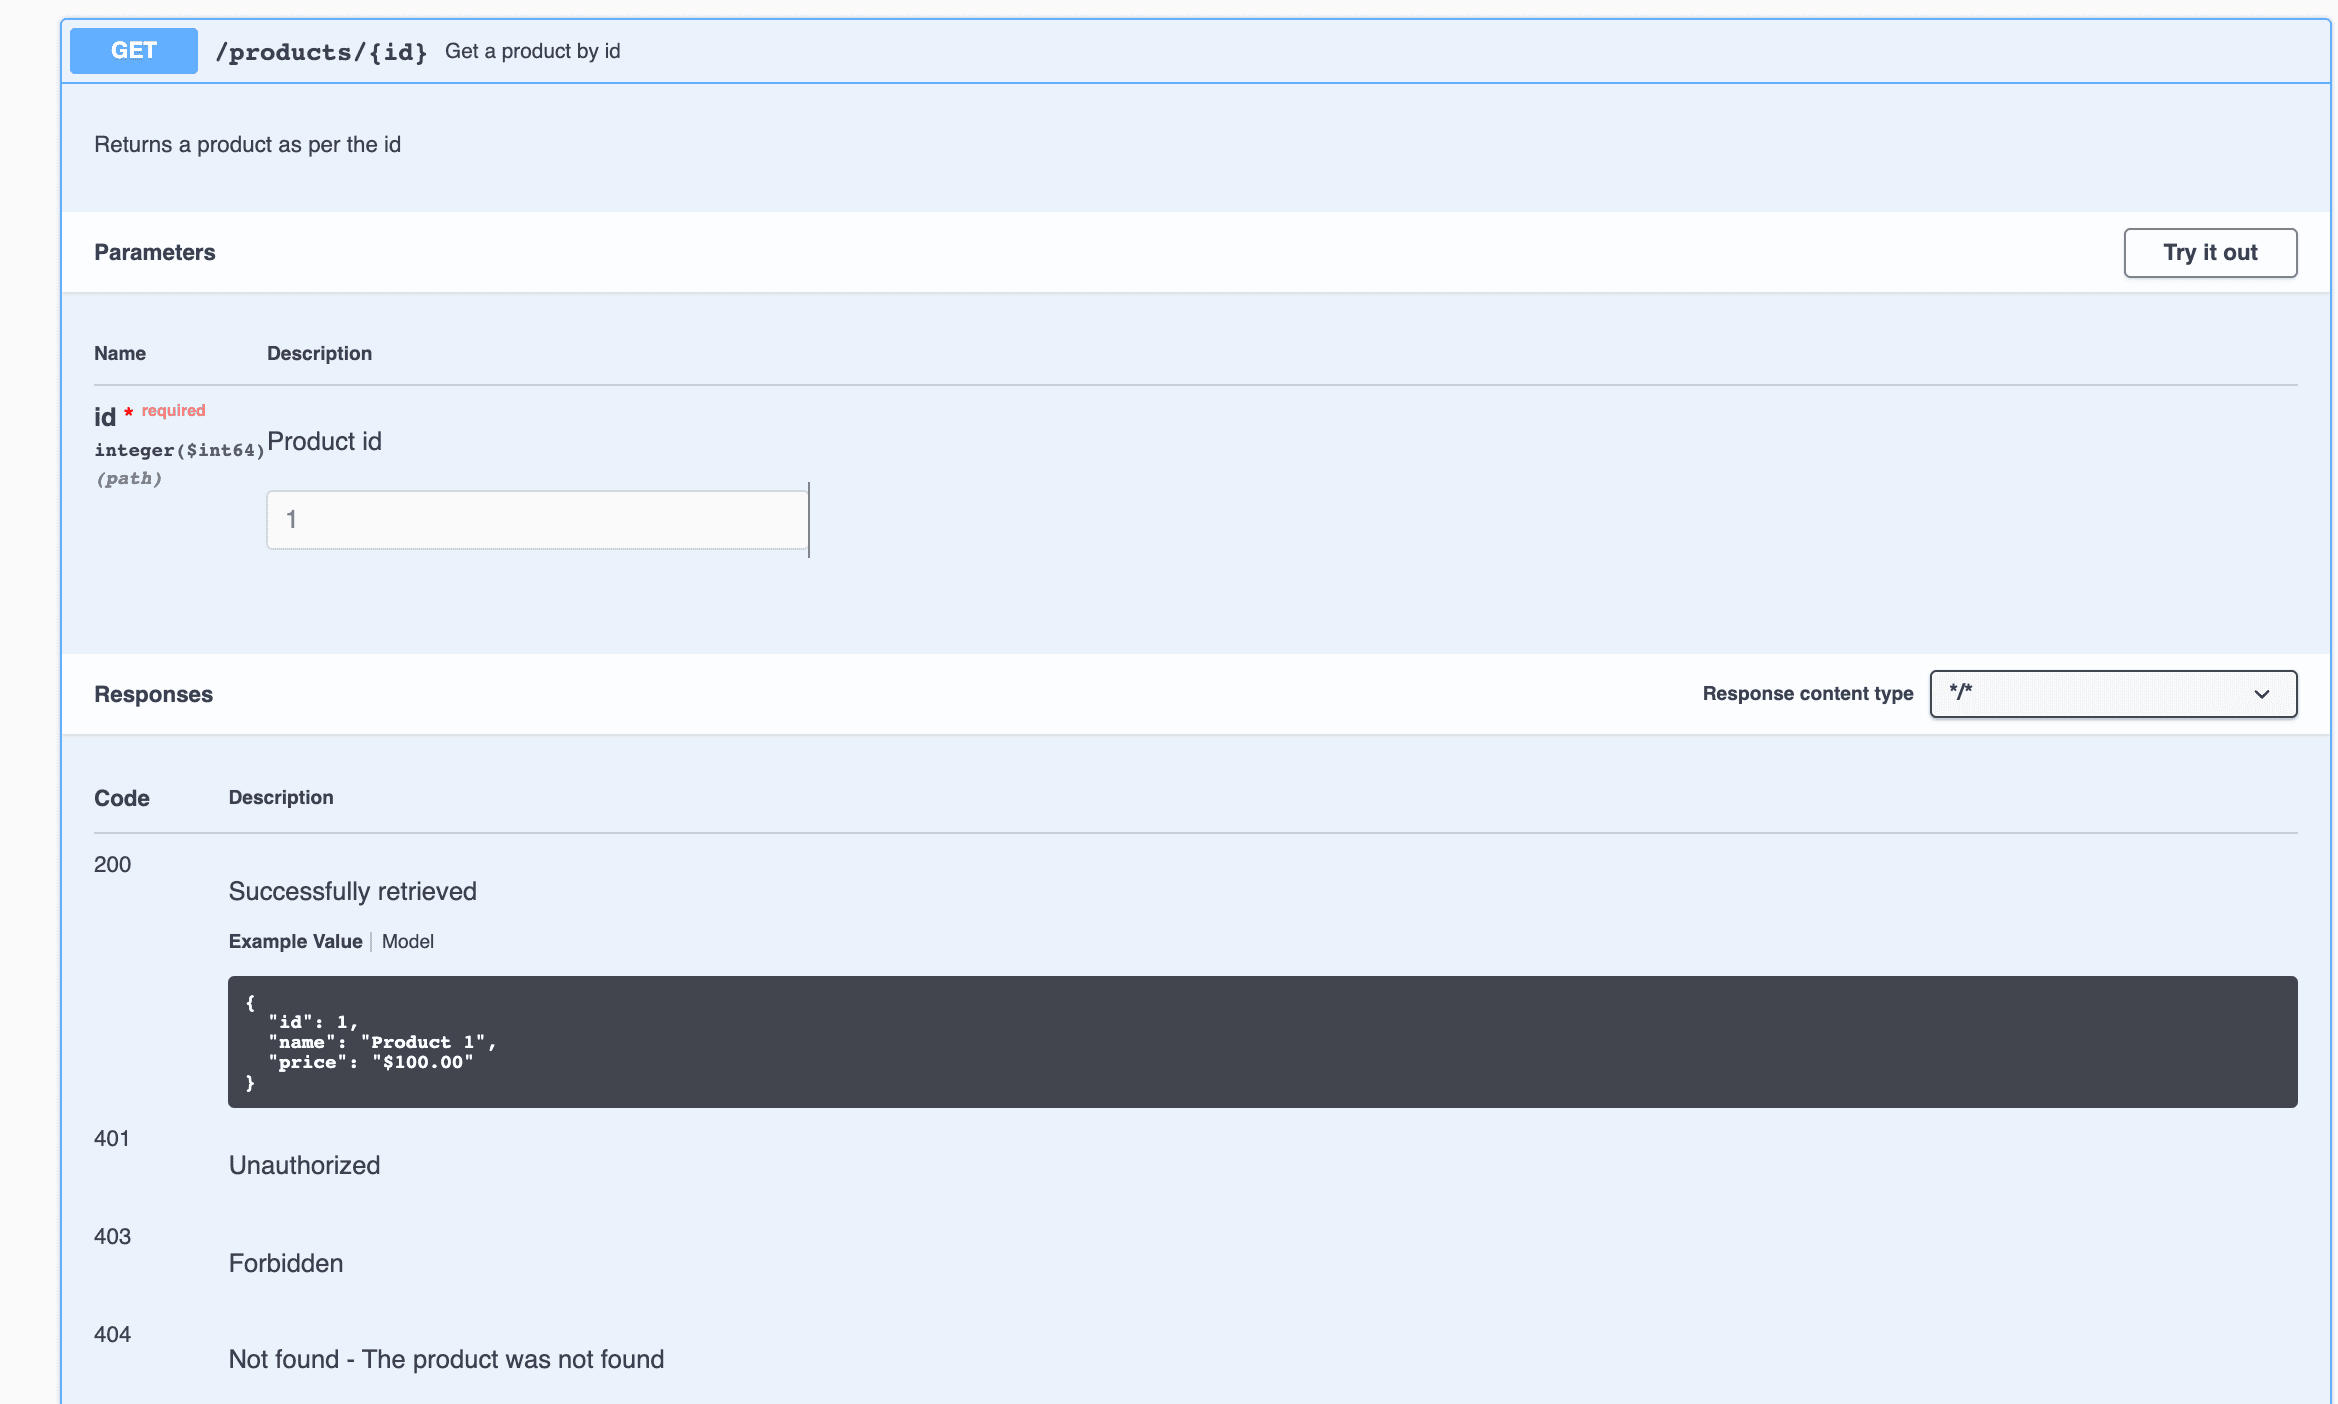
在這裏,我們可以看到名稱“獲取產品 ID”以及 API 路徑 /products/{id}。我們也可以看到描述緊隨其後。此外,在參數部分,我們有一個描述和一個示例,用於字段 id。最後,在響應部分,我們可以看到 200 和 404 代碼的錯誤描述已更改。
4.2. Add Description and Examples to the Model
我們可以對我們的 createProduct() 方法進行類似的改進。由於該方法接受一個 Product 對象,因此為模型提供描述和示例會更有意義。
讓我們對 Product 類進行一些更改以實現此目的:
@Schema(name = "Product ID", example = "1", required = true)
private Long id;
@Schema(name = "Product name", example = "Product 1", required = false)
private String name;
@Schema(name = "Product price", example = "$100.00", required = true)
private String price;
@
讓我們重新啓動應用程序並再次查看我們的 Product 模型的文檔:
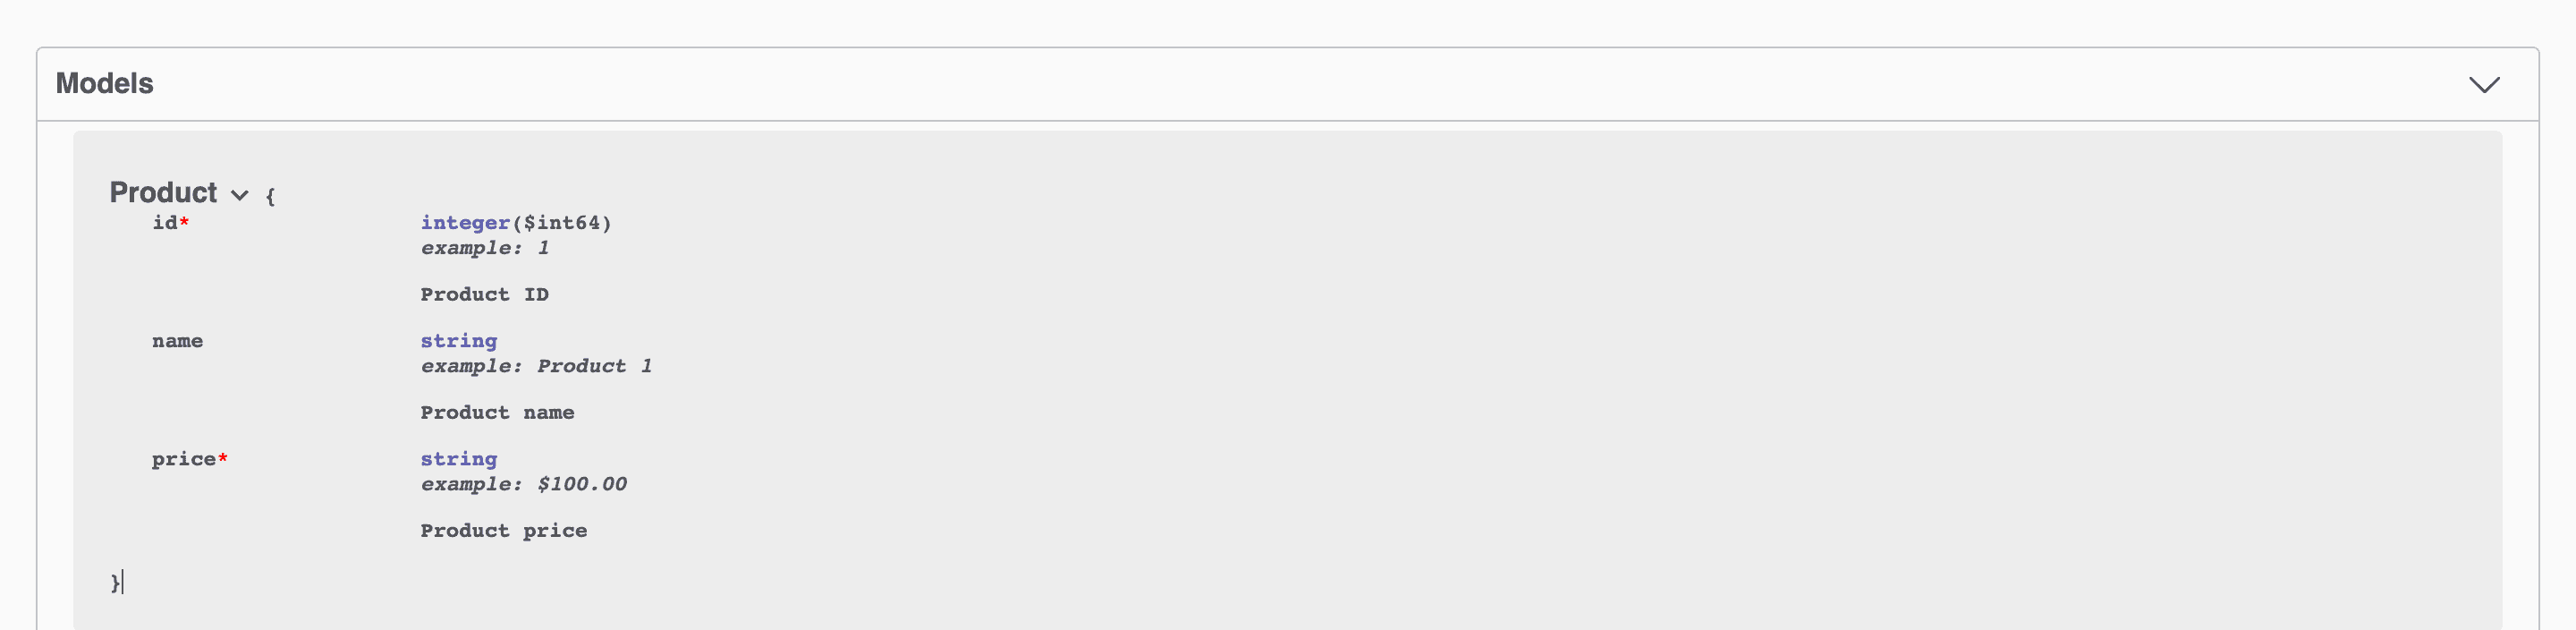
如果我們將其與原始文檔圖像進行比較,我們將找到新圖像包含示例、描述和*(星號)*來標識必需參數。
通過向模型添加示例,我們可以自動創建每個使用模型作為輸入或輸出的方法中的示例響應。例如,從與 getProduct() 方法對應的圖像中,我們可以看到響應包含我們提供的相同值。
向文檔添加示例很重要,因為這可以更精確地定義格式值。如果我們的模型包含日期、時間或價格等字段,則需要定義精確的格式。事先定義格式可以使 API 提供方和 API 客户端之間的開發過程更有效。
5. 結論
在本文中,我們探討了如何提高API文檔可讀性的各種方法。我們學習瞭如何使用註解 @Parameter, @Operation, @ApiResponses, @ApiResponse, 和 @Schema 文檔方法、參數、錯誤消息和模型。
