1. 概述
在本文中,我們將重點介紹 X.509 證書認證的主要用例——驗證通信夥伴的身份
簡單來説——在建立安全連接的同時,客户端會根據服務器頒發的證書(由受信任的證書頒發機構簽發)驗證服務器。
除此之外,X.509 在 Spring Security 中還可以被用於 服務器連接時驗證客户端的身份。 這被稱為 “雙向認證”,我們也將在此處探討如何進行操作。
最後,我們將探討 何時使用這種類型的身份驗證。
為了演示服務器驗證,我們將創建一個簡單的 Web 應用程序,並在瀏覽器中安裝一個自定義證書頒發機構。
此外,對於 “雙向認證”,我們將創建一個客户端證書並修改服務器以僅允許經過驗證的客户端。
強烈建議您按照教程一步一步地操作,並根據後續部分中的説明創建證書、密鑰庫和信任庫。但是,所有可用的文件都可以在 GitHub 倉庫中找到。
2. 自簽名根 CA為了能夠對我們的服務器端和客户端證書進行簽名,我們首先需要創建自己的自簽名根 CA 證書。 這樣一來 openssl 庫,所以在執行下一步之前,需要先安裝它。
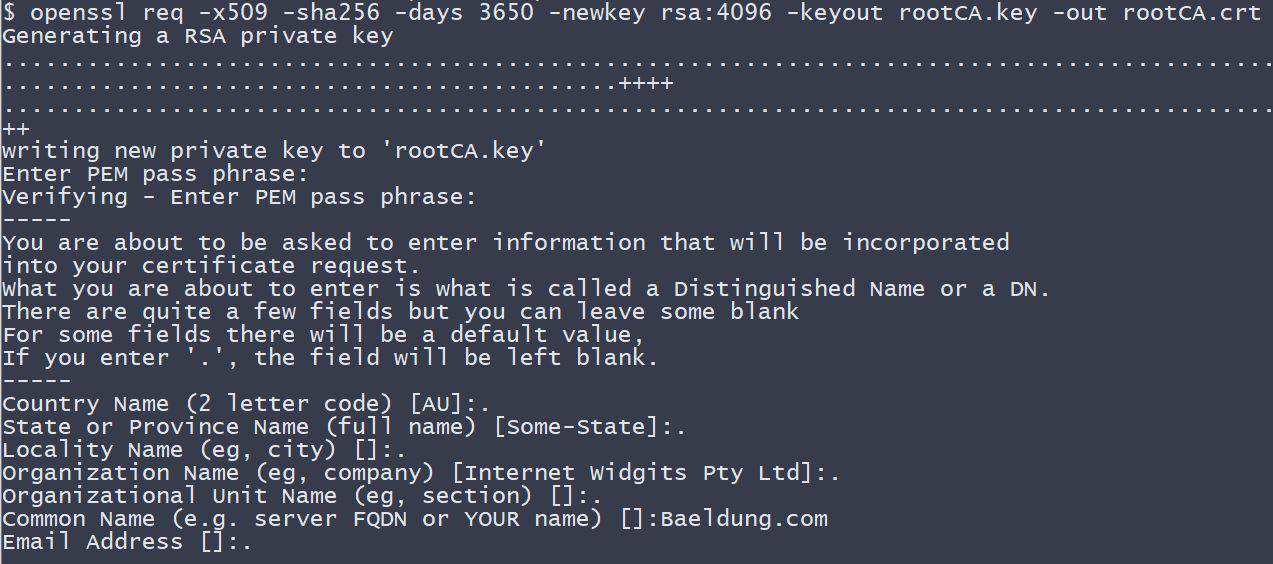
現在,讓我們創建 CA 證書:
openssl req -x509 -sha256 -days 3650 -newkey rsa:4096 -keyout rootCA.key -out rootCA.crt
當我們執行上述命令時,我們需要提供私鑰的密碼。 為了本教程的目的,我們將 changeit 用作密碼短語。
此外,我們需要輸入構成所謂的區段名稱的信息。 在這裏,我們只提供 CN(通用名稱)—— Baeldung.com —— 並讓其他部分為空。
3. Keystore
openssl req -x509 -sha256 -days 3650 -newkey rsa:4096 -keyout rootCA.key -out rootCA.crt這些可以從例如 Oracle (請按照下載中的安裝説明進行安裝)。 某些 Linux 發行版也通過其包管理器提供了一個可安裝的軟件包。
一個 keystore 是我們的 Spring Boot 應用程序將用於存儲服務器私鑰和證書的倉庫。 換句話説,
在本教程中,我們使用
3.1. Server-side Certificate
為了在我們的 Spring Boot 應用程序中實現服務器端 X.509 身份驗證,我們
讓我們從創建所謂的證書籤名請求 (CSR) 開始:
openssl req -new -newkey rsa:4096 -keyout localhost.key -out localhost.csr同樣,對於 CA 證書,我們必須提供私鑰的密碼。 此外,讓我們使用
在繼續之前,我們需要創建一個配置文件的
authorityKeyIdentifier=keyid,issuer
basicConstraints=CA:FALSE
subjectAltName = @alt_names
[alt_names]
DNS.1 = localhost
一個可直接使用的文件也可用在 GitHub 項目中。
現在,是時候
openssl x509 -req -CA rootCA.crt -CAkey rootCA.key -in localhost.csr -out localhost.crt -days 365 -CAcreateserial -extfile localhost.ext注意,我們必須提供我們創建 CA 證書時使用的相同密碼。
此時,
要以人類可讀的形式打印證書的詳細信息,可以使用以下命令:
openssl x509 -in localhost.crt -text3.2. Import to the Keystore
在本節中,我們將看到如何
我們將使用 PKCS 12 存檔,以將服務器的私鑰與已簽名證書打包在一起。 然後我們將將其導入到新創建的
我們可以使用以下命令來創建 .p12 文件:
openssl pkcs12 -export -out localhost.p12 -name "localhost" -inkey localhost.key -in localhost.crt因此,我們現在擁有
現在,讓我們使用 keytool
keytool -importkeystore -srckeystore localhost.p12 -srcstoretype PKCS12 -destkeystore keystore.jks -deststoretype JKS此時,我們已經準備好用於服務器身份驗證的部分。 讓我們繼續與我們的 Spring Boot 應用程序配置。
4. 示例應用程序
我們的 SSL 安全服務器項目包含一個 @SpringBootApplication 註解的應用程序類(它是一種 @Configuration),一個 application.properties 配置文件和一個非常簡單的 MVC 風格的前端。
所有應用程序只需要呈現一個帶有 “Hello {User}!” 消息的 HTML 頁面。這樣我們就可以在瀏覽器中檢查服務器證書,以確保連接已驗證和安全。
4.1. Maven 依賴項
首先,我們創建一個新的 Maven 項目,其中包含三個 Spring Boot Starter 捆包:
<dependency>
    <groupId>org.springframework.boot</groupId>
    <artifactId>spring-boot-starter-security</artifactId>
</dependency>
<dependency>
    <groupId>org.springframework.boot</groupId>
    <artifactId>spring-boot-starter-web</artifactId>
</dependency>
<dependency>
    <groupId>org.springframework.boot</groupId>
    <artifactId>spring-boot-starter-thymeleaf</artifactId>
</dependency>
參考: 我們可以從 Maven Central 找到這些捆包:security、web、thymeleaf。
4.2. Spring Boot 應用程序
接下來,我們創建主應用程序類和用户控制器:
@SpringBootApplication
public class X509AuthenticationServer {
    public static void main(String[] args) {
        SpringApplication.run(X509AuthenticationServer.class, args);
    }
}

@Controller
public class UserController {
    @RequestMapping(value = "/user")
    public String user(Model model, Principal principal) {

        UserDetails currentUser
          = (UserDetails) ((Authentication) principal).getPrincipal();
        model.addAttribute("username", currentUser.getUsername());
        return "user";
    }
}
現在,我們告訴應用程序如何找到我們的 keystore.jks 並且如何訪問它。我們將 SSL 設置為“已啓用”狀態,並將標準監聽端口更改為 指示已安全連接。
此外,我們配置了一些 用户詳細信息 用於通過基本身份驗證訪問我們的服務器:
server.ssl.key-store=../store/keystore.jks
server.ssl.key-store-password=${PASSWORD}
server.ssl.key-alias=localhost
server.ssl.key-password=${PASSWORD}
server.ssl.enabled=true
server.port=8443
spring.security.user.name=Admin
spring.security.user.password=admin
這將是 HTML 模板,位於 resources/templates 文件夾中:
<!DOCTYPE html>
<html xmlns:th="http://www.thymeleaf.org">
<head>
    <title>X.509 Authentication Demo</title>
</head>
<body>
    <h2>Hello <span th:text="${username}"/>!</h2>
</body>
</html>
4.3. 根 CA 安裝
在我們完成本部分並查看網站之前,我們需要將我們的生成的根證書頒發機構作為受信任證書在瀏覽器中安裝。
Mozilla Firefox 的示例安裝如下:
- 輸入 about:preferences 在地址欄中
- 打開 Advanced -> Certificates -> View Certificates -> Authorities
- 點擊 Import
- 找到 Baeldung tutorials 文件夾及其子文件夾 spring-security-x509/keystore
- 選擇 rootCA.crt 文件並點擊 OK
- 選擇 “Trust this CA to identify websites” 並點擊 OK
注意: 如果您不想將我們的 證書頒發機構 添加到受信任 權威機構 的列表中,您稍後可以選擇進行 異常 並顯示該網站,即使它被標記為不安全。但是,您將看到一個“黃色感嘆號”符號,指示連接不安全!
之後,我們將導航到 spring-security-x509-basic-auth 模塊並運行:
mvn spring-boot:run最後,我們訪問 https://localhost:8443/user,輸入我們的用户憑據來自 application.properties 並且應該看到一個 “Hello Admin!” 消息。現在我們能夠通過點擊地址欄中的“綠色鎖”符號檢查連接狀態,並且它將是一個安全連接。

5. Mutual Authentication
In the previous section, we presented how to implement the most common SSL authentication schema – server-side authentication. This means, only a server authenticated itself to clients.
In this section, we’ll describe how to add the other part of the authentication – client-side authentication. This way, only clients with valid certificates signed by the authority that our server trusts, can access our secured website.
But before we continue, let’s see what are the pros and cons of using the mutual SSL authentication.
Pros:
- The private key of an X.509 client certificate is stronger than any user-defined password. But it has to be kept secret!
- With a certificate, the identity of a client is well-known and easy to verify.
- No more forgotten passwords!
Cons:
- We need to create a certificate for each new client.
- The client’s certificate has to be installed in a client application. In fact: X.509 client authentication is device-dependent, which makes it impossible to use this kind of authentication in public areas, for example in an internet-café.
- There must be a mechanism to revoke compromised client certificates.
- We must maintain the clients’ certificates. This can easily become costly.
5.1. Truststore
A trustsore in some way is the opposite of a keystore. It holds the certificates of the external entities that we trust.
In our case, it’s enough to keep the root CA certificate in the truststore.
Let’s see how to create a truststore.jks file and import the rootCA.crt using keytool:
keytool -import -trustcacerts -noprompt -alias ca -ext san=dns:localhost,ip:127.0.0.1 -file rootCA.crt -keystore truststore.jksNote, we need to provide the password for the newly created truststore.jks. Here, we again used the changeit passphrase.
That’s it, we’ve imported our own CA certificate, and the truststore is ready to be used.
5.2. Spring Security Configuration
To continue, we are modifying our X509AuthenticationServer to configure HttpSecurity by creating a SecurityFilterChain Bean. Here we configure the x.509 mechanism to parse the Common Name (CN) field of a certificate for extracting usernames.
With this extracted usernames, Spring Security is looking up in a provided UserDetailsService for matching users. So we also implement this service interface containing one demo user.
Tip: In production environments, this UserDetailsService can load its users for example from a JDBC Datasource.
You have to notice that we annotate our class with @EnableWebSecurity and @EnableGlobalMethodSecurity with enabled pre-/post-authorization.
With the latter we can annotate our resources with @PreAuthorize and @PostAuthorize for fine-grained access control:
@SpringBootApplication
@EnableWebSecurity
@EnableGlobalMethodSecurity(prePostEnabled = true)
public class X509AuthenticationServer {
    ...

    @Bean
    public SecurityFilterChain filterChain(HttpSecurity http) throws Exception {
        http.authorizeRequests()
            .anyRequest()
            .authenticated()
            .and()
            .x509()
            .subjectPrincipalRegex("CN=(.*?)(?:,|$)")
            .userDetailsService(userDetailsService());
        return http.build();
    }

    @Bean
    public UserDetailsService userDetailsService() {
        return new UserDetailsService() {
            @Override
            public UserDetails loadUserByUsername(String username) throws UsernameNotFoundException {
                if (username.equals("Bob")) {
                    return new User(username, "",
                     AuthorityUtils.commaSeparatedStringToAuthorityList("ROLE_USER"));
                }
                throw new UsernameNotFoundException("User not found!");
            }
        };
    }
}
As said previously, we are now able to use Expression-Based Access Control in our controller. More specifically, our authorization annotations are respected because of the @EnableGlobalMethodSecurity annotation in our @Configuration:
@Controller
public class UserController {
    @PreAuthorize("hasAuthority('ROLE_USER')")
    @RequestMapping(value = "/user")
    public String user(Model model, Principal principal) {
        ...
    }
}
An overview of all possible authorization options can be found in the official documentation.
As a final modification step, we have to tell the application where our truststore is located and that SSL client authentication is necessary (server.ssl.client-auth=need).
So we put the following into our application.properties:
server.ssl.trust-store=store/truststore.jks
server.ssl.trust-store-password=${PASSWORD}
server.ssl.client-auth=need
Now, if we run the application and point our browser to https://localhost:8443/user, we become informed that the peer cannot be verified and it denies to open our website.
5.3. Client-side Certificate
Now it’s time to create the client-side certificate. The steps we need to take, are pretty much the same as for the server-side certificate we already created.
First, we have to create a certificate signing request:
openssl req -new -newkey rsa:4096 -nodes -keyout clientBob.key -out clientBob.csrWe’ll have to provide information that will be incorporated into the certificate. For this exercise, let’s only enter the common name (CN) – Bob. It’s important as we use this entry during the authorization and only Bob is recognized by our sample application.
Next, we need to sign the request with our CA:
openssl x509 -req -CA rootCA.crt -CAkey rootCA.key -in clientBob.csr -out clientBob.crt -days 365 -CAcreateserialThe last step we need to take is to package the signed certificate and the private key into the PKCS file:
openssl pkcs12 -export -out clientBob.p12 -name "clientBob" -inkey clientBob.key -in clientBob.crtFinally, we’re ready to install the client certificate in the browser.
Again, we’ll use Firefox:
- Type about:preferences in the address bar
- Open Advanced -> View Certificates -> Your Certificates
- Click on Import
- Locate the baeldung tutorials folder and its subfolder spring-security-x509/store
- Select the clientBob.p12
- Input the password for your certificate and click OK
- Click OK
Now, when we refresh our website, we’ll be prompted to select the client certificate we’d like to use:

If we see a welcome message like “Hello Bob!”

6. 使用XML進行互信認證
將X.509客户端認證添加到http安全配置中的XML也很有可能:
<http>
    ...
    <x509 subject-principal-regex="CN=(.*?)(?:,|$)"
      user-service-ref="userService"/>

    <authentication-manager>
        <authentication-provider>
            <user-service id="userService">
                <user name="Bob" password="" authorities="ROLE_USER"/>
            </user-service>
        </authentication-provider>
    </authentication-manager>
    ...
</http>為了配置底層的Tomcat,我們需要將我們的keystore和truststore放入它的conf文件夾中並編輯server.xml:
<Connector port="8443" protocol="HTTP/1.1" SSLEnabled="true" scheme="https" secure="true"
    clientAuth="true" sslProtocol="TLS"
    keystoreFile="${catalina.home}/conf/keystore.jks"
    keystoreType="JKS" keystorePass="changeit"
    truststoreFile="${catalina.home}/conf/truststore.jks"
    truststoreType="JKS" truststorePass="changeit"
/>
提示: 當clientAuth設置為“want”時,即使客户端未提供有效的證書,SSL仍然啓用。但是,在這種情況下,我們必須使用第二個認證機制,例如登錄表單,才能訪問受保護的資源。
7. 結論
總而言之,我們學習了如何創建自簽名 CA 證書以及如何使用它來簽署其他證書
此外,我們創建了服務器端和客户端證書。然後,我們演示瞭如何將它們導入到密鑰存儲和信任存儲中。
此外,您現在應該能夠將證書與其私鑰打包成 PKCS12 格式
我們還討論了何時使用 Spring Security X.509 客户端身份驗證,因此您需要決定是否將其實現到您的 Web 應用程序中。
