1. 概述
Auth0 提供用於各種類型的應用程序(如原生應用、單頁面應用和 Web 應用)的 身份驗證和授權服務。 此外,它還允許實現諸如單點登錄、社交登錄和多因素身份驗證等功能。
在本教程中,我們將通過分步指南探索 Spring Security 與 Auth0 的集成,並涵蓋 Auth0 賬户的關鍵配置。
2. Setting Up Auth0
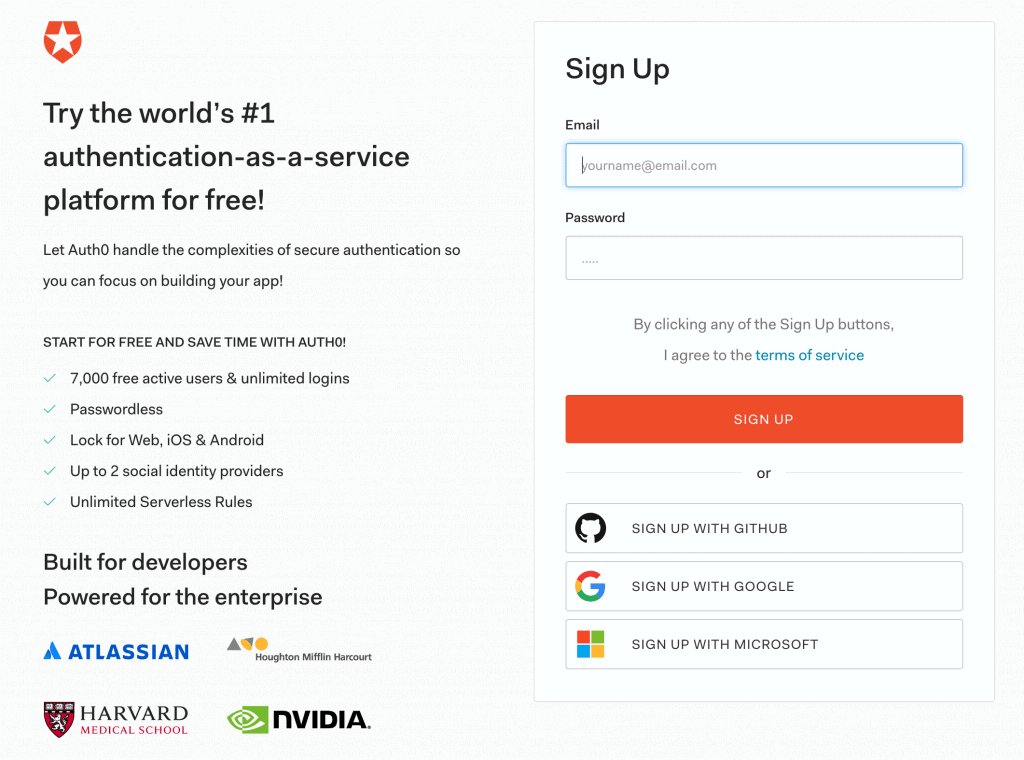
2.1. Auth0 Sign-Up
First, we’ll sign up for a free Auth0 plan that provides access for up to 7k active users with unlimited logins. However, we can skip this section if we already have one:
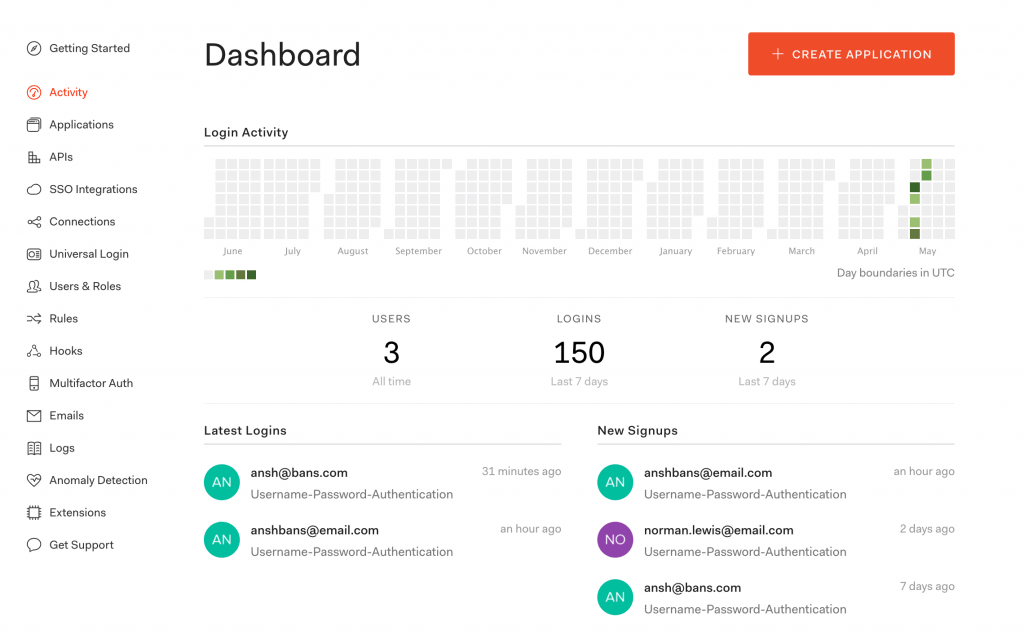
2.2. Dashboard
Once logged in to the Auth0 account, we’ll see a dashboard that highlights the details like login activities, latest logins, and new signups:
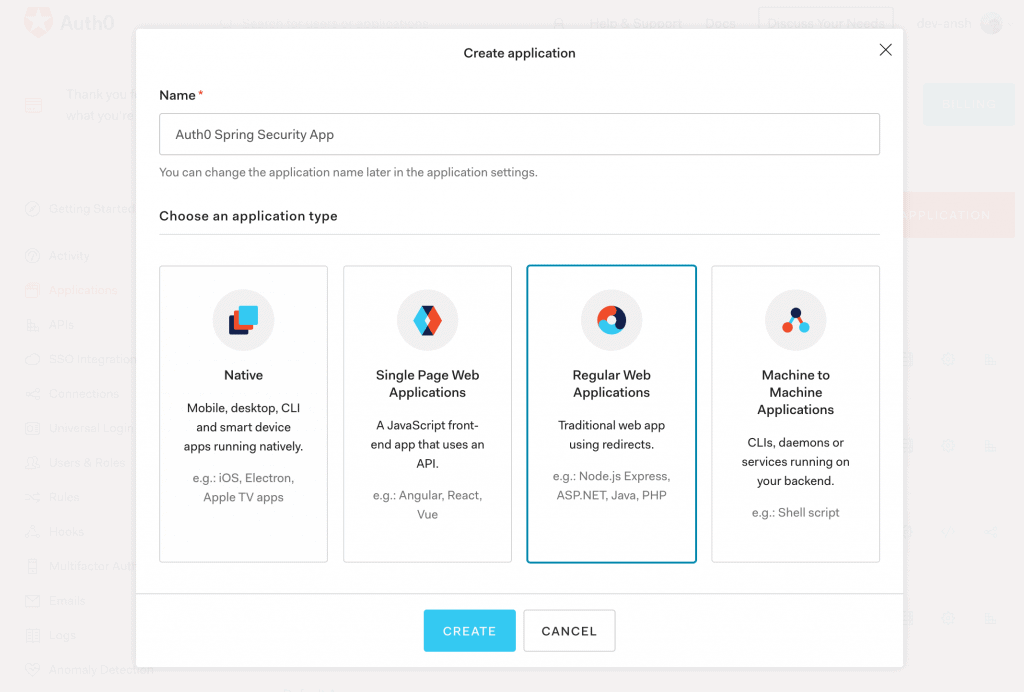
2.3. Create a New Application
Then, from the Applications menu, we’ll create a new OpenID Connect (OIDC) application for Spring Boot.
Further, we’ll chooseRegular Web Applications as application type out of available options like Native, Single-Page Apps, and Machine to Machine Apps:
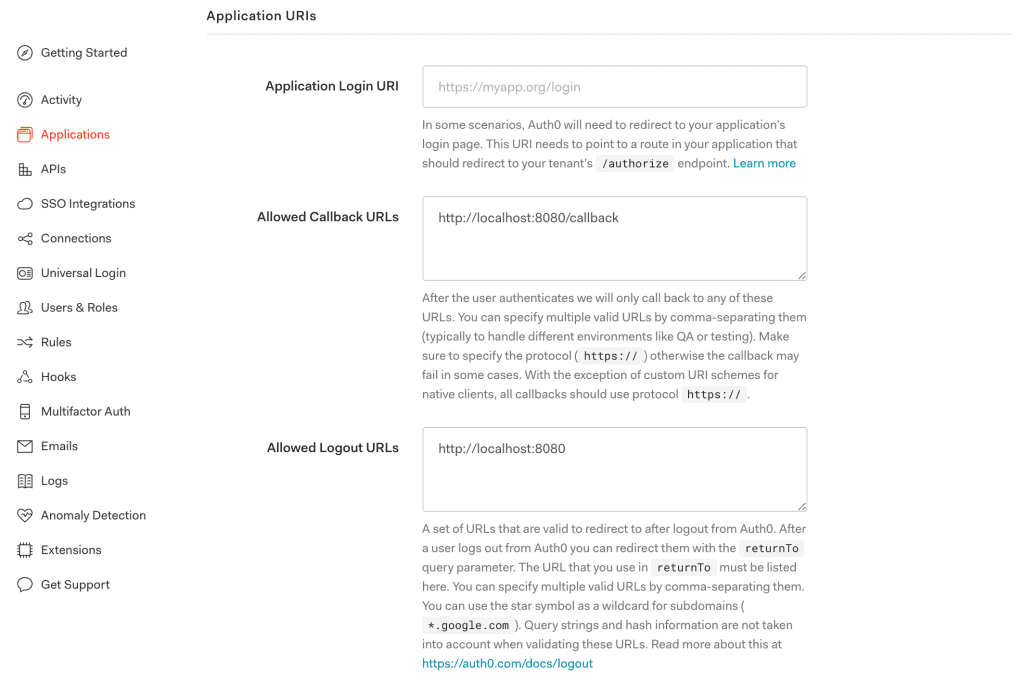
2.4. Application Settings
Next, we’ll configure a few Application URIs like Callback URLs and Logout URLs pointing to our application:
2.5. Client Credentials
At last, we’ll get values of the Domain, Client ID, and Client Secret associated with our app:
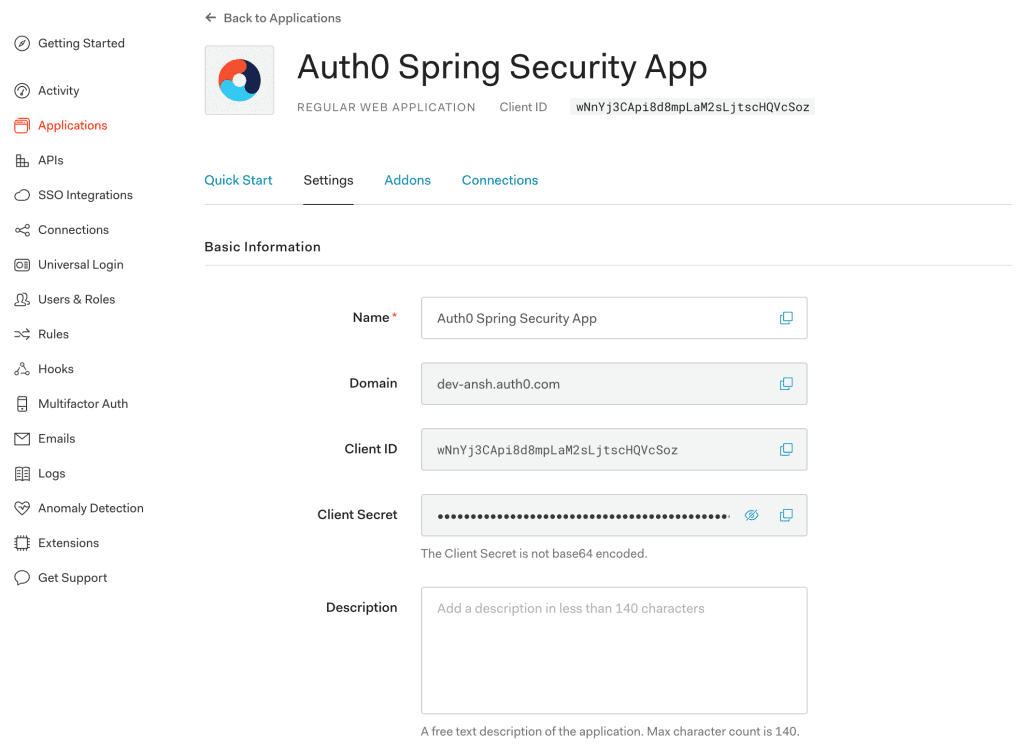
Please keep these credentials handy because they are required for the Auth0 setup in our Spring Boot App.
3. Spring Boot App Setup
現在,我們的 Auth0 賬户已準備就緒,並具有關鍵配置,我們已準備好在 Spring Boot App 中集成 Auth0 安全性。
3.1. Maven
首先,我們將在我們的 pom.xml 中添加最新的 mvc-auth-commons Maven 依賴項:
<dependency>
    <groupId>com.auth0</groupId>
    <artifactId>mvc-auth-commons</artifactId>
    <version>1.2.0</version>
</dependency>
3.2. Gradle
同樣,在使用 Gradle 時,我們可以將 mvc-auth-commons 依賴項添加到 build.gradle 文件中:
compile 'com.auth0:mvc-auth-commons:1.2.0'
3.3. application.properties
我們的 Spring Boot App 需要像 Client Id 和 Client Secret 這樣的信息才能啓用 Auth0 賬户的身份驗證。因此,我們將它們添加到 application.properties 文件中:
com.auth0.domain: dev-example.auth0.com
com.auth0.clientId: {clientId}
com.auth0.clientSecret: {clientSecret}
3.4. AuthConfig
接下來,我們將創建 AuthConfig 類來從 application.properties 文件中讀取 Auth0 屬性:
@Configuration
@EnableWebSecurity
public class AuthConfig {
    @Value(value = "${com.auth0.domain}")
    private String domain;

    @Value(value = "${com.auth0.clientId}")
    private String clientId;

    @Value(value = "${com.auth0.clientSecret}")
    private String clientSecret;

    @Bean
    public SecurityFilterChain filterChain(HttpSecurity http) throws Exception {
        http.csrf()
          .disable()
          .authorizeRequests()
          .antMatchers("/callback", "/login", "/").permitAll()
          .anyRequest().authenticated()
          .and()
          .formLogin()
          .loginPage("/login")
          .and()
          .logout().logoutSuccessHandler(logoutSuccessHandler()).permitAll();
        return http.build();
    }
}
此外,AuthConfig 類已配置為通過創建 SecurityFilterChain 豆來啓用 Web 安全性。
3.5. AuthenticationController
最後,我們將為 AuthenticationController 類添加一個豆引用到已經討論的 AuthConfig 類中:
@Bean
public AuthenticationController authenticationController() throws UnsupportedEncodingException {
    JwkProvider jwkProvider = new JwkProviderBuilder(domain).build();
    return AuthenticationController.newBuilder(domain, clientId, clientSecret)
      .withJwkProvider(jwkProvider)
      .build();
}
在這裏,我們在構建 AuthenticationController 類的一個實例時使用了 JwkProviderBuilder 類。我們將使用它來驗證令牌的簽名(默認情況下,令牌使用 RS256 不對稱簽名算法進行簽名)。
此外,authenticationController 豆提供了一個登錄 URL,並處理回調請求。
4. AuthController
接下來,我們將創建用於登錄和回調功能的 AuthController 類:
@Controller
public class AuthController {
    @Autowired
    private AuthConfig config;

    @Autowired
    private AuthenticationController authenticationController;
}
在此,我們已注入 AuthConfig 和 AuthenticationController 類中的依賴項,正如上一節中討論的那樣。
4.1. Login
讓我們創建一個允許 Spring Boot App 認證用户的 login 方法:
@GetMapping(value = "/login")
protected void login(HttpServletRequest request, HttpServletResponse response) {
    String redirectUri = "http://localhost:8080/callback";
    String authorizeUrl = authenticationController.buildAuthorizeUrl(request, response, redirectUri)
      .withScope("openid email")
      .build();
    response.sendRedirect(authorizeUrl);
}
buildAuthorizeUrl 方法生成 Auth0 授權 URL 並重定向到默認的 Auth0 登錄屏幕。
4.2. Callback
用户使用 Auth0 憑據登錄後,回調請求將被髮送到我們的 Spring Boot App。為此,讓我們創建一個 callback 方法:
@GetMapping(value="/callback")
public void callback(HttpServletRequest request, HttpServletResponse response) {
    Tokens tokens = authenticationController.handle(request, response);

    DecodedJWT jwt = JWT.decode(tokens.getIdToken());
    TestingAuthenticationToken authToken2 = new TestingAuthenticationToken(jwt.getSubject(),
      jwt.getToken());
    authToken2.setAuthenticated(true);

    SecurityContextHolder.getContext().setAuthentication(authToken2);
    response.sendRedirect(config.getContextPath(request) + "/");
}
我們處理了回調請求以獲取 accessToken 和 idToken,這些令牌表示成功的認證。然後,我們創建了 TestingAuthenticationToken 對象來將認證設置到 SecurityContextHolder 中。
但是,我們可以為 AbstractAuthenticationToken 類創建一個自定義實現,以提高可用性。
5. HomeController
最後,我們將創建一個 HomeController,併為我們的應用程序的默認登陸頁提供映射:
@Controller
public class HomeController {
    @GetMapping(value = "/")
    @ResponseBody
    public String home(final Authentication authentication) {
        TestingAuthenticationToken token = (TestingAuthenticationToken) authentication;
        DecodedJWT jwt = JWT.decode(token.getCredentials().toString());
        String email = jwt.getClaims().get("email").asString();
        return "Welcome, " + email + "!";
    }
}
在這裏,我們從 DecodedJWT提取了 idToken。 此外,用户信息(例如電子郵件)是從聲明中提取的。
就這樣! 我們的 Spring Boot App 已經準備好支持 Auth0 安全。 讓我們使用 Maven 命令運行應用程序:
mvn spring-boot:run
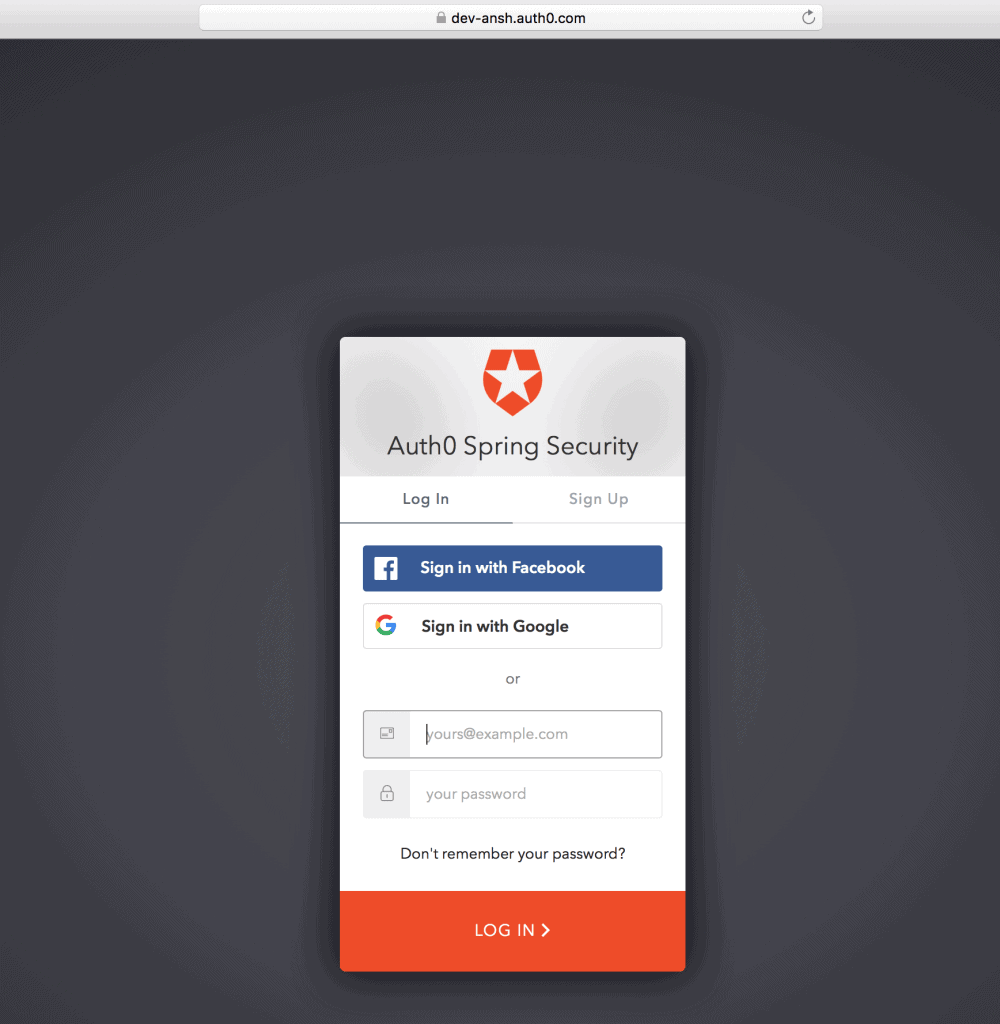
當訪問應用程序時,在 localhost:8080/login,我們將看到 Auth0 提供的默認登陸頁面:
一旦使用註冊用户的憑據登錄,將顯示帶有用户電子郵件的歡迎消息:

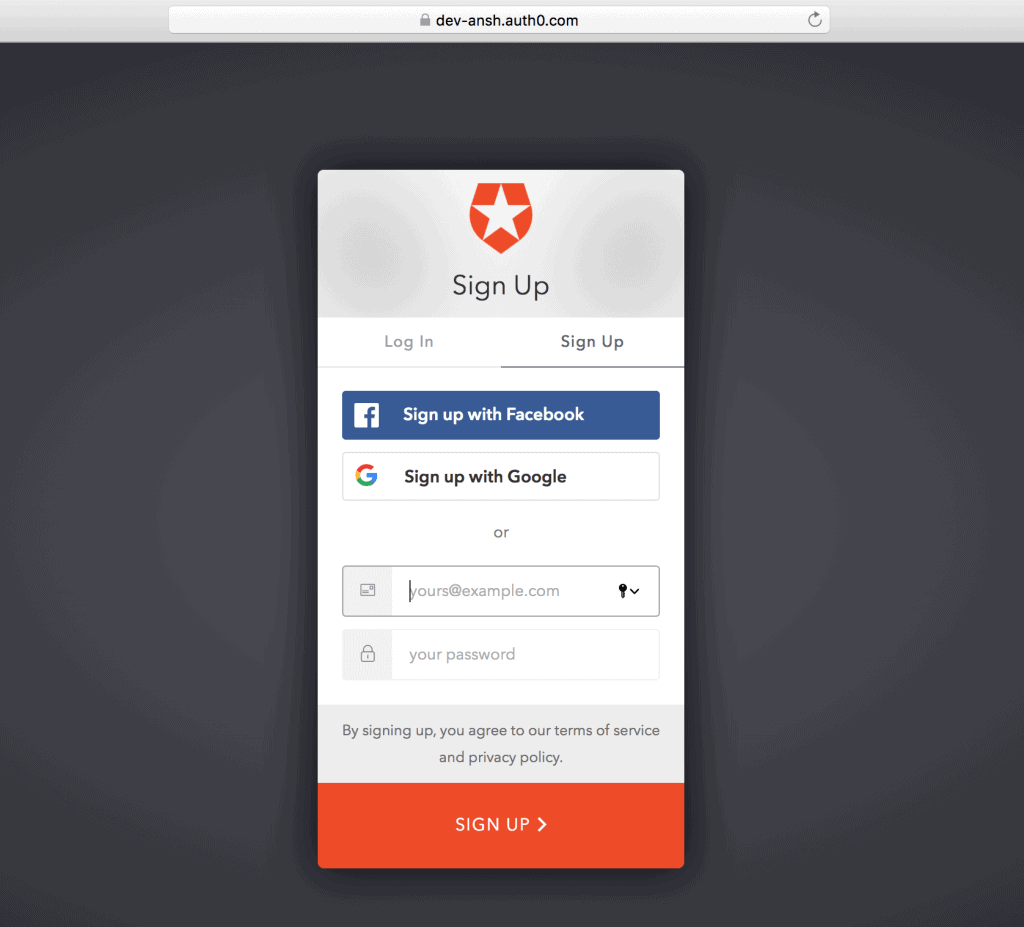
此外,我們會在默認登陸屏幕上找到“註冊”按鈕(在“登錄”旁邊),用於自注冊。
6. 註冊
6.1. 自動註冊
首次使用,我們可以通過“註冊”按鈕創建 Auth0 賬户,然後提供電子郵件和密碼等信息:
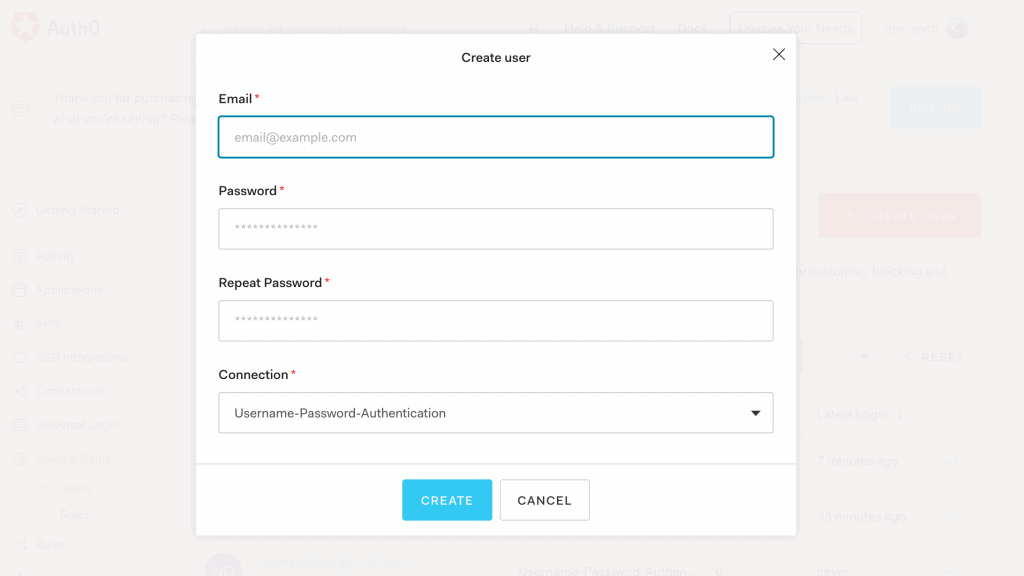
6.2. 創建用户
或者,我們可以從 Auth0 賬户中的“用户”菜單創建一個新用户:
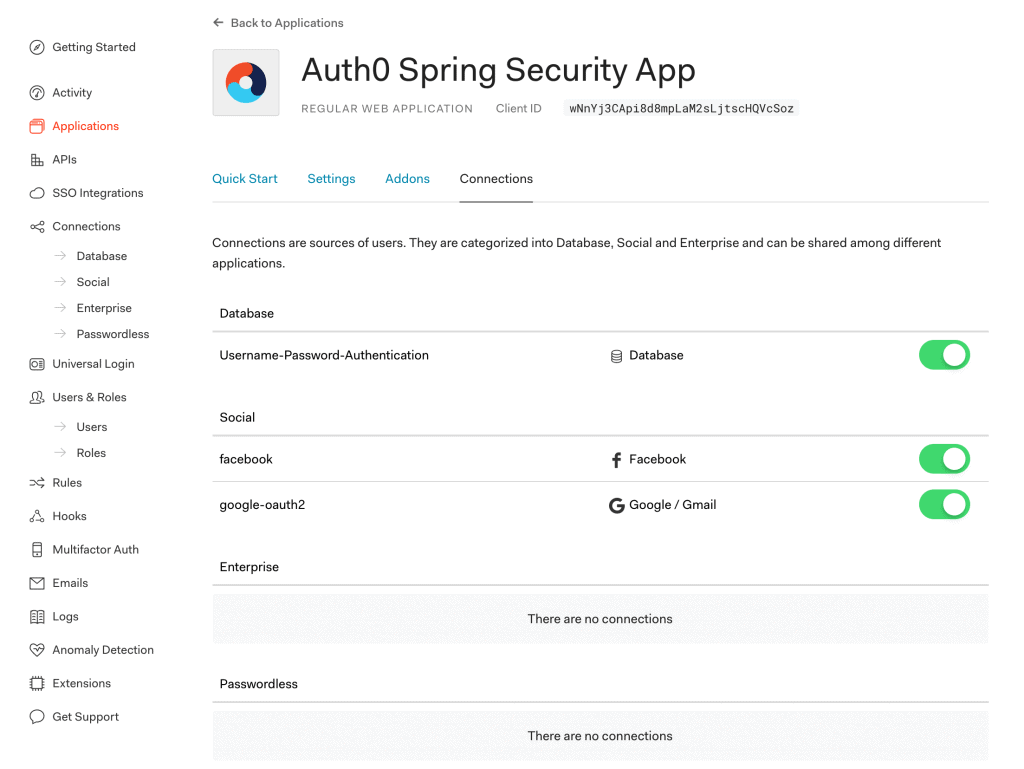
6.3. 連接設置
此外,我們還可以選擇各種連接類型,如數據庫和社交登錄,用於向我們的 Spring Boot App 進行註冊/登錄:
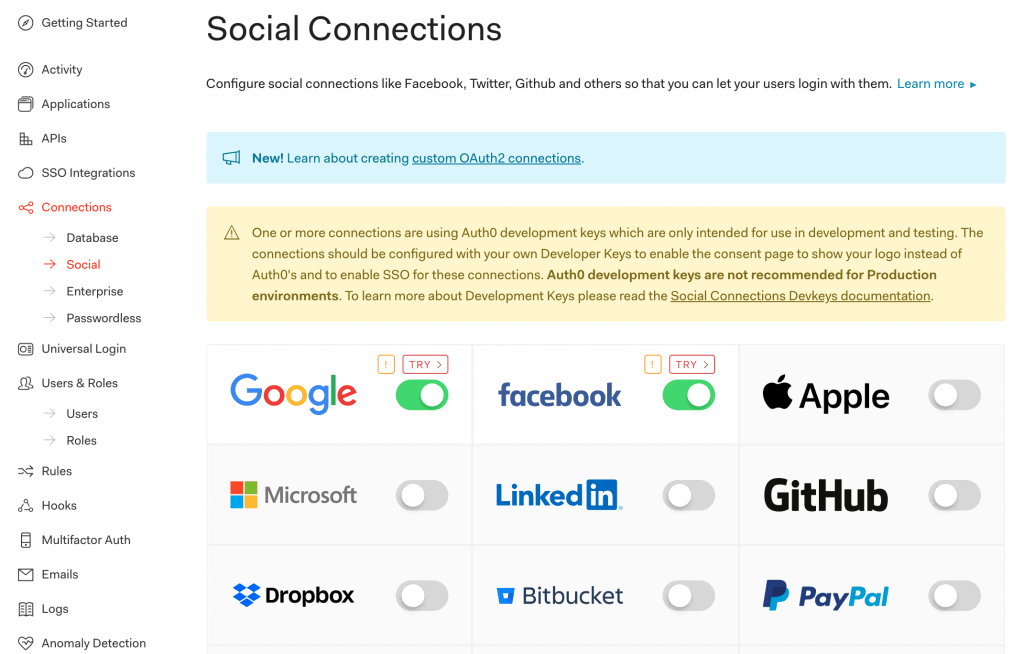
此外,還提供多種社交連接供您選擇:
7. LogoutController
現在我們已經看到了登錄和回調功能,現在可以為我們的 Spring Boot App 添加註銷功能。
讓我們創建一個實現 LogoutSuccessHandler 類的 LogoutController 類:
@Controller
public class LogoutController implements LogoutSuccessHandler {
    @Autowired
    private AuthConfig config;

    @Override
    public void onLogoutSuccess(HttpServletRequest req, HttpServletResponse res,
      Authentication authentication) {
        if (req.getSession() != null) {
            req.getSession().invalidate();
        }
        String returnTo = "http://localhost:8080/";
        String logoutUrl = "https://dev-example.auth0.com/v2/logout?client_id=" +
          config.getClientId() + "&returnTo=" +returnTo;
        res.sendRedirect(logoutUrl);
    }
}
在這裏,onLogoutSuccess 方法被覆蓋以調用 Auth0 註銷 URL /v2/logout
8. Auth0 Management API
So far, we’ve seen Auth0 security integration in the Spring Boot App. Now, let’s interact with the Auth0 Management API (system API) in the same app.
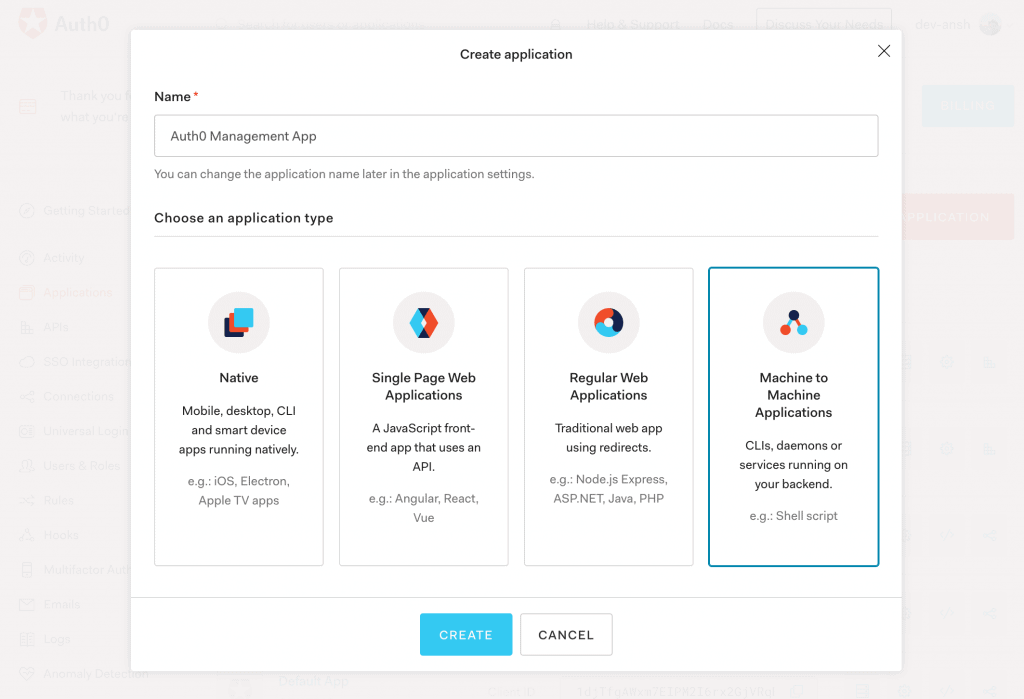
8.1. Create a New Application
First, to access the Auth0 Management API, we’ll create a Machine to Machine Application in the Auth0 account:
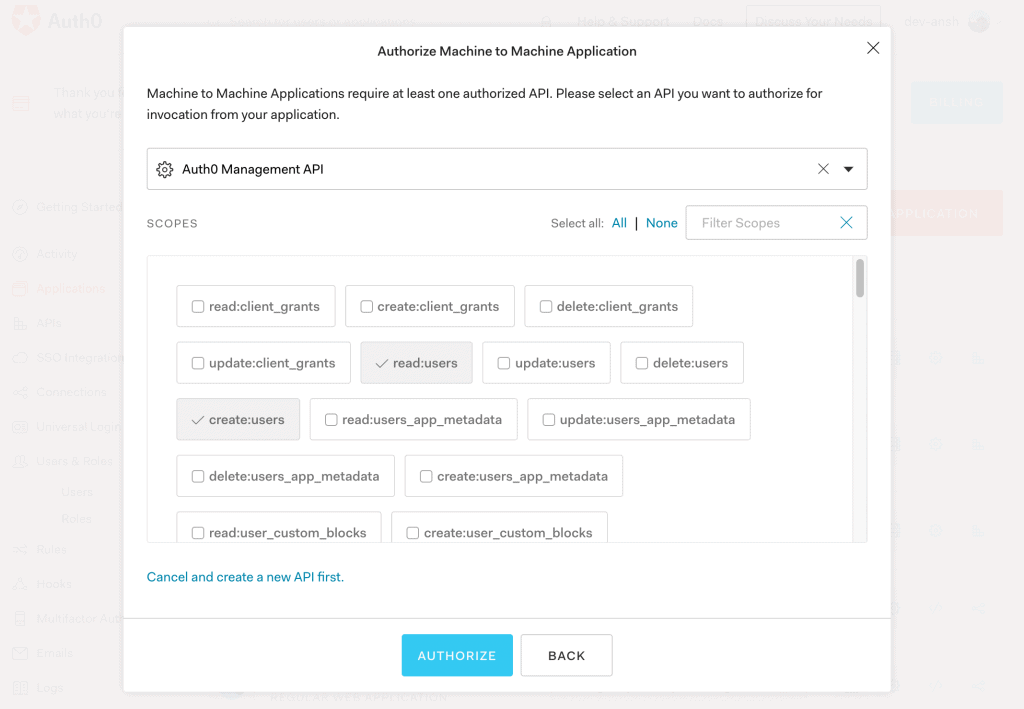
8.2. Authorization
Then, we’ll add authorization to the Auth0 Management API with permissions to read/create users:
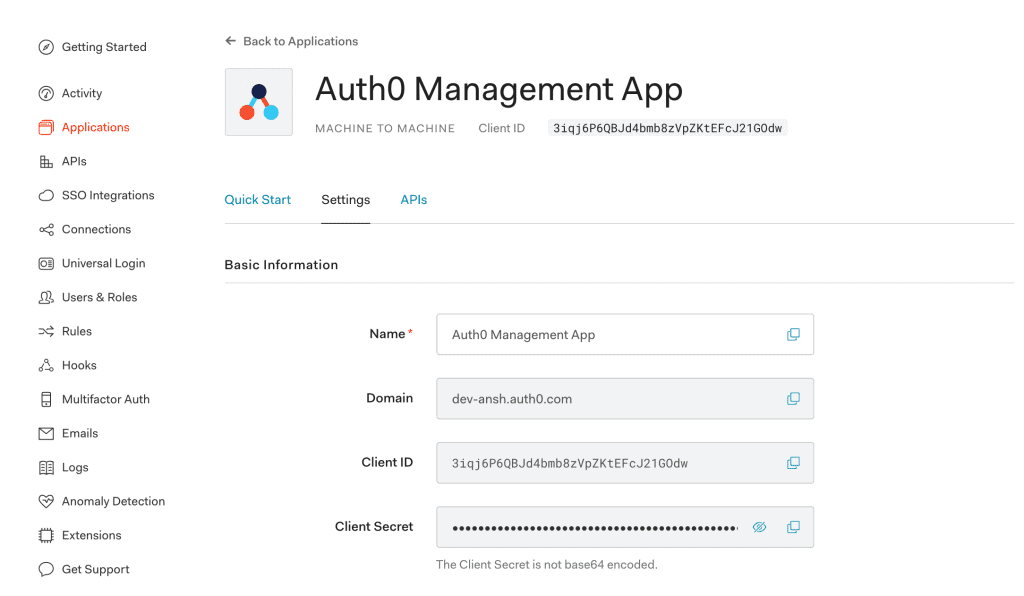
8.3. Client Credentials
At last, we’ll receive Client Id and Client Secret to access the Auth0 Management App from our Spring Boot App:
8.4. Access Token
Let’s generate an access token for the Auth0 Management App using client credentials received in the previous section:
public String getManagementApiToken() {
    HttpHeaders headers = new HttpHeaders();
    headers.setContentType(MediaType.APPLICATION_JSON);

    JSONObject requestBody = new JSONObject();
    requestBody.put("client_id", "auth0ManagementAppClientId");
    requestBody.put("client_secret", "auth0ManagementAppClientSecret");
    requestBody.put("audience", "https://dev-example.auth0.com/api/v2/");
    requestBody.put("grant_type", "client_credentials");

    HttpEntity<String> request = new HttpEntity<String>(requestBody.toString(), headers);

    RestTemplate restTemplate = new RestTemplate();
    HashMap<String, String> result = restTemplate
      .postForObject("https://dev-example.auth0.com/oauth/token", request, HashMap.class);

    return result.get("access_token");
}
Here, we’ve made a REST request to the /oauth/token Auth0 Token URL to get the access and refresh tokens.
Also, we can store these client credentials in the application.properties file and read it using the AuthConfig class.
8.5. UserController
After that, let’s create the UserController class with the users method:@Controller
public class UserController {
@GetMapping(value="/users")
@ResponseBody
public ResponseEntity<String> users(HttpServletRequest request, HttpServletResponse response) {
HttpHeaders headers = new HttpHeaders();
headers.setContentType(MediaType.APPLICATION_JSON);
headers.set("Authorization", "Bearer " + getManagementApiToken());
HttpEntity<String> entity = new HttpEntity<String>(headers);
RestTemplate restTemplate = new RestTemplate();
ResponseEntity<String> result = restTemplate
.exchange("https://dev-example.auth0.com/api/v2/users", HttpMethod.GET, entity, String.class);
return result;
}
}The users method fetches a list of all users by making a GET request to the /api/v2/users Auth0 API with the access token generated in the previous section.
So, let’s access localhost:8080/users to receive a JSON response containing all users:
{
    "created_at": "2020-05-05T14:38:18.955Z",
    "email": "[email protected]",
    "email_verified": true,
    "identities": [
        {
            "user_id": "5eb17a5a1cc1ac0c1487c37f78758",
            "provider": "auth0",
            "connection": "Username-Password-Authentication",
            "isSocial": false
        }
    ],
    "name": "[email protected]",
    "nickname": "ansh",
    "logins_count": 64
    // ...
}
8.6. Create User
Similarly, we can create a user by making a POST request to the /api/v2/users Auth0 API:
@GetMapping(value = "/createUser")
@ResponseBody
public ResponseEntity<String> createUser(HttpServletResponse response) {
    JSONObject request = new JSONObject();
    request.put("email", "[email protected]");
    request.put("given_name", "Norman");
    request.put("family_name", "Lewis");
    request.put("connection", "Username-Password-Authentication");
    request.put("password", "Pa33w0rd");

    // ...
    ResponseEntity<String> result = restTemplate
      .postForEntity("https://dev-example.auth0.com/api/v2/users", request.toString(), String.class);
    return result;
}
Then, let’s access localhost:8080/createUser and verify the new user’s details:
{
    "created_at": "2020-05-10T12:30:15.343Z",
    "email": "[email protected]",
    "email_verified": false,
    "family_name": "Lewis",
    "given_name": "Norman",
    "identities": [
        {
            "connection": "Username-Password-Authentication",
            "user_id": "5eb7f3d76b69bc0c120a8901576",
            "provider": "auth0",
            "isSocial": false
        }
    ],
    "name": "[email protected]",
    "nickname": "norman.lewis",
    // ...
}
Similarly, we can perform various operations like listing all connections, creating a connection, listing all clients, and creating a client using Auth0 APIs, depending on our permissions.
9. 結論
在本教程中,我們探討了 Spring Security 與 Auth0 的集成。
首先,我們設置了 Auth0 賬户並進行了必要的配置。然後,我們創建了一個 Spring Boot 應用,並配置了 application.properties 以進行 Spring Security 與 Auth0 的集成。
接下來,我們研究了創建 Auth0 Management API 的 API 令牌。最後,我們研究了諸如獲取所有用户和創建用户之類的功能。
