1. 簡介
RESTHeart 是一個基於 Java 的框架,允許我們快速地在 MongoDB 上構建 HTTP API。它使我們能夠將 MongoDB 集合作為 REST 和 GraphQL API 暴露出來,同時還能在需要時進行控制。
在本教程中,我們將快速瞭解 RESTHeart API 框架。
2. 什麼是 RESTHeart?
RESTHeart 提供了一個基於 MongoDB 的開源 API 服務器。它自動將我們的集合暴露為 REST 和 GraphQL 端點,允許我們無需編寫任何代碼即可創建 API
我們得到以下內容:
- 對 HTTP 和 GraphQL 上的完整 CRUD 支持
- 基於角色的訪問控制和身份驗證
- 內置的管理員 API 用於用户和角色管理
- 通過 Java 插件或配置自定義行為的擴展點
這為構建基於 HTTP 的 API 提供了一種零代碼解決方案,從而實現快速實施。當需要時,我們還可以集成自定義 Java 代碼以實現超出“開箱即用”功能的額外功能。
3. 運行 RESTHeart如果我們要本地運行 RESTHeart,則需要安裝 Java 21 或更高版本。 此外,還需要下載 RESTHeart 分配。 下載並解壓後,我們可以立即通過運行 restheart.jar 啓動服務:
$ java -jar restheart.jar
17:39:17.943 [main] INFO  org.restheart.Bootstrapper - Starting RESTHeart instance default
17:39:17.945 [main] INFO  org.restheart.Bootstrapper - Version 8.4.0
.....
17:39:19.188 [main] INFO  org.restheart.Bootstrapper - RESTHeart started
$ java -jar restheart.jar
17:39:17.943 [main] INFO org.restheart.Bootstrapper - Starting RESTHeart instance default
17:39:17.945 [main] INFO org.restheart.Bootstrapper - Version 8.4.0
.....
17:39:19.188 [main] INFO org.restheart.Bootstrapper - RESTHeart started沒有配置的情況下,它將嘗試使用可訪問的 MongoDB,該 MongoDB 位於 127.0.0.1:27017 且不需要憑據。
或者,提供了一個 Docker 鏡像,可用於運行 RESTHeart。 這也使我們能夠運行一個 Docker Compose 設置,其中包括 MongoDB,因此所有內容都可以作為一個堆棧啓動。 為此,我們需要一個 docker-compose.yml 文件:
$ cat docker-compose.yml
services:
  mongodb:
    image: mongo:latest
    container_name: mongodb
    ports:
      - "27017:27017"
    networks:
      - mongo-restheart-network

  restheart:
    image: softinstigate/restheart:latest
    container_name: restheart
    ports:
      - "8080:8080"
    networks:
      - mongo-restheart-network
    environment:
      MONGO_URI: mongodb://mongodb:27017
    depends_on:
      - mongodb

networks:
  mongo-restheart-network:
    driver: bridge
然後我們可以使用 docker compose 啓動服務,我們就可以開始了:
$ docker compose up -d
[+] Running 3/3
   Network restheart_mongo-restheart-network  Created
   Container mongodb                          Started
   Container restheart                        Started
一切啓動後,我們可以通過調用服務器上的 /ping 端點來測試設置:
$ curl localhost:8080/ping
{"message": "Greetings from RESTHeart!", "client_ip": "192.168.65.1", "host": "localhost:8080", "version": "8.4.0"}
此時,我們已經擁有一個功能齊全的服務。
4. 身份驗證與用户
大多數對我們的 RESTHeart 服務發出的 API 調用都需要身份驗證,RESTHeart 會自動處理這些驗證
例如,如果我們對根資源發出未進行身份驗證的請求,則我們會收到 HTTP401 未授權
$ curl -v localhost:8080/
> GET / HTTP/1.1
>
< HTTP/1.1 401 Unauthorized
< WWW-Authenticate: Basic realm="RESTHeart Realm"
默認情況下,用户記錄都存儲在我們的 MongoDB 數據庫中,在 users集合中
如果啓動 RESTHeart 應用程序時,數據庫為空,則該集合將自動創建,並且會向其中添加一個 admin用户:
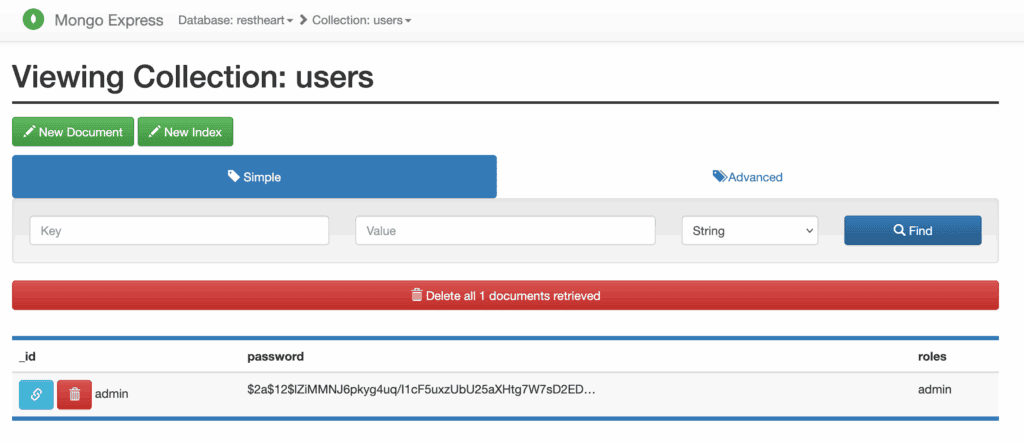
密碼已安全地進行哈希處理,並且無法查看,默認憑據包括用户名 admin和密碼 secret。 我們可以使用這些憑據再次發出請求:
$ curl -v -u admin:secret localhost:8080/
> GET / HTTP/1.1
> Authorization: Basic YWRtaW46c2VjcmV0
>
< HTTP/1.1 200 OK
< Content-Type: application/json
<
["acl", "users"]
現在它能正常工作,並且我們會收到預期的響應。
5. CRUD Operations With RESTHeart
RESTHeart automatically exposes MongoDB collections from our database so that we can read and manipulate them via standard REST and GraphQL APIs with minimal effort.
5.1. REST API
RESTHeart exposes a REST API with a standard set of URL patterns for each collection:
- GET /<collection> – Search the collection
- GET /<collection>/<id> – Get a record from the collection
- POST /<collection> – Create a new record in the collection
- PUT /<collection>/<id> – Replace a record in the collection
- PATCH /<collection>/<id> – Patch a record in the collection
- DELETE /<collection>/<id> – Delete a record from the collection
We can also create a new collection by sending a special request. To do this, we issue a PUT request directly to the collection’s endpoint:
$ curl -v -u admin:secret -X PUT localhost:8080/posts
> PUT /posts HTTP/1.1
>
< HTTP/1.1 200 OK
< Content-Type: application/json
< Content-Length: 0
<
Once we’ve got a collection,let’s create a new record in it using a POST request:
$ curl -v -u admin:secret -X POST localhost:8080/posts -d '{"title": "Introduction to RESTHeart", "author": "Baeldung"}' -H "Content-Type: application/json"
> POST /posts HTTP/1.1
> Content-Type: application/json
> Content-Length: 60
>
< HTTP/1.1 201 Created
< Location: http://localhost:8080/posts/681a139012d5c00fcb674298
This doesn’t return the actual record, but it does give us a Location header pointing to it. This is also visible directly in the database:
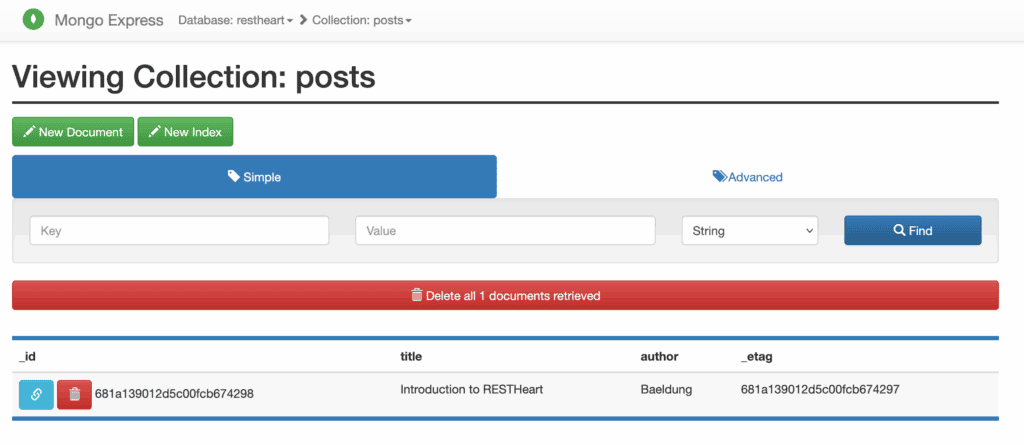
We can then retrieve this record using a GET request while specifying the ID:
$ curl -v -u admin:secret localhost:8080/posts/681a139012d5c00fcb674298
> GET /posts/681a139012d5c00fcb674298 HTTP/1.1
>
< HTTP/1.1 200 OK
< Content-Type: application/json
< Content-Length: 152
<
{
  "_id": { "$oid": "681a139012d5c00fcb674298" },
  "title": "Introduction to RESTHeart",
  "author": "Baeldung",
  "_etag": { "$oid": "681a139012d5c00fcb674297" }
}
We can also select the entire collection by using a GET request to the collection as a whole:
$ curl -v -u admin:secret localhost:8080/posts
> GET /posts HTTP/1.1
>
< HTTP/1.1 200 OK
< Content-Type: application/json
< Content-Length: 154
<
[
  {
    "_id": { "$oid": "681a139012d5c00fcb674298" },
    "title": "Introduction to RESTHeart",
    "author": "Baeldung",
    "_etag": { "$oid": "681a139012d5c00fcb674297" }
  }
]
As expected, we can also update and delete these records using PUT, PATCH, and DELETE calls:
$ curl -v -u admin:secret -X PUT localhost:8080/posts/681a139012d5c00fcb674298 -H "Content-Type: application/json" -d '{"title": "Intro to RESTHeart", "author": "Baeldung"}'
> PUT /posts/681a139012d5c00fcb674298 HTTP/1.1
> Content-Type: application/json
> Content-Length: 53
>
< HTTP/1.1 200 OK
< Content-Type: application/json
< Content-Length: 0
<
None of these return the result, but it’s immediately available if we query again.
5.2. GraphQL API
In addition to a REST API, RESTHeart also enables us to expose our data via a GraphQL API. Unlike with the REST API, this needs some initial configuration to make everything work as desired.
All of the GraphQL APIs are defined by records in the gql-apps collection. So the first thing we need to do is to create this:
$ curl -v -u admin:secret -X PUT localhost:8080/gql-apps
> PUT /gql-apps HTTP/1.1
>
< HTTP/1.1 200 OK
< Content-Type: application/json
< Content-Length: 0
<
We then need to create a special record in this collection containing our GraphQL API definition. To create an API that exposes the Posts we’ve been working with, the configuration would look something like this:
$ cat posts.schema
{
    "_id": "restheart-posts",
    "descriptor": {
        "name": "restheart-posts",
        "description": "RESTHeart Tutorial",
        "enabled": true,
        "uri": "restheart-posts"
    },
    "schema": "type Post { title: String author: String } type Query { posts: [Post] }",
    "mappings": {
        "Post": {
            "name": "name",
            "author": "author"
        },
        "Query": {
            "posts": {
                "db": "restheart",
                "collection": "posts"
            }
        }
    }
}
The descriptor field gives some definitions that RESTHeart uses to manage the API. The most important part here is the uri field, which we’ll use shortly. The schema field here is the full GraphQL Schema Definition Language definition for our API, written in the GraphQL Schema Definition Language. The mappings field tells RESTHeart how to map between the GraphQL API and the MongoDB collections. In this case, we define a Post type with name and author fields and a Query type with a posts field that maps to the posts collection in our database.
We then create this record in the same way as before:
$ curl -v -u admin:secret -X POST localhost:8080/gql-apps -d "@posts.schema" -H "Content-Type: application/json"
> POST /gql-apps HTTP/1.1
> Content-Type: application/json
> Content-Length: 154
>
< HTTP/1.1 200 OK
< Content-Type: application/json
< Content-Length: 0
<
Once we’ve done this, our GraphQL API is ready to use. We’ve set our uri field to restheart-posts, which means our API is exposed on /graphql/restheart-posts:
$ curl -v -u admin:secret -X POST localhost:8080/graphql/restheart-posts -d "{ posts { title author } }" -H "Content-Type: application/graphql"
> POST /graphql/restheart-posts HTTP/1.1
> Content-Type: application/graphql
> Content-Length: 26
>
* upload completely sent off: 26 bytes
< HTTP/1.1 200 OK
< Content-Type: application/graphql-response+json
< Content-Length: 83
<
{
  "data": {
    "posts": [
      {
        "title": "Intro to RESTHeart",
        "author": "Baeldung"
      }
    ]
  }
}
We can immediately see this is the same data that our REST API was managing.
6. 結論
在本文中,我們對 RESTHeart 進行了簡短的介紹,並瞭解了我們可以用它做什麼。 憑藉這個框架,可以實現更多功能,因此,在您需要創建 HTTP API 的時候,不妨一探究竟。
