1. 簡介
在本教程中,我們將演示如何輕鬆地使用 AzureAD 作為 Spring Boot 應用程序的身份提供程序。
2. 概述
微軟的 AzureAD 是一項全面的身份管理產品,被全球許多組織廣泛使用。它支持多種登錄機制和控制,為跨組織應用程序組合的用户提供統一的單點登錄體驗。
此外,正如微軟的起源那樣,AzureAD 與現有的 Active Directory 安裝緊密集成,許多組織已經將其用於企業網絡中的身份和訪問管理。 這允許管理員授予現有用户對應用程序的訪問權限,並使用他們已經熟悉的工具管理其權限。
3. 集成 AzureAD
從 Spring Boot 應用程序的視角來看,AzureAD 充當一個符合 OIDC 標準的身份提供者。這意味着我們可以通過僅配置所需的屬性和依賴項來使用它與 Spring Security。
為了説明 AzureAD 的集成,我們將實現一個 授權客户端,其中訪問代碼與代碼交換髮生在服務器端。 這種流程不會將訪問令牌暴露給用户的瀏覽器,因此它比公共客户端方案更安全
4. Maven 依賴項
我們首先添加 Spring Security 類型的 WebMVC 應用程序所需的 Maven 依賴項:
<dependency>
    <groupId>org.springframework.boot</groupId>
    <artifactId>spring-boot-starter-oauth2-client</artifactId>
    <version>3.1.5</version>
</dependency>
<dependency>
    <groupId>org.springframework.boot</groupId>
    <artifactId>spring-boot-starter-web</artifactId>
    <version>3.1.5</version>
</dependency>
這些依賴項的最新版本可以在 Maven Central 上找到:
5. 配置屬性
接下來,我們將添加用於配置客户端所需的 Spring Security 屬性。 在維護應用程序隨着時間推移而增長時,將這些屬性放在一個專用 Spring 配置文件中是一種好做法。 我們將為該配置文件命名為 azuread,以便清楚地表明其目的。 因此,我們將相關屬性添加到 application-azuread.yml 文件中:
spring:
  security:
    oauth2:
      client:
        provider:
          azure:
            issuer-uri: https://login.microsoftonline.com/your-tenant-id-comes-here/v2.0
        registration:
          azure-dev:
            provider: azure
            #client-id: externally provided
            #client-secret: externally provided
            scope:
            - openid
            - email
            - profile
在提供者部分,我們定義了 azure 提供者。 AzureAD 支持 OIDC 標準的端點發現機制,因此我們只需要配置一個屬性,即 issuer-uri。
此屬性具有雙重用途:首先,它是客户端附加發現資源名稱以獲取實際 URL 的基礎 URI;其次,它還用於檢查 JSON Web Token (JWT) 的真實性。
例如,身份提供者創建的 JWT 的 iss 聲明必須與 issuer-uri 值相同。
對於 AzureAD,issuer-uri 始終具有以下格式:https://login.microsoftonline.com/my-tenant-id/v2.0,其中 my-tenant-id 是您的租户標識符。
在 registration 部分,我們定義了 azure-dev 客户端,該客户端使用先前定義的提供者。 此外,我們必須通過 client-id 和 client-secret 屬性提供客户端憑據。 我們稍後在本文章中涵蓋如何將此應用程序註冊到 Azure 時將返回這些屬性。
最後,範圍屬性定義了客户端在授權請求中包含的範圍集。 在這裏,我們請求 profile 範圍,該範圍允許此客户端應用程序請求標準 UserInfo 端點。 此端點返回 AzureAD 用户目錄中存儲的配置信息集。 這些信息可能包括用户的首選語言和區域設置等信息。
6. Client Registration
As mentioned before, we need to register our client application in AzureAD to get the actual values for the required properties client-id and client-secret. Assuming we already have an Azure account, the first step is to login into the web console and use the top-left menu to select the Azure Active Directory service page:
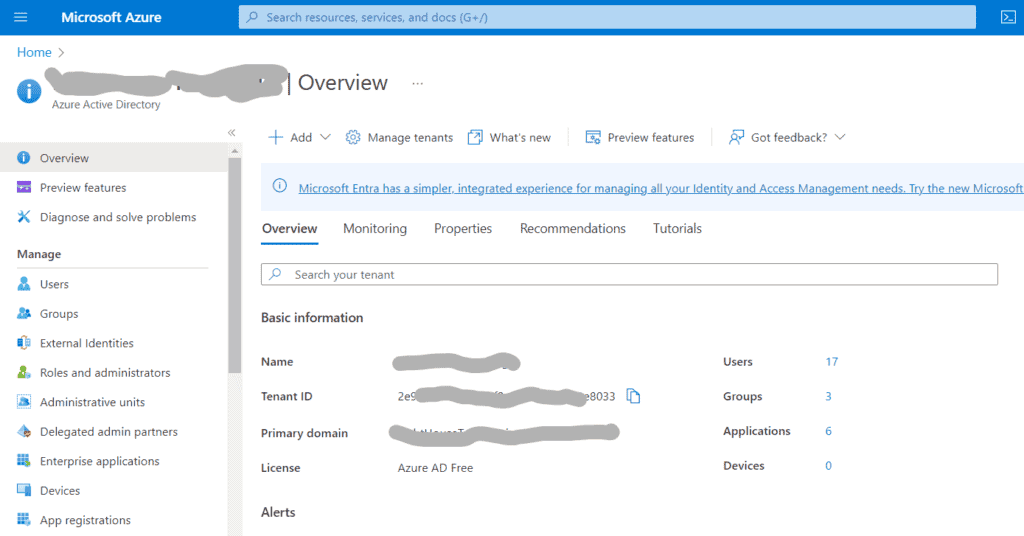
In the Overview section, we can get the tenant identifier that we need to use in the issuer-uri configuration property. Next, we’ll click on App Registrations, which brings us to the list of existing applications, followed by clicking on “New Registration”, which shows the client registration form. Here, we must provide three pieces of information:
- Application name
- Supported Account Types
- Redirect URI
Let’s detail each of these items.
6.1. Application Name
The value we put here will be shown to end users during the authentication process. As such, we should choose a name that makes sense for the target audience. Let’s use a very unimaginative one: “Baeldung Test App”:
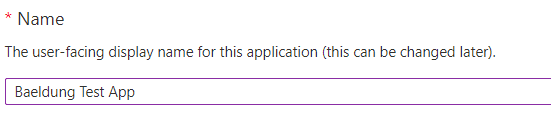
We don’t need to worry too much about getting the name right, though. AzureAD allows us to change it anytime without affecting the registered application. It is important to notice that, although this name doesn’t have to be unique, it’s not a clever idea to have multiple applications using the same display name.
6.2. Supported Account Types
Here, we have a few options from which to choose according to the target audience of the application. For applications intended for an organization’s internal use, the first option (“accounts in this organizational directory only”) is usually what we want. This means that even if the application is accessible from the internet, only users within the organization can log in:
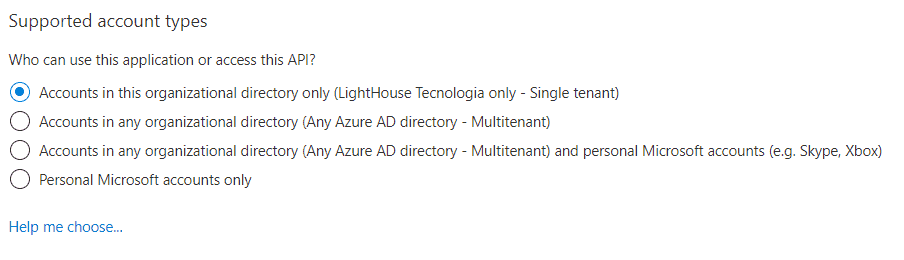
Other available options add the capability to also accept users from other AzureAD-backed directories, like any school or organization using Office 365 and personal accounts used on Skype and/or Xbox.
Although not that common, we can also change this setting later, but as stated in the documentation, users may get error messages after doing this change.
6.3. Redirect URI
Lastly, we need to provide one or more redirect URIs that are acceptable authorization flow targets. We must select a “platform” associated with the URI, which translates to the kind of application we’re registering:
- Web: authorization code vs. access token exchange happens at the backend
- SPA: authorization code vs. access token exchange happens at the frontend
- Public Client: Used for desktop and mobile applications.
In our case, we’ll pick the first option as this is what we need for user authentication.
As for the URI, we’ll use the value http://localhost:8080/login/oauth2/code/azure-dev. This value comes from the path used by Spring Security’s OAuth callback controller, which, by default, expects the response code at /login/oauth2/code/{registration-name}. Here, {registration-name} must match one of the keys present in the registration section of the configuration, which is azure-dev in our case.
Also important, AzureAD mandates using HTTPS for those URIs, but there’s an exception for localhost. This enables local development without the need to set up certificates. Later, when we move to the target deployment environment (e.g., Kubernetes cluster), we can add additional URIs.
Notice that this key’s value has no direct relationship with AzureAD’s registration name, although it makes sense to use a name that relates to where it is used.
6.4. Adding a Client Secret
Once we press the register button on the initial registration form, we’ll see the client’s information page:
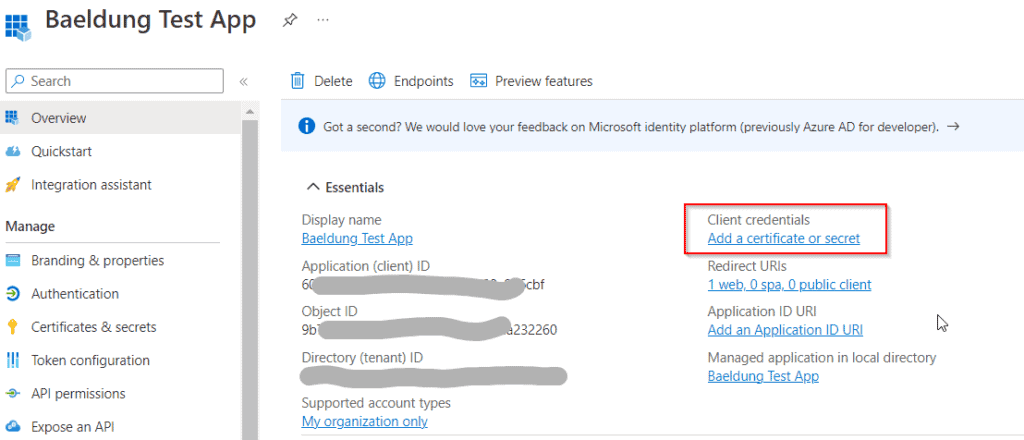
The Essentials section has the application ID on the left side, corresponding to the client-id property in our property file. To generate a new client secret, we’ll now click on Add a certificate or secret, which takes us to the Certificates & Secrets page. Next, we’ll select the Client Secrets tab and click on New client secret to open the secret creation form:
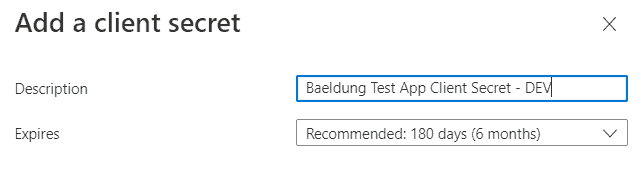
Here, we’ll give a descriptive name for this secret and define its expiration date. We can choose from one of the preconfigured durations or choose the custom option, which allows us to define both the start and end date.
As of this writing, client secrets will expire after two years at most. This means we must put in place a secret rotation procedure, preferably using an automation tool such as Terraform. Two years may seem a long time, but, in corporate environments, applications that run for years before being replaced or updated are quite common.
Once we click on Add, the newly created secret appears on the client credentials list:
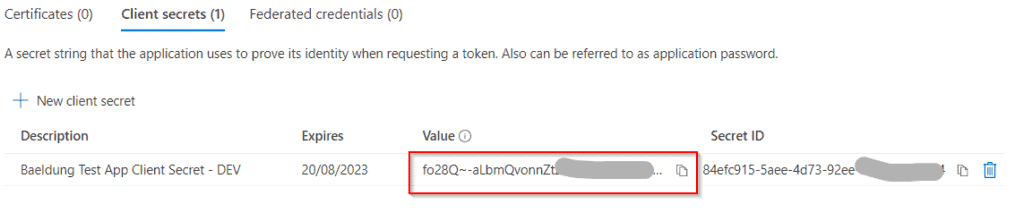
We must copy the secret value immediately to a safe place as it will not be shown again once we leave this page. In our case, we’ll copy the value directly to the application’s properties file, under the client-secret property.
In any case, we must remember this is a sensitive value! When deploying the application to a production environment, this value will usually be supplied through some dynamic mechanism, like a Kubernetes secret.
7. 應用代碼
我們的測試應用有一個單一的控制器,它處理到根路徑的請求,記錄有關傳入身份驗證的信息,並將請求轉發到 Thymeleaf 視圖。 在那裏,它將渲染包含有關當前用户的信息的頁面。
實際控制器的代碼很簡單:
@Controller
@RequestMapping("/")
public class IndexController {

    @GetMapping
    public String index(Model model, Authentication user) {
        model.addAttribute("user", user);
        return "index";
    }
}
視圖代碼使用 user 模型屬性來創建一個包含有關身份驗證對象和所有可用聲明的漂亮表格。
8. 運行測試應用程序
所有組件已就位,現在我們可以運行應用程序。 由於我們使用了具有 AzureAD 屬性的特定配置文件,因此需要激活它。 通過 Spring Boot 的 Maven 插件運行應用程序時,可以使用 spring-boot.run.profiles 屬性:
mvn -Dspring-boot.run.profiles=azuread spring-boot:run現在,我們可以打開瀏覽器並訪問 http://localhost:8080。 Spring Security 會檢測到此請求尚未進行身份驗證,並將其重定向到 AzureAD 的通用登錄頁面:
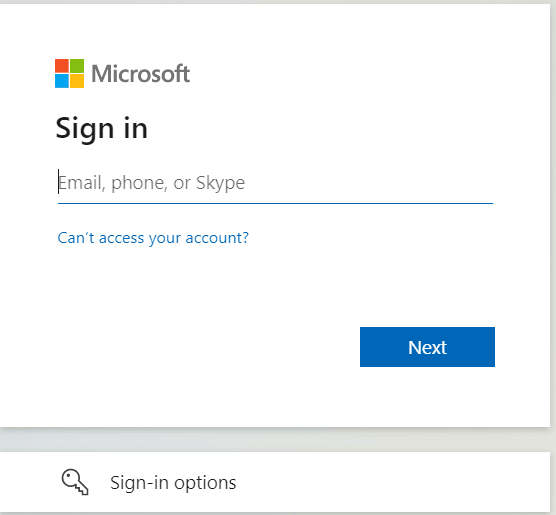
具體的登錄序列將取決於組織的設置,但通常包括填寫用户名或電子郵件並提供密鑰。 如果已配置,還可以請求第二個身份驗證因素。 但是,如果我們在同一 AzureAD 租户的同一瀏覽器中已登錄到另一個應用程序,則它將跳過登錄序列——這正是單點登錄的意義所在。
首次訪問我們的應用程序時,AzureAD 還會顯示應用程序的授權表單:
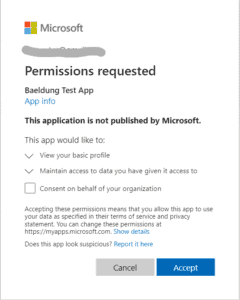
雖然此處未涵蓋,但 AzureAD 支持自定義登錄 UI 的多個方面,包括地區特定自定義。 此外,還可以完全繞過授權表單,這在授權內部應用程序時非常有用。
在授予權限後,我們會看到應用程序的主頁,部分顯示如下:
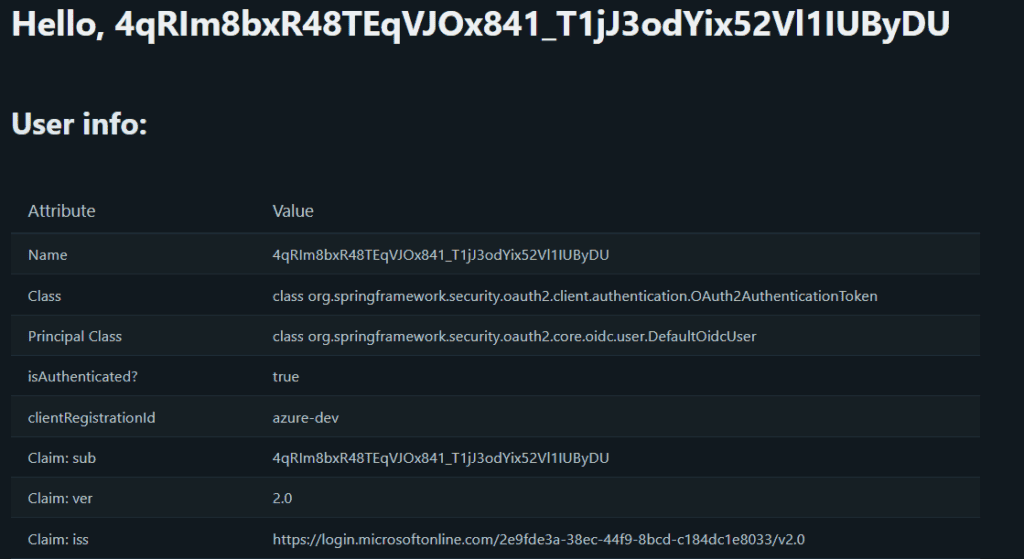
我們可以看到我們已經可以訪問有關用户的基本信息,包括姓名、電子郵件,甚至用於檢索其照片的 URL。 然而,有一個令人討厭的細節:Spring 選擇的用户名值不夠友好。
讓我們看看如何改進這一點。
9. 用户名映射
Spring Security 使用 Authentication 接口來表示已認證的 Principal。 具體的實現必須提供 getName() 方法,該方法返回的值通常用作認證域中用户的唯一標識符。
在使用基於 JWT 的認證時,Spring Security 默認使用 sub 聲明值作為 Principal 的名稱。
查看聲明,我們看到 AzureAD 將此字段填充為內部標識符,這不適合用於顯示目的。
幸運的是,在這種情況下有一個簡單的解決方案。 唯一需要做的就是選擇可用的屬性之一,並將它的名稱放在提供程序的 user-name-attribute 屬性中:
spring:
  security:
    oauth2:
      client:
        provider:
          azure:
            issuer-uri: https://login.microsoftonline.com/xxxxxxxxxxxxx/v2.0
            user-name-attribute: name
... 其他屬性省略
在這裏,我們選擇了名稱聲明,因為它對應於用户的完整名稱。 另一個合適的候選者是 email 屬性,如果我們的應用程序需要將其值作為數據庫查詢的一部分使用,則它可能是一個不錯的選擇。
現在我們可以重啓應用程序,並查看這種更改的影響:

現在好了!
10. 檢索組成員身份
更仔細地檢查可用的聲明,顯示出沒有關於用户組成員身份的信息。唯一的 GrantedAuthority 值在 Authentication 中是與請求的範圍相關的。
如果所有我們需要的只是限制組織成員的訪問權限,那麼這可能就足夠了。但是,通常情況下,我們會根據當前用户的角色分配授予不同的訪問級別。此外,將這些角色映射到 AzureAD 組可以重用現有的流程,例如用户註冊和/或重新分配。
為了實現這一點,我們必須指示 AzureAD 在接收到的 idToken 中包含組成員身份。
首先,我們需要前往應用程序的頁面並選擇右側菜單中的 Token Configuration。然後,我們點擊 Add groups claim,這會打開一個對話框,其中我們將定義此聲明類型的詳細信息:
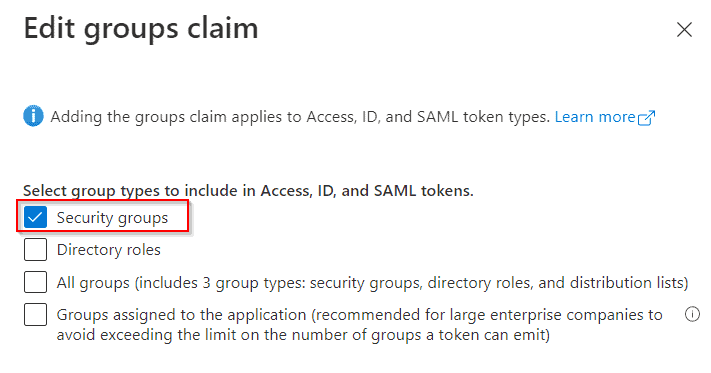
我們將使用常規 AzureAD 組,因此我們將選擇第一個選項 (“Security Groups”)。此對話框還具有受支持的令牌類型的其他配置選項。我們現在將保留默認值。
一旦我們點擊 Save,應用程序的聲明列表將顯示組聲明:

現在,我們可以返回到我們的應用程序以查看此配置的效果:

11. 將組映射到 Spring 權限
組聲明包含與用户分配的組的對應對象標識列表。但是,Spring 默認不會將這些組自動映射到 GrantedAuthority 實例中。
要執行此操作,需要一個自定義 OidcUserService,如 Spring Security 的 文檔中所述。我們的實現使用外部映射來“豐富”標準 OidcUser 實現,添加額外的權限。我們使用一個 @ConfigurationProperties 類,其中包含所需的信息:
- 從我們獲取組列表的聲明名稱(“groups”)
- 映射自此提供程序的權限前綴
- 對象標識到 GrantedAuthority 值的映射
使用組到列表的映射策略,使我們能夠處理在希望使用現有組的情況。它還有助於保持應用程序的角色集與組分配策略分離。
以下是一個典型的配置外觀:
baeldung:
  jwt:
    authorization:
      group-to-authorities:
        "ceef656a-fca9-49b6-821b-xxxxxxxxxxxx": BAELDUNG_RW
        "eaaecb69-ccbc-4143-b111-xxxxxxxxxxxx": BAELDUNG_RO,BAELDUNG_ADMIN
對象標識可在 Groups 頁面上找到:

完成所有映射後並重啓我們的應用程序,我們可以測試我們的應用程序。這是屬於兩個組的用户獲得的測試結果:
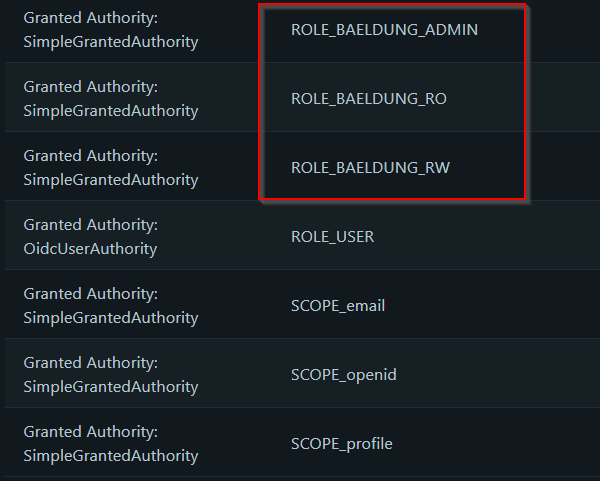
現在它有三個新的權限,對應於映射的組。
12. 結論
在本文中,我們展示瞭如何使用 AzureAD 與 Spring Security 進行用户身份驗證,包括演示應用程序所需的配置步驟。
