


Mocha測試框架和項目實例
測試項目已上傳github
地址:https://github.com/Hanxueqing...
運行克隆命令,下載到本地
git clone git@github.com:Hanxueqing/Mocha-test.git
一、什麼是Mocha
Mocha(發音"摩卡")誕生於2011年,是現在最流行的JavaScript測試框架之一,在瀏覽器和Node環境都可以使用。所謂"測試框架",就是運行測試的工具。通過它,可以為JavaScript應用添加測試,從而保證代碼的質量。
二、Mocha安裝和準備
前期準備:安裝vue-cli腳手架、安裝node、安裝Git
(1)先用vue-cli創建一個vue-test項目
vue create vue-test(2)全局安裝mocha
npm i mocha -g將mocha安裝到本地目錄
npm i mocha -D(3)修改package.json中的test路徑為我們本地的mocha路徑
"test": "./node_modules/mocha/bin/mocha"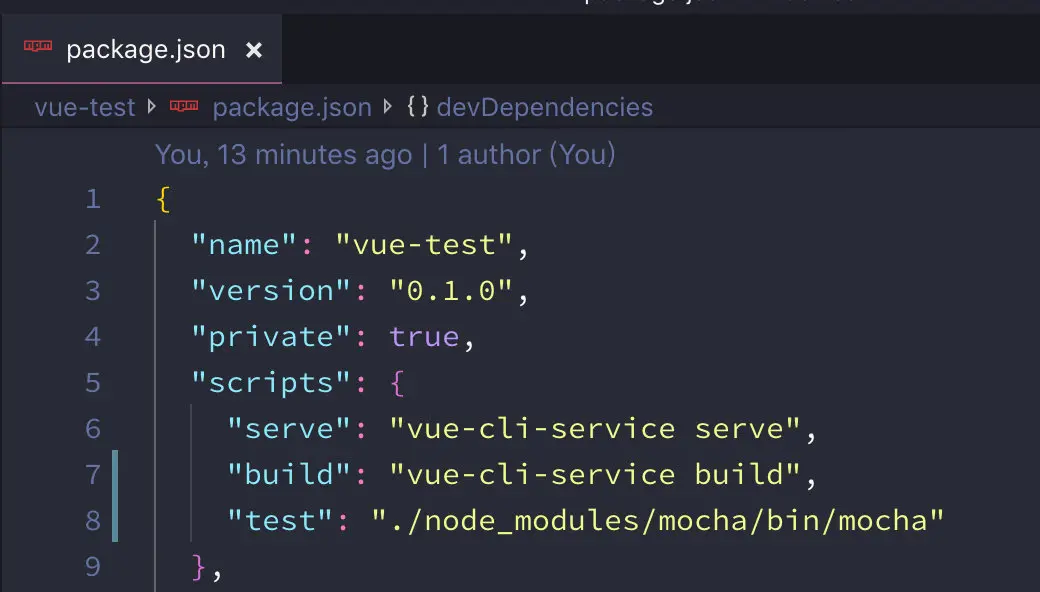
三、測試框架
1、創建test文件夾
測試腳本都存放在test文件夾中
2、編寫測試框架
創建test/demo.js
describe("Demo", function(){
    describe("方法 1", function(){
        context("情境 1", function(){
            before(function(){
                console.log("-----測試之前------");
            });
            after(function(){
                console.log("-----測試之後------");
            });
            beforeEach(function(){
                console.log("-------每條測試之前---------");
            })
            afterEach(function(){
                console.log("-------每條測試之後---------");
            })
            it("測試 1", function(){

            })
            it("測試 2", function(){

            })
        })
    })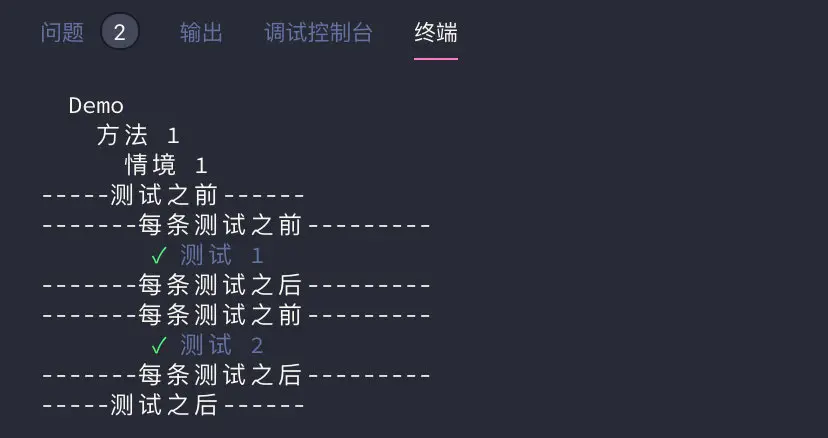
})上面這段代碼,就是測試腳本,它可以獨立執行。測試腳本里面應該包括一個或多個describe塊,每個describe塊應該包括一個或多個it塊。
describe
describe塊稱為"測試套件"(test suite),表示一組相關的測試。它是一個函數,第一個參數是測試套件的名稱("Demo"),第二個參數是一個實際執行的函數。
it
it塊稱為"測試用例"(test case),表示一個單獨的測試,是測試的最小單位。它也是一個函數,第一個參數是測試用例的名稱("測試1"),第二個參數是一個實際執行的函數。
測試用例的鈎子
Mocha在describe塊之中,提供測試用例的四個鈎子:before()、after()、beforeEach()和afterEach()。它們會在指定時間執行。
befor:定義測試之前進行的操作
after:定義測試之後進行的操作
beforeEach:定義每條測試之前進行的操作
afterEach:定義每條測試之後進行的操作
3、進行測試
執行mocha 命令使用全局安裝的mocha進行測試或者執行npm test命令使用本地安裝的mocha進行測試
四、斷言庫chai
所謂"斷言",就是判斷源碼的實際執行結果與預期結果是否一致,如果不一致就拋出一個錯誤。
1、全局安裝chai模塊
npm i chai -g2、本地安裝chai模塊
npm i chai -D3、斷言風格
斷言庫有很多種,Mocha並不限制使用哪一種。
assert風格的斷言
在test文件夾下新建test_lib文件夾,創建assert.js編寫測試腳本。
const chai = require("chai");
//引入斷言的風格
const assert = chai.assert;

describe("Demo", function () {
    it("使用 assert風格的斷言測試", function () {
        var value = "hello";
        //斷言value值的類型為字符串
        assert.typeOf(value, "string");
        //斷言value值等於"hello"
        assert.equal(value, "hello");
        //斷言value值的長度為5
        assert.lengthOf(value, 5);
    })
})進入test_lib文件夾下,執行mocha assert.js運行測試腳本,因為我們這三個斷言都是真的,所以測試通過。

should風格斷言
創建should.js編寫測試腳本。
const chai = require("chai");
const should = chai.should();

describe("Demo", () => {
    it("使用 should風格的斷言測試", function () {
        var value = "hello";
        //value應該存在
        value.should.exist
        //value的數字類型應該是一個字符串
        value.should.be.a("string");
        //value值應該等於"hello"
        value.should.equal("hello");
        //value值不等於"你好"
        value.should.not.equal("你好");
        //value的長度應該為5
                value.should.have.length(5);


    })
})
我們也可以換成另一種更簡潔的寫法,使用and連接斷言
value.should.exist
            .and.be.a("string")
            .and.equal("hello")
.and.have.length(5)進入test_lib文件夾下,執行mocha should.js運行測試腳本,因為我們這五個斷言都是真的,所以測試通過。

expect風格斷言
expect斷言的優點是很接近自然語言
創建expect.js編寫測試腳本。
const chai = require("chai");
const expect = chai.expect;

describe("Demo", () => {
    it("使用 expect風格的斷言測試", function () {
        var value = "hello";
        //value應該存在
        expect(value).to.exist;
        //value的數字類型應該是一個字符串
        expect(value).to.be.a("string");
        //value值應該等於"hello"
        expect(value).to.equal("hello");
        //value值不等於"你好"
        expect(value).to.not.equal("你好");
        //value的長度應該為5
        expect(value).to.have.length(5);
    })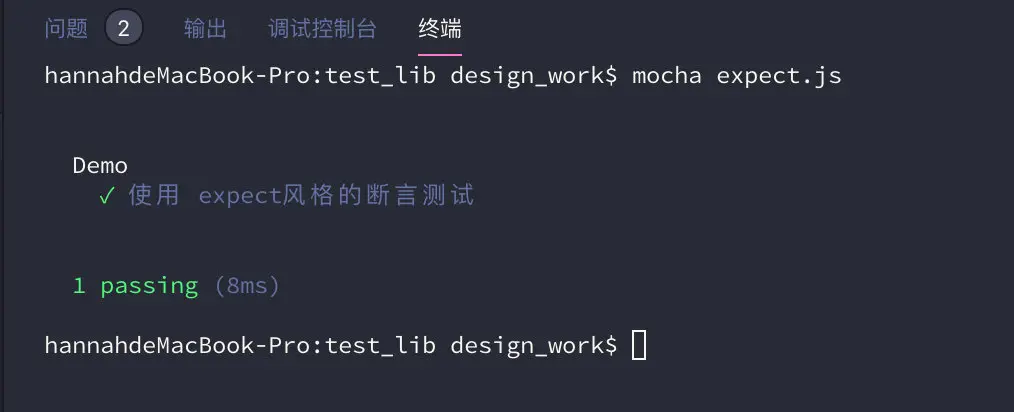
})進入test_lib文件夾下,執行mocha expect.js運行測試腳本,因為我們這五個斷言都是真的,所以測試通過。
同樣我們也可以定義一個數字,使用expect斷言來判斷數字的區間
var number = 3;
        //判斷number是否在3~5之間的數
        expect(number).to.be.at.most(5);
        expect(number).to.be.at.least(3);
        //判斷number是否在1~3之間的數
        expect(number).to.be.within(1, 3);
五、編寫測試腳本
Mocha的作用是運行測試腳本,首先必須學會寫測試腳本。所謂"測試腳本",就是用來測試源碼的腳本。
1、測試返回結果是否正確
(1)創建被測試的項目lib/demo-1.js
class Demo {
    subtotal(unitPrice, quantity) {
        return unitPrice * quantity;
    }
}
module.exports = Demo;
(2)創建測試腳本test/demo-1.test.js
通常,測試腳本與所要測試的源碼腳本同名,但是後綴名為.test.js(表示測試)或者.spec.js(表示規格)。比如,demo-1.js的測試腳本名字就是demo-1.test.js。
//demo-1.test.js
const chai = require("chai");
const expect = chai.expect;
var Demo = require("../lib/demo-1");
var demo = new Demo();
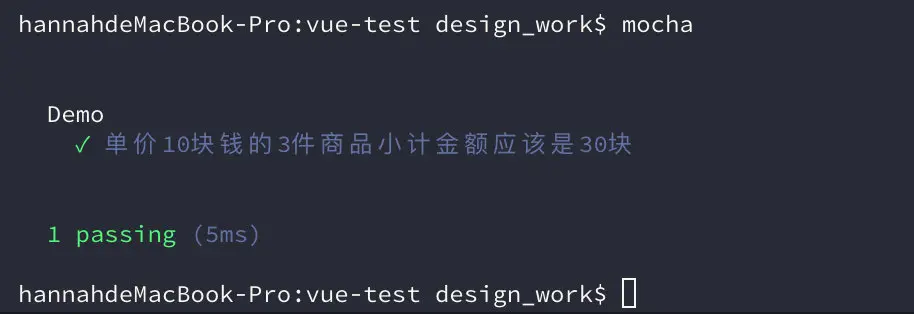
describe("Demo",()=>{
it("單價10塊錢的3件商品小計金額應該是30塊",function(){
var subtotal = demo.subtotal(10,3);
expect(subtotal).to.equal(30);
})
})2、異步操作測試setTimeout
(1)Mocha默認每個測試用例最多執行2000毫秒,如果到時沒有得到結果,就報錯。對於涉及異步操作的測試用例,這個時間往往是不夠的,需要用-t或--timeout參數指定超時門檻。
進入lib/demo-1.js,編寫異步等待方法,規定2秒之後返回結果
waitTwoSecond(data,callback){
        setTimeout(function(){
            callback(data);
        },2000);
    }
(2)進入test/demo-1.test.js,編寫測試腳本
//異步操作測試
    //mocha不會等到異步執行結束以後進行測試,而是直接運行得到測試結果
    it("一段時間以後返回數據",function(done){
        demo.waitTwoSecond("hello",function(data){
            expect(data).to.equal("hello")
            done(); //只有調用done方法才能等待調用結束以後測試
            //mocha默認的等待時間是2秒,上述操作超過兩秒,報錯
            //運行命令mocha demo-1.test.js -t 5000重置等待時間解決
        })
})另外,上面的測試用例裏面,有一個done函數。it塊執行的時候,傳入一個done參數,當測試結束的時候,必須顯式調用這個函數,告訴Mocha測試結束了。否則,Mocha就無法知道,測試是否結束,會一直等到超時報錯。如果把這行刪除,則mocha不會等到異步執行結束以後進行測試,而是直接運行得到測試結果,返回的斷言結果始終為真。
(3)雖然測試用例中規定2秒返回結果,但是實際運行時間肯定超過2秒,所以,需要用-t或--timeout參數,改變默認的超時設置。
mocha demo-1.test.js -t 5000上面命令將測試的超時時限指定為5000毫秒。
3、測試接口數據https
接口地址https://douban.uieee.com/v2/m...

(1)lib/demo-1.js
引入https模塊
var https = require("https");定義fetchData方法
fetchData(api,callback){
        var requestUrl = `https://douban.uieee.com/v2/movie/${api}`;
        https.get(requestUrl,function(res){
            var responseData = ""
            res.setEncoding("utf8")

            res.on("data",function(chunk){
                responseData += chunk
            })

            res.on("end",function(){
                callback(JSON.parse(responseData))
            })
        })
    }
(2)test/demo-1.test.js
it("加載豆瓣api,返回的數據,應該包含subjects屬性",function(done){
demo.fetchData("top250",function(data){
expect(data).to.have.property("subjects");
done();
})
})
it("加載豆瓣api,返回的數據,subjects應為對象類型", function (done) {
demo.fetchData("top250", function (data) {
var subjects = data.subjects;
expect(subjects).to.be.a("array");
done();
})
})
it("加載豆瓣api,返回的數據,subjects長度應為20", function (done) {
demo.fetchData("top250", function (data) {
var subjects = data.subjects;
expect(subjects).to.have.length(20);
done();
})
})
it("加載豆瓣api,返回的數據,title屬性應該是字符串類型的", function (done) {
demo.fetchData("top250", function (data) {
var title = data.subjects[0].title
expect(title).to.be.a("string");
expect(title).to.equal("肖申克的救贖")
done();
})
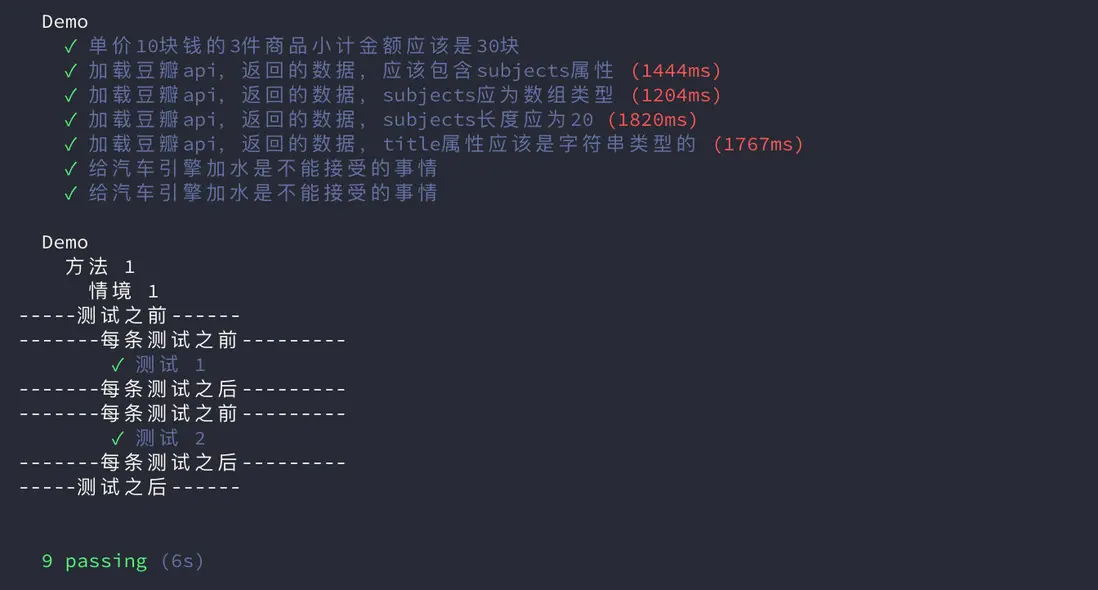
})(3)運行結果

4、測試異常
(1)lib/demo-1.js
engine(fuel){
        if(fuel !== "gas"){
            throw new Error("not accept")
        }
    }
(2)test/demo-1.test.js
//定義一個異常
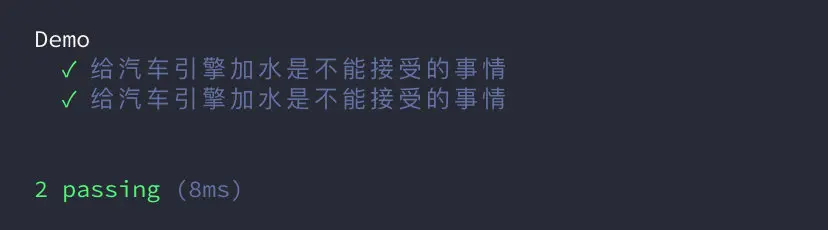
it("給汽車引擎加水是不能接受的事情",function(){
expect(function(){
demo.engine("water");
}).to.throw("not accept")
})//另外一種寫法
it("給汽車引擎加水是不能接受的事情",function(){
expect(demo.engine.bind(demo,"water")).to.throw("not accept")
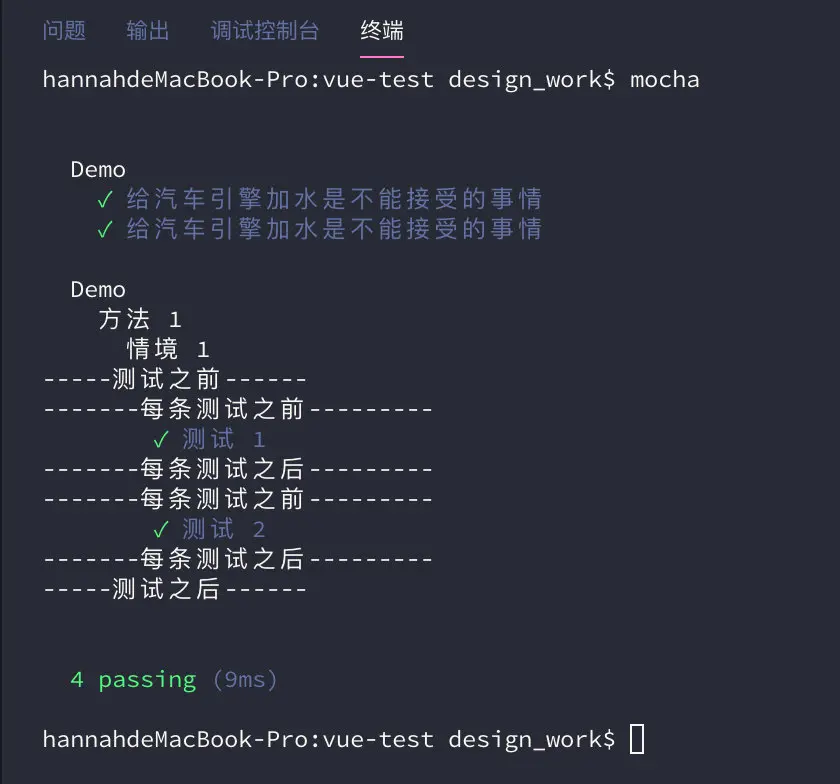
})(3)測試結果
六、運行多個測試
1、直接使用mocha命令運行test子目錄中的測試腳本
Mocha默認運行test子目錄裏面的測試腳本。所以,一般都會把測試腳本放在test目錄裏面,然後執行mocha就不需要參數了。

所以在控制枱中輸入mocha,只會執行test子目錄裏的測試腳本demo-1.test.js和demo.js,而test_lib中的assert.js、expect.js、should.js則不會執行。
運行結果:
2、執行test子目錄下面所有的測試用例
這時可以看到,test子目錄裏面的測試腳本執行了。但是,你打開test子目錄,會發現下面還有一個test/test_lib子目錄,裏面還有三個測試腳本assert.js、expect.js、should.js,並沒有得到執行。Mocha默認只執行test子目錄下面第一層的測試用例,不會執行更下層的用例。
為了改變這種行為,就必須加上--recursive參數,這時test子目錄下面所有的測試用例,不管在哪一層,都會執行。
mocha --recursive運行結果:

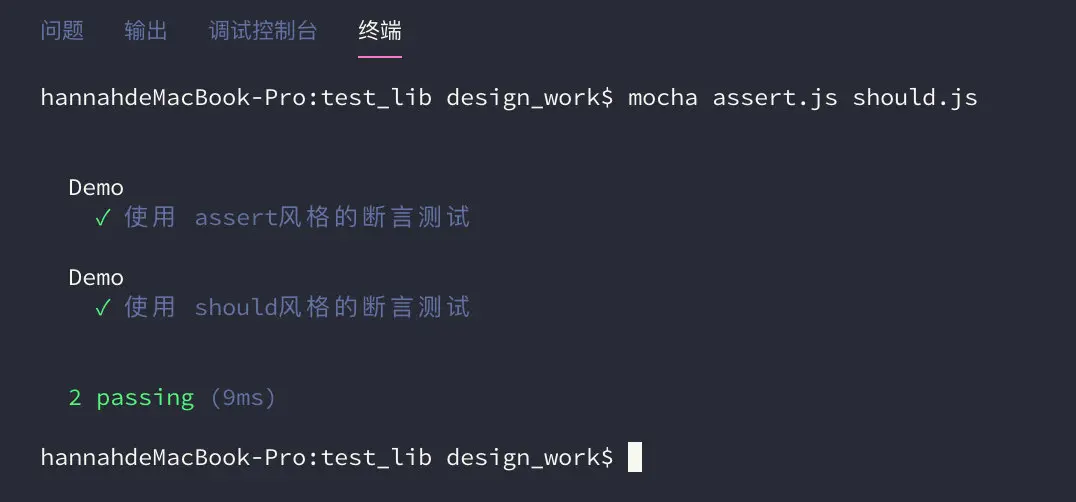
3、執行多個測試腳本
mocha命令後面緊跟測試腳本的路徑和文件名,可以指定多個測試腳本。
進入tets_lib目錄下,運行assert.js和should.js兩個測試腳本
mocha assert.js should.js運行結果
七、測試用例管理
1、only表示只運行某個測試套件或測試用例。
大型項目有很多測試用例。有時,我們希望只運行其中的幾個,這時可以用only方法。describe塊和it塊都允許調用only方法,表示只運行某個測試套件或測試用例。
it.only("單價10塊錢的3件商品小計金額應該是30塊",function(){
        var subtotal = demo.subtotal(10,3);
        expect(subtotal).to.equal(30);
    })
運行結果:只運行了添加only方法的測試腳本
2、skip表示跳過指定的測試套件或測試用例。
it.skip("一段時間以後返回數據",function(done){
        demo.waitTwoSecond("hello",function(data){
            expect(data).to.equal("hello")
            done(); //只有調用done方法才能等待調用結束以後測試
            //mocha默認的等待時間是2秒,上述操作超過兩秒,報錯
            //運行命令mocha demo-5.js -t 5000重置等待時間解決
        })
    })
運行結果:跳過了添加skip方法的測試腳本

八、ES6測試
1、ES5寫法
src/add.js
function add(x, y) {
    return x + y;
}

module.exports = add;
test/demo-2.test.js
const chai = require("chai");
const expect = chai.expect;
var Add = require("../src/add.js");
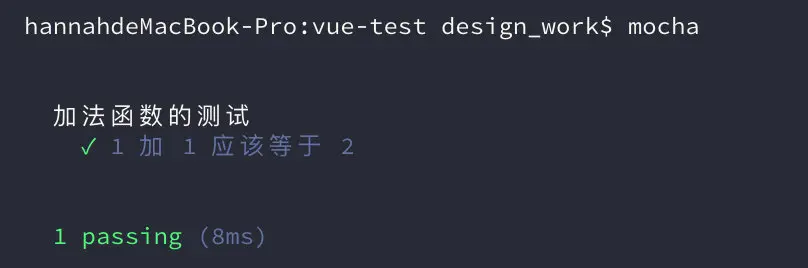
describe('加法函數的測試', function () {
it('1 加 1 應該等於 2', function () {
expect(Add(1, 1)).to.be.equal(2);
});
});
運行命令
mocha運行結果
2、ES6寫法
test/demo-2.test.js
const chai = require("chai");
const expect = chai.expect;
var Add = require("../src/add.js");

describe('加法函數的測試', function () {
    it('1 加 1 應該等於 2', function () {
        expect(Add(1, 1)).to.be.equal(2);
    });
});
如果測試腳本是用ES6寫的,那麼運行測試之前,需要先用Babel轉碼。
(1)安裝Babel
npm install babel-core babel-preset-es2015 --save-dev(2)在項目目錄下面,新建一個.babelrc文件:
{
  "presets": [ "es2015" ]
}
運行命令
./node_modules/mocha/bin/mocha --require babel-core/register運行結果

九、測試報告
運行 mocha --reporters可以顯示所有內置的報告格式。

1、spec格式
--reporter參數用來指定測試報告的格式,默認是spec格式。
mocha
等同於
mocha --reporter spec
運行結果:
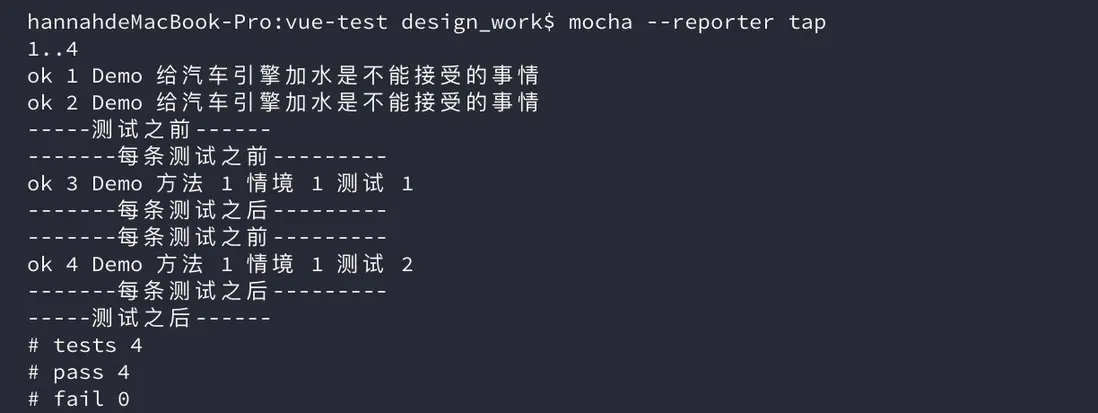
2、tap格式
mocha --reporter tap運行結果:
3、HTML格式
使用mochawesome模塊,可以生成漂亮的HTML格式的報告。
(1)安裝mochawesome模塊
npm install --save-dev mochawesome(2)執行測試命令
./node_modules/.bin/mocha --reporter mochawesome上面代碼中,mocha命令使用了項目內安裝的版本,而不是全局安裝的版本,因為mochawesome模塊是安裝在項目內的。
(3)運行結果:

(4)測試結果報告在mochaawesome-reports子目錄生成。

(5)在瀏覽器中瀏覽html格式的測試報告

十、生成測試文件
Mocha支持從測試用例生成規格文件。
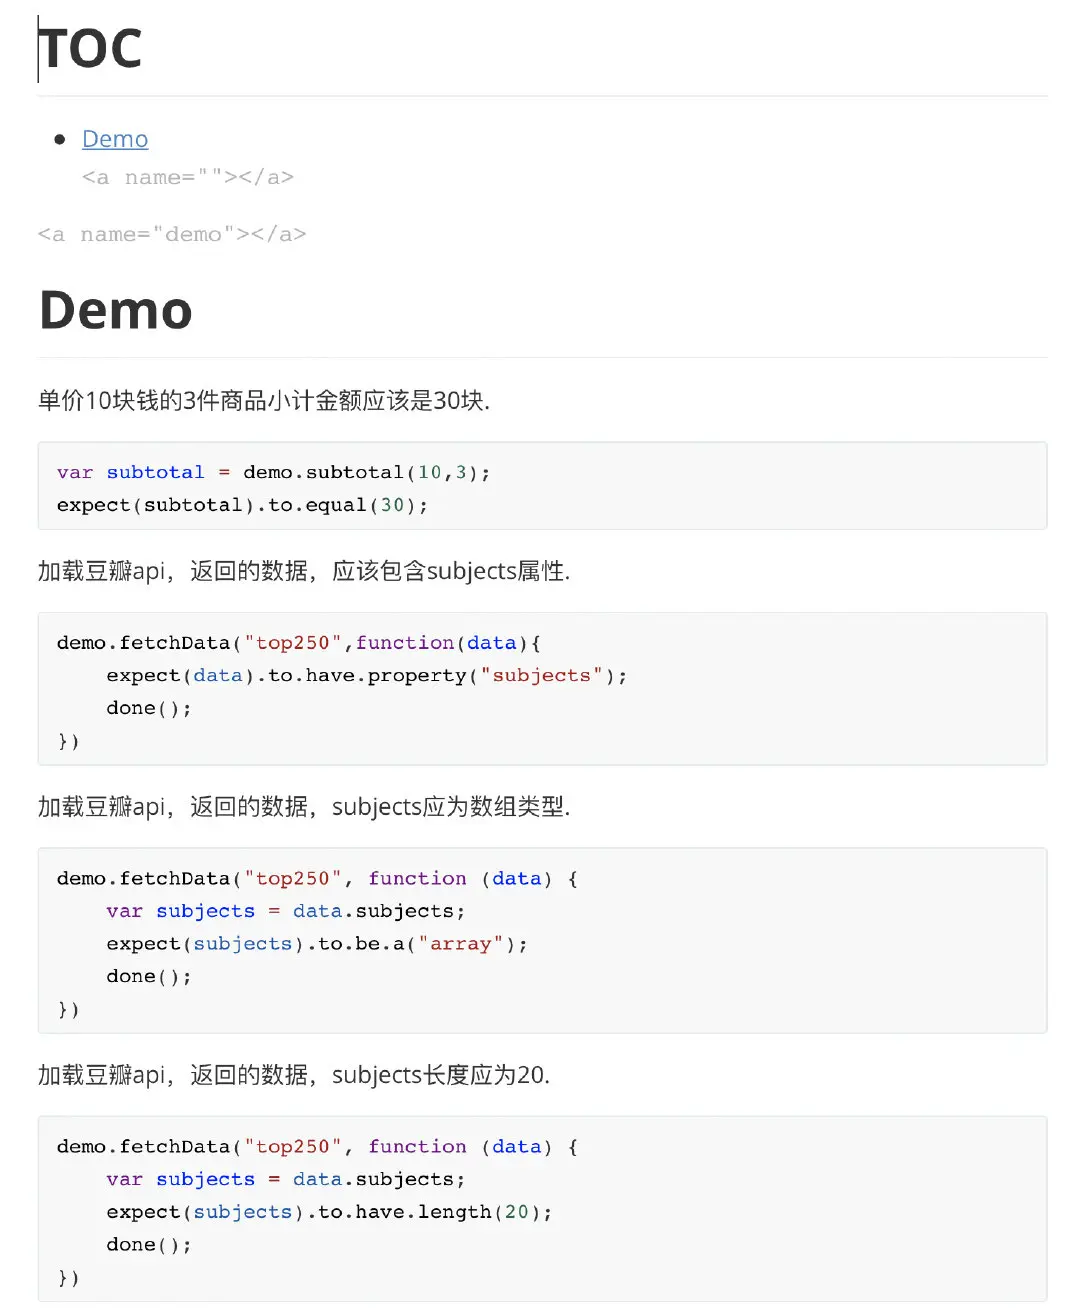
1、Markdown格式
mocha demo-1.test.js --recursive -R markdown > spec.md上面命令根據test目錄的demo-1.test.js測試腳本,生成一個規格文件spec.md。-R markdown參數指定規格報告是markdown格式。
2、HTML格式
mocha demo-1.test.js --recursive -R doc > spec.html上面命令根據test目錄的demo-1.test.js測試腳本,生成一個規格文件spec.html.

十一、在瀏覽器中測試
除了在命令行運行,Mocha還可以在瀏覽器運行。
1、首先,使用mocha init命令在指定目錄生成初始化文件。
mocha init vue-test運行上面命令,就會在vue-test目錄下生成index.html文件,以及配套的腳本和樣式表。
<!DOCTYPE html>
<html lang="en">
  <head>
    <meta charset="utf-8">
    <title>Mocha</title>
    <meta name="viewport" content="width=device-width, initial-scale=1.0">
    <link rel="stylesheet" href="mocha.css">
  </head>
  <body>
    <div id="mocha"></div>
    <script src="mocha.js"></script>
    <script>mocha.setup('bdd');</script>
    <script src="tests.js"></script>
    <script>
      mocha.run();
    </script>
  </body>
</html>
2、新建一個源碼文件add.js
function add(x, y) {
    return x + y;
}

module.exports = add;
3、新建一個測試腳本tests.js
var expect = chai.expect;

describe('加法函數的測試', function () {
    it('1 加 1 應該等於 2', function () {
        expect(add(1, 1)).to.be.equal(2);
    });

    it('任何數加0等於自身', function () {
        expect(add(1, 0)).to.be.equal(1);
        expect(add(0, 0)).to.be.equal(0);
    });
});4、然後,把這個文件,以及斷言庫chai.js,加入index.html。
<!DOCTYPE html>
<html lang="en">
  <head>
    <meta charset="utf-8">
    <title>Mocha</title>
    <meta name="viewport" content="width=device-width, initial-scale=1.0">
    <link rel="stylesheet" href="mocha.css">
  </head>
  <body>
    <div id="mocha"></div>
    <script src="mocha.js"></script>
    <script>mocha.setup('bdd');</script>
    <script src="add.js"></script>
    <script src="http://chaijs.com/chai.js"></script>
    <script src="tests.js"></script>
    <script>
      mocha.run();
    </script>
  </body>
</html>5、現在,在瀏覽器裏面打開index.html,就可以看到測試腳本的運行結果。

參考文檔
mocha官網
https://mochajs.org/
測試框架 Mocha 實例教程 by 阮一峯
https://juejin.im/entry/5941e...
【前端單元測試入門01】Mocha與chai
https://www.jianshu.com/p/aa5...
vue項目中添加單元測試
https://blog.csdn.net/weixin_...
vue官網-單元測試模塊
https://cn.vuejs.org/v2/guide...