


實踐環境
elasticsearch-8.16.4-linux-x86_64.tar.gz
https://artifacts.elastic.co/downloads/elasticsearch/elasticsearch-8.16.4-linux-x86_64.tar.gz
kibana-8.16.4-linux-x86_64.tar.gz
https://artifacts.elastic.co/downloads/kibana/kibana-8.16.4-linux-x86_64.tar.gz
麒麟V10
新建運行用户
# groupadd -g 505 elastic
# useradd -u 505 -g 505 elastic
修改系統參數配置
# vi /etc/sysctl.conf
vm.overcommit_memory=1
vm.max_map_count=262144
# sysctl -p

# 查看語言配置
# locale
LANG=zh_CN.UTF-8
LC_CTYPE="zh_CN.UTF-8"
...

# swapoff -a
# vi /etc/security/limits.conf
# End of file
elastic soft memlock unlimited
elastic hard memlock unlimited


#  ulimit -l unlimited
説明:如果locale命令輸出和上述不一樣,修改locale.conf配置,設置LANG=zh_CN.UTF-8
# vi /etc/locale.conf
...
LANG=zh_CN.UTF-8
bootstrap.memory_lock相關配置
禁用swap
# swapoff -a
永久配置
# vi /etc/fstab
去掉swap所在行
#
# /etc/fstab
# Created by anaconda on Wed Jul  5 22:21:55 2023
#
# Accessible filesystems, by reference, are maintained under '/dev/disk/'.
# See man pages fstab(5), findfs(8), mount(8) and/or blkid(8) for more info.
#
# After editing this file, run 'systemctl daemon-reload' to update systemd
# units generated from this file.
#
/dev/mapper/klas-root   /                       xfs     defaults        0 0
UUID=59b10633-de57-4a13-83c5-49ea947edefc /boot                   xfs     defaults        0 0
/dev/mapper/klas-opt_data /opt/data               xfs     defaults        0 0
/dev/mapper/klas-opt_log /opt/log                xfs     defaults        0 0
#/dev/mapper/klas-swap   swap                    swap    defaults        0 0
# vi /etc/security/limits.conf
添加以下配置:
# End of file
elastic soft memlock unlimited
elastic hard memlock unlimited
# ulimit -l unlimited
注意:如果不執行上述這行命令,啓動時會報錯:
bootstrap check failure [1] of [2]: memory locking requested for elasticsearch process but memory is not locked;
參考連接:
https://www.elastic.co/guide/en/elasticsearch/reference/8.16/setup-configuration-memory.html#bootstrap-memory_lock
停止防火牆
# systemctl disable firewalld
# systemctl stop firewalld
elasticsearch
提前創建elasticsearch.yml、jvm.options配置相關目錄,否則運行ES時會報錯
# mkdir /opt/data/esdata
# mkdir -p /opt/data/eslogs/jvm/logs
# mkdir -p /opt/data/eslogs/jvm/tmpdir
# mkdir -p /opt/data/eslogs/jvm/data
解壓壓縮包
# cd /opt/data/
# tar -xvf elasticsearch-8.16.4-linux-x86_64.tar.gz
修改elasticsearch.yml
修改配置
# vi /opt/data/elasticsearch-8.16.4/config/elasticsearch.yml
關鍵配置項如下
# 集羣名稱
cluster.name: es001db

# 節點名稱
node.name: node1

# 監聽IP地址(本機地址)
network.host: 192.168.34.51

# 監聽端口地址
http.port: 19200

# 增加內部通訊端口
transport.port: 19300

# 節點發現過程中的種子,默認為 ["127.0.0.1", "[::1]"]
# 這裏因為是單機,所以保持配置不變
#discovery.seed_hosts: ["host1", "host2"]

# 初始有master資格的節點列表,只在集羣第一次啓動有效
cluster.initial_master_nodes: ["node1"]

#數據存儲目錄路徑
path.data: /opt/data/esdata

# 日誌存儲目錄路徑
path.logs: /opt/data/eslogs

# 在數據庫層面金庸swap,同時設置會場參數memlock值為unlimited
bootstrap.memory_lock: true
修改jvm.options
修改配置
# vi /opt/data/elasticsearch-8.16.4/config/jvm.options
關鍵配置項如下
# 編碼設置
-Dfile.encoding=zh_CU.UTF-8

# JVM內存配置
-Xms16g
-Xmx16g

## JVM 臨時目錄
-Djava.io.tmpdir=/opt/data/eslogs/jvm/tmpdir

# dump日誌路徑
-XX:HeapDumpPath=/opt/data/eslogs/jvm/data

# fatal日誌配路徑
# 注意:/opt/data/eslogs/jvm/logs目錄必須提前創建,如果不存在的話
-XX:ErrorFile=/opt/data/eslogs/jvm/logs/hs_err_pid%p.log


# gc 日誌
-Xlog:gc*,gc+age=trace,safepoint:file=/opt/data/eslogs/jvm/logs/gc.log:utctime,level,pid,tags:filecount=32,filesize=64m
修改log4j2.properties(可選)
# vi /opt/data/elasticsearch-8.16.4/config/log4j2.properties
關鍵配置默認如下,無須修改
logger.index_indexing_slowlog.level = trace
基礎安全設置
首次啓動Elasticsearch時,會為elastic用户生成密碼,並自動配置TLS。如果在啓動Elasticsearch節點之前手動配置了安全性,則自動配置過程將遵循自定義安全配置。可以隨時調整TLS配置,例如更新節點證書。
如果集羣有多個節點,那麼必須在節點之間配置TLS。如果不啓用TLS,生產模式集羣將無法啓動。
傳輸層依賴於雙向TLS來對節點進行加密和身份驗證。正確應用TLS可確保惡意節點無法加入集羣並與其他節點交換數據。雖然在HTTP層實現用户名和密碼身份驗證對於保護本地集羣很有用,但節點之間的通信安全需要使用TLS。
在節點之間配置TLS是基本的安全設置,可防止未經授權的節點訪問集羣。
理解傳輸上下文
傳輸層安全(TLS)是一項行業標準協議的名稱,用於對網絡通信實施安全控制(如加密)。TLS是過去稱為安全套接字層(SSL)的現代名稱。Elasticsearch文檔中可互換使用TLS和SSL這兩個術語。
傳輸協議是Elasticsearch節點之間用於通信的協議名稱。此名稱特定於Elasticsearch,用於區分傳輸端口(默認9300)和HTTP端口(默認9200)。節點之間使用傳輸端口進行通信,而REST客户端則使用HTTP端口與Elasticsearch進行通信。
儘管“transport”一詞在兩種情境下都有出現,但它們的含義卻不同。可以將TLS應用於Elasticsearch的傳輸端口和HTTP端口。這些重疊的術語可能會造成混淆,因此為了澄清,在此場景下我們將TLS應用於Elasticsearch的傳輸端口。在下一場景中,我們將把TLS應用於Elasticsearch的HTTP端口。
生成證書頒發機構(certificate authority)
在集羣中,可以根據需要添加任意數量的節點,但這些節點必須能夠相互通信。集羣中節點之間的通信由傳輸模塊處理。為了保護集羣,必須確保節點間的通信是加密且經過驗證的,這可以通過雙向TLS來實現。
在安全的集羣中,Elasticsearch節點在與其他節點通信時使用證書來標識自己。
集羣必須驗證這些證書的真實性。推薦的做法是信任特定的證書頒發機構(certificate authority,CA)。當向集羣中添加節點時,這些節點必須使用由同一CA簽發的證書。
對於傳輸層,建議使用一個單獨的專用證書頒發機構(CA),而不是現有的、可能為共享的CA,以便嚴格控制節點成員資格。使用elasticsearch-certutil工具為集羣生成一個CA。
-
在啓動Elasticsearch之前,在任何單個節點上使用
elasticsearch-certutil工具為您的集羣生成一個證書頒發機構(CA)。# cd /opt/data/elasticsearch-8.16.4 # ./bin/elasticsearch-certutil ca This tool assists you in the generation of X.509 certificates and certificate signing requests for use with SSL/TLS in the Elastic stack. The 'ca' mode generates a new 'certificate authority' This will create a new X.509 certificate and private key that can be used to sign certificate when running in 'cert' mode. Use the 'ca-dn' option if you wish to configure the 'distinguished name' of the certificate authority By default the 'ca' mode produces a single PKCS#12 output file which holds: * The CA certificate * The CA's private key If you elect to generate PEM format certificates (the -pem option), then the output will be a zip file containing individual files for the CA certificate and private key Please enter the desired output file [elastic-stack-ca.p12]:#説明:此處直接回車(使用默認文件名稱elastic-stack-ca.p12) Enter password for elastic-stack-ca.p12 :#説明:此處直接回車,即不設置密碼elastic-stack-ca.p12文件包含此文件包含的證書頒發機構(CA)的公鑰證書以及用於為每個節點簽署證書的私鑰。- 如果計劃部署到生產環境,需要為CA輸入一個密碼,否則可以選擇將密碼留空。
-
在任一單個節點上,為集羣中的節點生成證書和私鑰。需要包含在上一步中生成的
elastic-stack-ca.p12輸出文件。# ./bin/elasticsearch-certutil cert --ca elastic-stack-ca.p12 This tool assists you in the generation of X.509 certificates and certificate signing requests for use with SSL/TLS in the Elastic stack. The 'cert' mode generates X.509 certificate and private keys. * By default, this generates a single certificate and key for use on a single instance. * The '-multiple' option will prompt you to enter details for multiple instances and will generate a certificate and key for each one * The '-in' option allows for the certificate generation to be automated by describing the details of each instance in a YAML file * An instance is any piece of the Elastic Stack that requires an SSL certificate. Depending on your configuration, Elasticsearch, Logstash, Kibana, and Beats may all require a certificate and private key. * The minimum required value for each instance is a name. This can simply be the hostname, which will be used as the Common Name of the certificate. A full distinguished name may also be used. * A filename value may be required for each instance. This is necessary when the name would result in an invalid file or directory name. The name provided here is used as the directory name (within the zip) and the prefix for the key and certificate files. The filename is required if you are prompted and the name is not displayed in the prompt. * IP addresses and DNS names are optional. Multiple values can be specified as a comma separated string. If no IP addresses or DNS names are provided, you may disable hostname verification in your SSL configuration. * All certificates generated by this tool will be signed by a certificate authority (CA) unless the --self-signed command line option is specified. The tool can automatically generate a new CA for you, or you can provide your own with the --ca or --ca-cert command line options. By default the 'cert' mode produces a single PKCS#12 output file which holds: * The instance certificate * The private key for the instance certificate * The CA certificate If you specify any of the following options: * -pem (PEM formatted output) * -multiple (generate multiple certificates) * -in (generate certificates from an input file) then the output will be be a zip file containing individual certificate/key files Enter password for CA (elastic-stack-ca.p12) : #説明:此處直接回車 Please enter the desired output file [elastic-certificates.p12]:#説明:此處直接回車(使用默認名稱) Enter password for elastic-certificates.p12 :#説明:此處輸入密碼後回車,密碼設置:elastic*123 Certificates written to /opt/data/elasticsearch-8.16.4/elastic-certificates.p12 This file should be properly secured as it contains the private key for your instance. This file is a self contained file and can be copied and used 'as is' For each Elastic product that you wish to configure, you should copy this '.p12' file to the relevant configuration directory and then follow the SSL configuration instructions in the product guide. For client applications, you may only need to copy the CA certificate and configure the client to trust this certificate.-
--ca <ca_file>用於簽署證書的CA文件的名稱。來自
elasticsearch-certutil工具的默認文件名為elastic-stack-ca.p12。-
Enter password for CA (elastic-stack-ca.p12) :: 次處等待輸入CA密碼,如果在上一步中未配置密碼,可直接按回車鍵。 -
Please enter the desired output file [elastic-certificates.p12]:使用默認輸出文件 -- 一個名為elastic-certificates.p12的密鑰庫。此文件包含節點證書、節點密鑰和CA證書。 -
Enter password for elastic-certificates.p12 :為證書創建一個密碼。
-
-
-
集羣中的每個節點上,拷貝
elastic-certificates.p12文件到集羣中每個節點上$ES_PATH_CONF目錄下(本文中為)。# pwd /opt/data/elasticsearch-8.16.4/config # ls bin config elastic-certificates.p12 elastic-stack-ca.p12 jdk lib LICENSE.txt logs modules NOTICE.txt plugins README.asciidoc # cp elastic-certificates.p12 config/
使用TLS加密節點間通信
傳輸網絡層用於集羣中節點間的內部通信。啓用安全功能後,必須使用TLS來確保節點間的通信是加密的。
Elasticsearch會監控所有配置為TLS相關節點設置值的文件,如證書、密鑰、密鑰庫或信任庫。如果更新了這些文件中的任何一個,例如當您的主機名更改或證書即將過期時,Elasticsearch會重新加載它們。Elasticsearch會以全局Elasticsearch resource.reload.interval.high設置確定的頻率輪詢這些文件是否有更改,該設置默認為5秒。
為集羣中的每個節點完成以下步驟。若要加入同一集羣,所有節點必須共享相同的cluster.name值。
-
打開
$ES_PATH_CONF/elasticsearch.yml(例中為vi /opt/data/elasticsearch-8.16.4/config/elasticsearch.yml)文件,並進行以下修改:-
添加
cluster.name配置併為集羣設置一個名字,例如:cluster.name: es001db -
添加
node.name配置並設置節點名稱(節點名稱默認為機器的主機名)node.name: node1 -
添加以下設置以啓用節點間通信,並提供對節點證書的訪問。
由於集羣中的每個節點上使用相同的
elastic-certificates.p12文件,所以將驗證模式設置為證書.xpack.security.transport.ssl.enabled: true xpack.security.transport.ssl.verification_mode: certificate xpack.security.transport.ssl.client_authentication: required xpack.security.transport.ssl.keystore.path: elastic-certificates.p12 xpack.security.transport.ssl.truststore.path: elastic-certificates.p12如果想使用主機名驗證,請將驗證模式設置為完全驗證。應為每個與DNS或IP地址匹配的主機生成不同的證書。請參閲TLS 設置中的
xpack.security.transport.ssl.verification_mode參數。
-
-
如果在創建節點證書時輸入了密碼,請運行以下命令以將密碼存儲在Elasticsearch密鑰庫中:
# cd /opt/data/elasticsearch-8.16.4 # ./bin/elasticsearch-keystore add xpack.security.transport.ssl.keystore.secure_password The elasticsearch keystore does not exist. Do you want to create it? [y/N]y #説明:此處輸入y後回車 Enter value for xpack.security.transport.ssl.keystore.secure_password:#説明:此處輸入密碼後回車,密碼設置:elastic*123 # ./bin/elasticsearch-keystore add xpack.security.transport.ssl.truststore.secure_password Enter value for xpack.security.transport.ssl.truststore.secure_password:#説明:此處輸入密碼後回車,密碼:elastic*123 -
為集羣中的其它節點完成以上步驟。
-
在集羣中的每個節點上,啓動Elasticsearch。啓動和停止Elasticsearch的方法因安裝方式而異。
例如,如果你使用歸檔分發版(tar.gz或.zip)安裝了Elasticsearch,可以在命令行中輸入Ctrl+C來停止Elasticsearch。
必須執行完整的集羣重啓。配置為使用TLS進行傳輸的節點無法與使用未加密傳輸連接的節點進行通信(反之亦然)
# cd /opt/data/
# chown -R elastic:elastic esdata
# chown -R elastic:elastic eslogs
# chown -R elastic:elastic elasticsearch-8.16.4
# cd elasticsearch-8.16.4
# su elastic
$ ./bin/elasticsearch
備註:如果希望es以後台服務的方式運行,可以這樣
$ ./bin/elasticsearch -d -p pid
參考連接
https://www.elastic.co/guide/en/elasticsearch/reference/8.16/security-basic-setup.html
https://www.elastic.co/docs/deploy-manage/maintenance/start-stop-services/start-stop-elasticsearch
修改內置用户密碼
另外新開一個窗口,修改內置elastic, kibana_system用户
# su elastic
$ cd /opt/data/elasticsearch-8.16.4/
$ ./bin/elasticsearch-reset-password -i -u elastic
This tool will reset the password of the [elastic] user.
You will be prompted to enter the password.
Please confirm that you would like to continue [y/N]y # 説明:此處輸入y後回車


Enter password for [elastic]:# 説明:此處輸入密碼後回車,密碼:elastic*123
Re-enter password for [elastic]:# 説明:此處輸入密碼後回車,密碼:elastic*123
Password for the [elastic] user successfully reset.
$ ./bin/elasticsearch-reset-password -i -u kibana_system
This tool will reset the password of the [kibana_system] user.
You will be prompted to enter the password.
Please confirm that you would like to continue [y/N]y # 説明:此處輸入y後回車


Enter password for [kibana_system]:# 説明:此處輸入密碼後回車,密碼:kibana*123
Re-enter password for [kibana_system]:# 説明:此處輸入密碼後回車,密碼:kibana*123
Password for the [kibana_system] user successfully reset.
用户訪問驗證
# curl -I http://192.168.34.51:19200
HTTP/1.1 401 Unauthorized
WWW-Authenticate: Basic realm="security", charset="UTF-8"
WWW-Authenticate: ApiKey
content-type: application/json
content-length: 405

# curl -u elastic:elastic*123 -X GET "http://192.168.34.51:19200/_cat/health?v"
epoch      timestamp cluster status node.total node.data shards pri relo init unassign unassign.pri pending_tasks max_task_wait_time active_shards_percent
1761727114 08:38:34  es001db green           1         1     33  33    0    0        0            0             0                  -                100.0%
參考鏈接
https://www.elastic.co/guide/en/elasticsearch/reference/8.16/security-minimal-setup.html
https://www.elastic.co/guide/en/elasticsearch/reference/8.16/built-in-users.html
kibana(可選)
解壓安裝包
# tar -xvf kibana-8.16.4-linux-x86_64.tar.gz
# cd kibana-8.16.4/
# ls
bin  config  data  LICENSE.txt  logs  node  node_modules  NOTICE.txt  package.json  packages  plugins  README.txt  src  x-pack
# cd  cd config/
# ls
kibana.yml  node.options
修改kibana.yal配置文件
# vi kibana.yml
關鍵配置項如下:
# 設置訪問es的賬户和密碼
elasticsearch.username: "kibana_system"
elasticsearch.password: "kibana*123"

# 設置es訪問地址
elasticsearch.hosts: ["http://192.168.34.51:19200"]

# 設置kibana自身服務監聽端口和IP地址
server.port: 5601
server.host: "192.168.34.51"
Kibana密碼連接ES其它相關配置
# cd /opt/data/kibana-8.16.4/
# ./bin/kibana-keystore create
Kibana is currently running with legacy OpenSSL providers enabled! For details and instructions on how to disable see https://www.elastic.co/guide/en/kibana/8.16/production.html#openssl-legacy-provider
Created Kibana keystore in /opt/data/kibana-8.16.4/config/kibana.keystore
# ./bin/kibana-keystore add elasticsearch.password
Kibana is currently running with legacy OpenSSL providers enabled! For details and instructions on how to disable see https://www.elastic.co/guide/en/kibana/8.16/production.html#openssl-legacy-provider
Enter value for elasticsearch.password: **********# 説明,這裏輸入上述為kibana_system用户設置的密碼(kibana*123)後回傳
運行kibana
# ./bin/kibana --allow-root
或者
# cd /opt/data
# chown -R elastic:elastic kibana-8.16.4
# su elastic
$ cd kibana-8.16.4/
$ ./bin/kibana
訪問Kibana
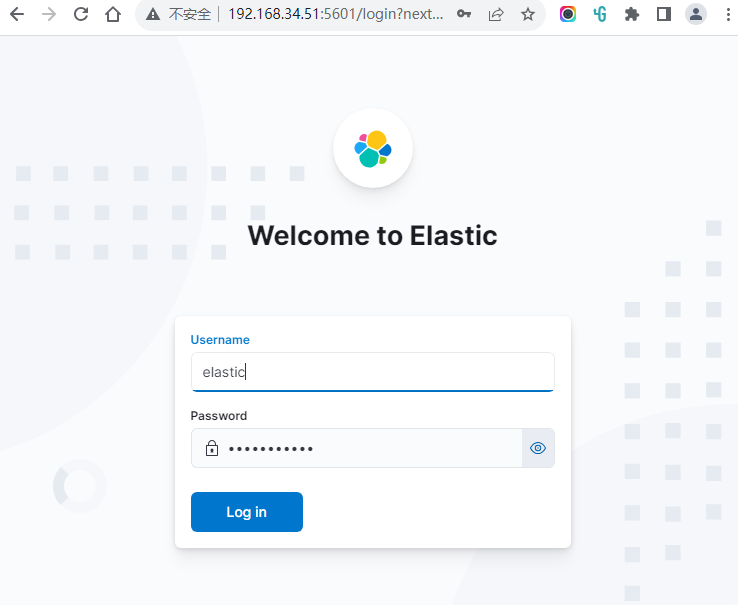
説明:此處輸入上文es內置用户elastic及密碼(本文中為elastic*123)後點擊 Log in
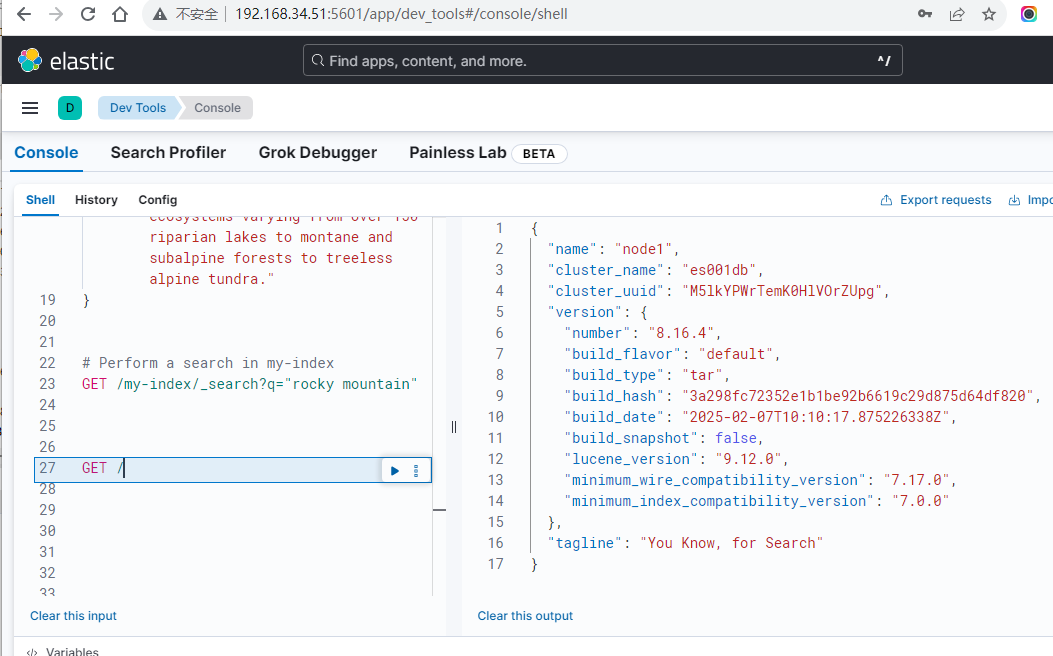
ES 訪問驗證:點擊左側三線按鈕,展開抽屜欄中點擊 Management -> Dev Tools
參考鏈接
https://www.elastic.co/guide/en/elasticsearch/reference/8.16/security-minimal-setup.html
https://www.elastic.co/guide/en/kibana/8.16/targz.html
