
目錄
一、安裝anaconda
二、配置虛擬環境
三、安裝vscode
四、在vscode安裝pylint
五、安裝YAPE
六、安裝TensorFlow
pip install與conda install
測試安裝
git工具安裝
tensorflow object detection api 下載安裝
建立文件結構並下載api
安裝依賴的python軟件包
配置環境變量
安裝COCO api
一、下載編譯工具visualcppbuildtools_full.exe
二、下載工具
三、完成coco api的安裝
測試coco api是否安裝成功
編譯proto文件
測試安裝
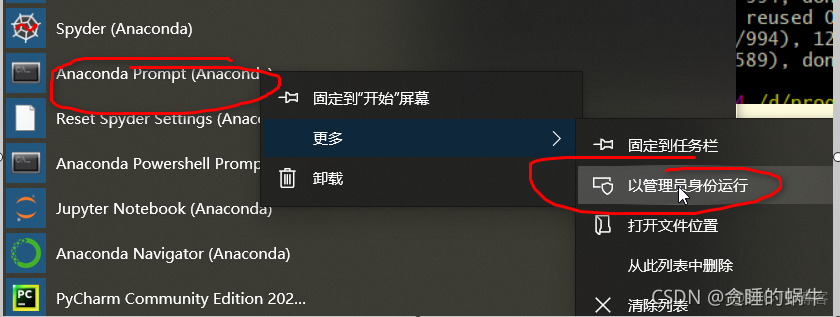
安裝LabelImag
一、安裝anaconda
二、配置虛擬環境
添加一個新的python3.6的虛擬環境
三、安裝vscode
在激活虛擬環境後 在首頁找的vscode,點擊安裝
四、在vscode安裝pylint
在vscode的下面TERMINAL中輸入pip install pylint
用於代碼分析
五、安裝YAPE
pip install yape
然後配置
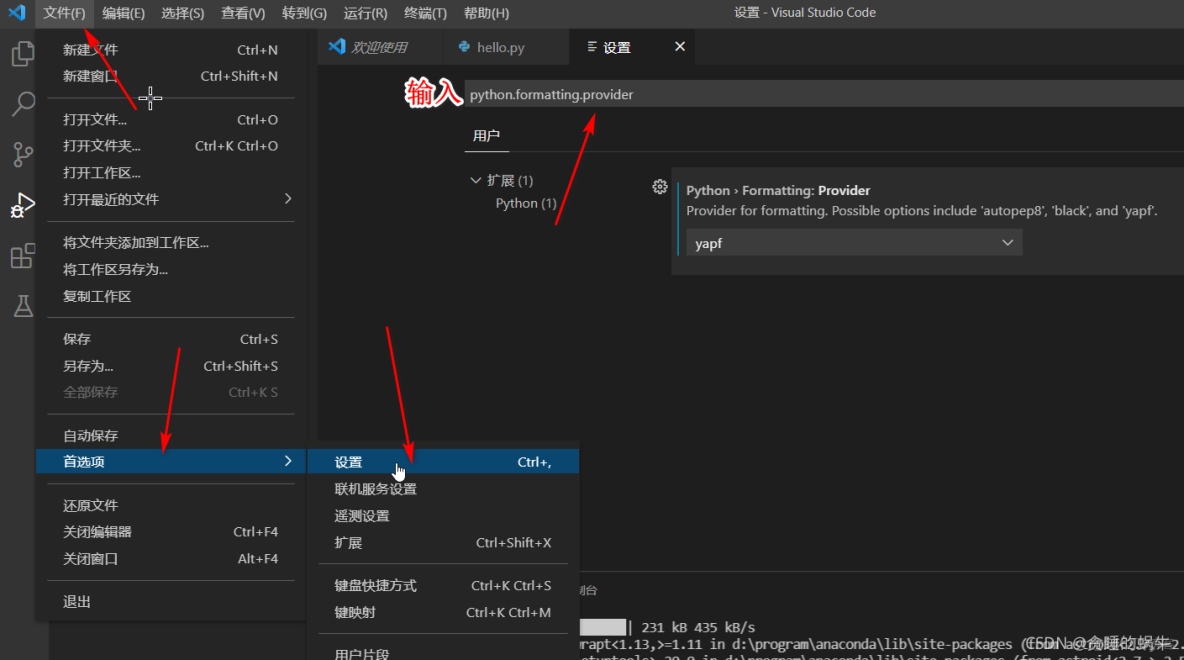
選擇yapf
使用的時候,按alt+shift+f
六、安裝TensorFlow
輸入conda install tensorflow-gpu=1.13 (3000系列顯卡這裏可以conda install tensorflow-gpu==2.5)
如果不指名tensorflow的版本,conda會安裝當前最新版,需要注意的是開源不像商業那樣,商業在發佈之前已經充分測試過,但開源並沒有,開源在不斷迭代過程中,所依賴的軟件包有的迭代快,有的迭代慢,版本之間並不一定兼容,因此最新版本不一定就是最好的
在這裏通過一條指明具體版本的命令就可以安裝所有,包括其依賴庫並且不用操心依賴庫之間的版本控制問題,十分方便,但是如果不安裝Anaconda,直接在python中安裝,那麼還需要手動安裝其他的依賴庫,還要確認每個依賴庫版本和TensorFlow版本的對應關係,十分繁瑣
pip install與conda install
pip是python官方推薦的,它只專注於python軟件包之間的依賴關係,不考慮python軟件包和非python軟件包的依賴關係
而conda在安裝時,虧同時解決tensorflow所以來的python軟件包和非python軟件包的關係
測試安裝
python
import tensorflow as tf
tf.enable_eager_execution()
hello=tf.constant('hello,tensorflow')
print(hello)
發現問題

問題解決Your CPU supports instructions that this TensorFlow binary was not compiled to use: AVX2 FMA_baidu_41553551的博客-
python
import tensorflow as tf
import os
os.environ['TF_CPP_MIN_LOG_LEVEL'] = '2'
tf.enable_eager_execution()
hello=tf.constant("hello,tensorflow")
print(hello)
運行成功圖

git工具安裝
git官網 https://git-scm.com下載win的版本,可以最新版,點擊安裝,什麼都不用動,一直點next就可以
安裝完成在空白處點擊右鍵,如果右鍵菜單中找到git bash here 並啓動git bash則説明安裝成功
tensorflow object detection api 下載安裝
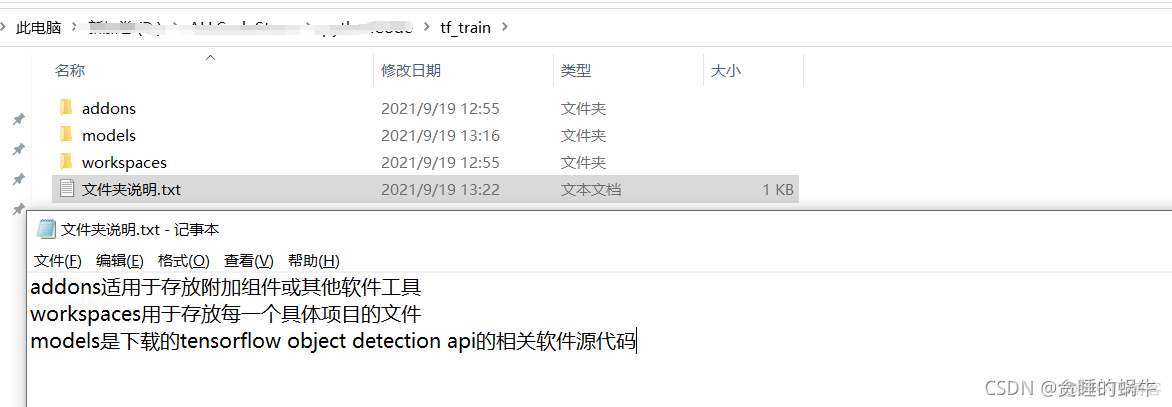
建立文件結構並下載api
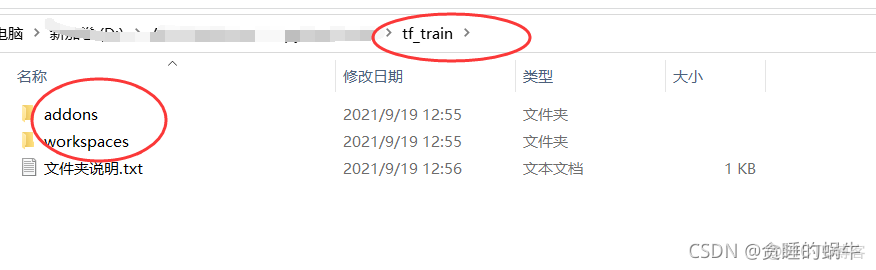
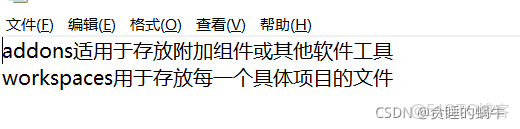
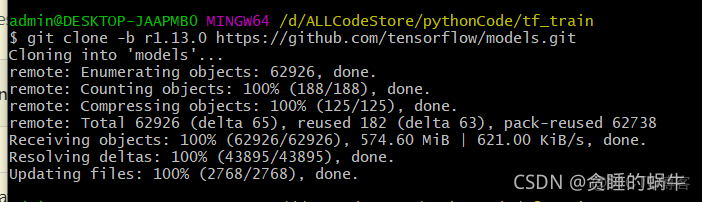
在這裏面也就是tf_train裏面空白處點擊右鍵,單擊git bash here
輸入
git clone -b r1.13.0 https://github.com/tensorflow/models.gittensorflow是2.5的則
git clone -b r2.5.0 https://github.com/tensorflow/models.git

下載完成後的文件夾結構
安裝依賴的python軟件包
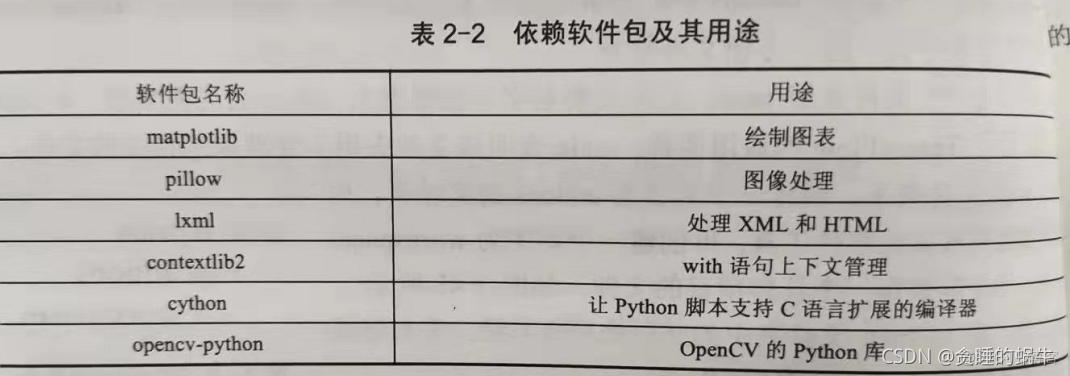
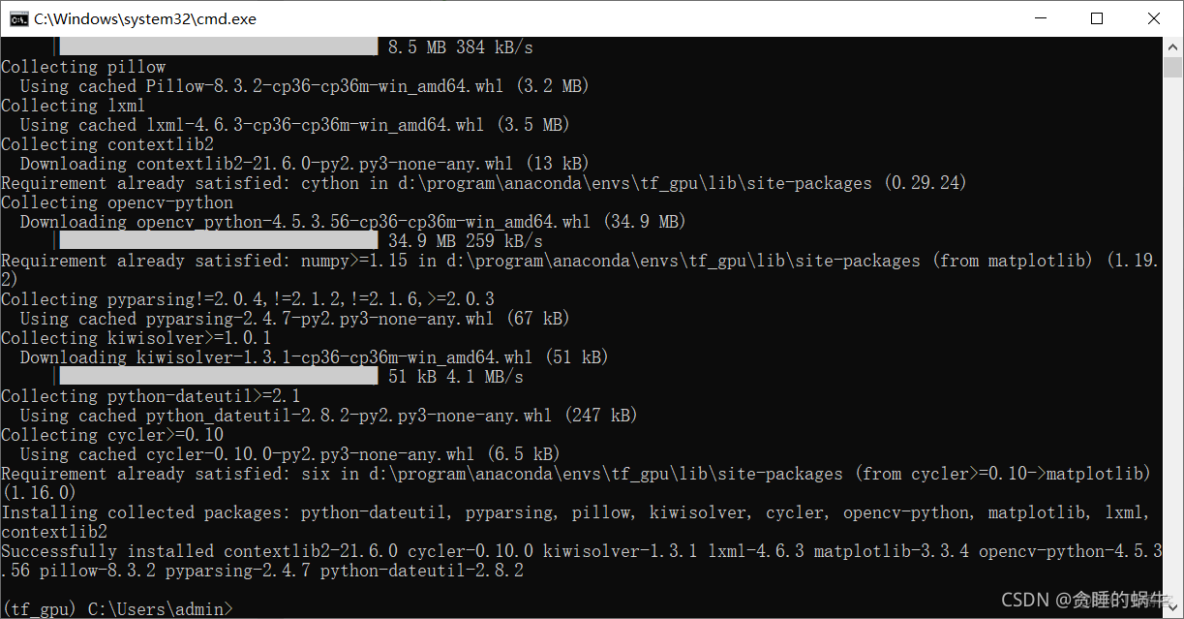
在anaconda的虛擬環境中輸入命令
pip install matplotlib pillow lxml contextlib2 cython opencv-python
配置環境變量
為了讓python能夠找到api依賴的軟件模塊,需要給python的模塊搜索路徑變量PYTHONPATH添加三個路徑

安裝COCO api
一、下載編譯工具visualcppbuildtools_full.exe
下載鏈接為https://go.microsoft.com/fwlink/?LinkId=691126
然後直接安裝 如果失敗了 看
二、下載工具
在addons文件夾裏面的空白處單擊右鍵選擇git bash here
輸入命令
git clone https://github.com/philferriere/cocoapi.git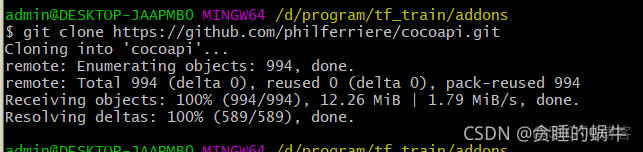
三、完成coco api的安裝
打開prompt
切換環境
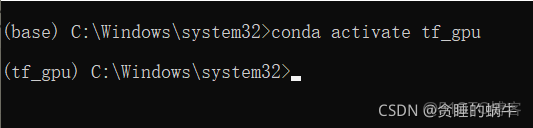
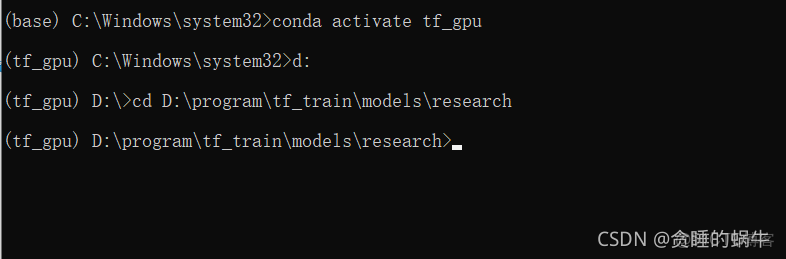
conda activate tf_gpu
進入d盤 輸入d:
在進入工作目錄
cd D:\program\tf_train\addons\cocoapi\PythonAPI
輸入安裝命令
python setup.py install測試coco api是否安裝成功
輸入python 啓動python環境
輸入語句import pycocotools
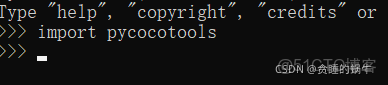
則表示安裝成功
編譯proto文件
api框架使用protobuf工具配置模型和訓練參數
由於在conda install tensorflow已經安裝過了,所以不需要再次安裝
但在運行框架前需要編譯proto文件
進入tf_train\models\research文件夾,在文件夾地址欄中輸入cmd,啓動命令行,然後輸入
conda activate tf_gpu
如果沒有對conda加入環境變量,那麼正常的啓動cmd,然後調到上面這個文件夾內
輸入命令,然後回車完成對proto文件的編譯
for /f %i in ('dir /b object_detection\protos\*.proto') do protoc object_detection\protos\%i --python_out=.
測試安裝
下載模型
https://github.com/librahfacebook/Detection/blob/master/object_detection/g3doc/detection_model_zoo.md
如果鏈接失效,在谷歌中搜索detection_model_zoo.md,找github裏的tensorflow的那個鏈接
點擊下載模型
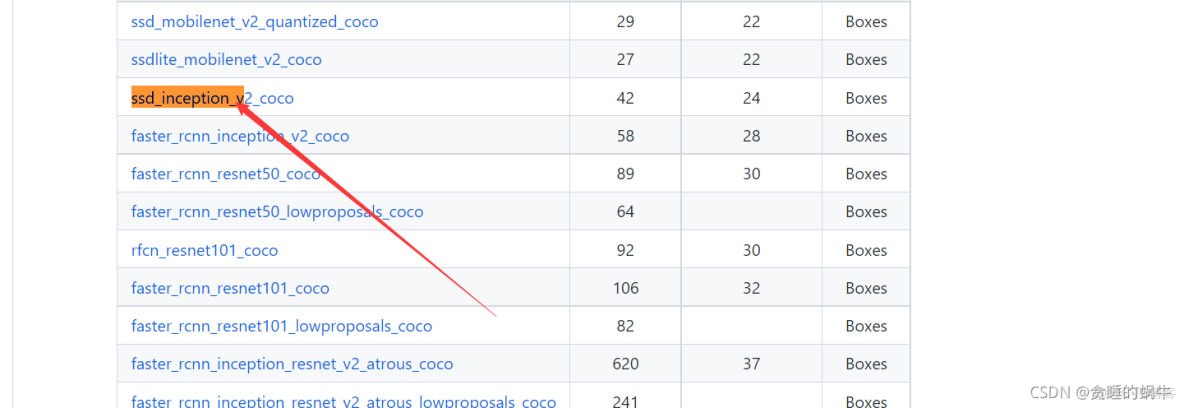
如果下載不了,使用下面的鏈接
鏈接:https://pan.baidu.com/s/1u4J0RQH-0pw3Rb2EOjACyA
提取碼:s1lc
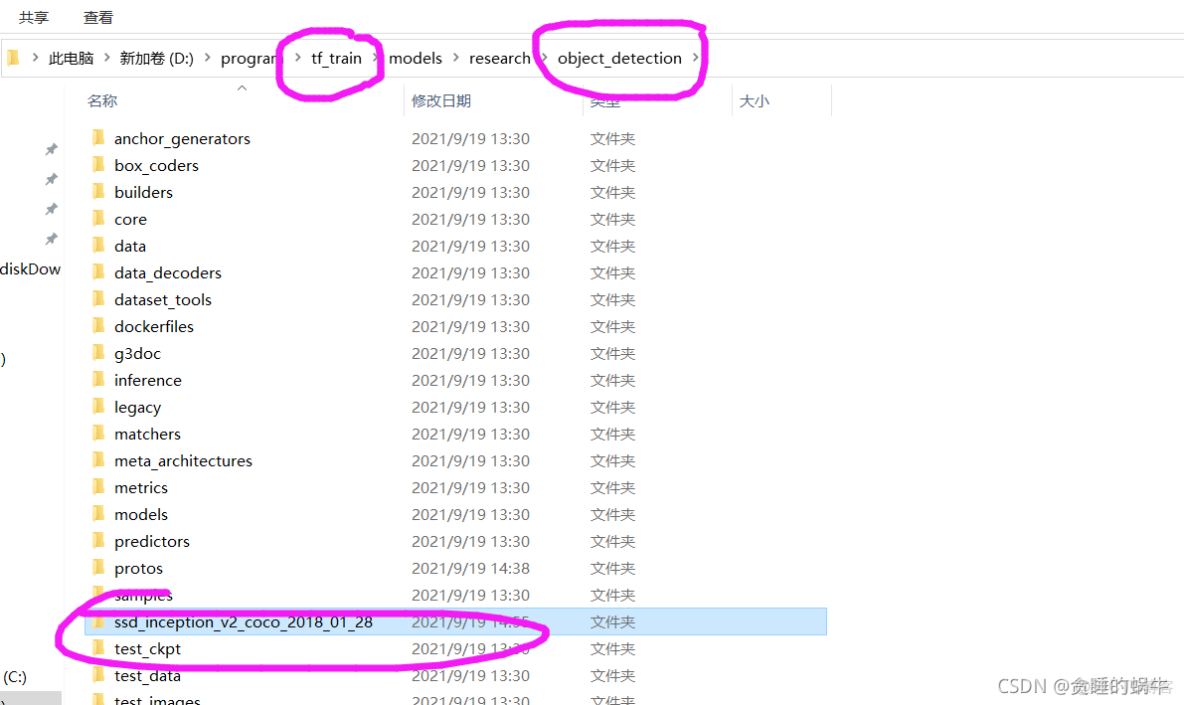
下載後的文件解壓,然後將解壓後的文件複製到
修改
將
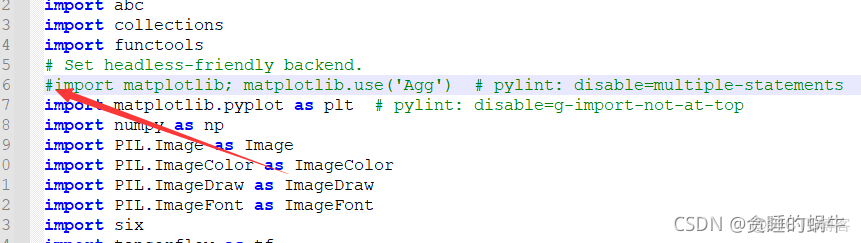
註釋掉(如果後面圖片不顯示,就是這裏沒有註釋掉)
使用cmd激活tf_gpu環境,然後進入到object_detection文件夾,最後輸入命令
python object_detection_example_1.py這個py文件自己新建,複製到object_detection文件夾
代碼內容:
# object_detection_example_1.py演示一個完整的推理(Inference)過程
# -----------------------------------------------------------
# 第一步,導入相關的軟件包
# -----------------------------------------------------------
import numpy as np
import os
import tensorflow as tf
import matplotlib.pyplot as plt
from PIL import Image
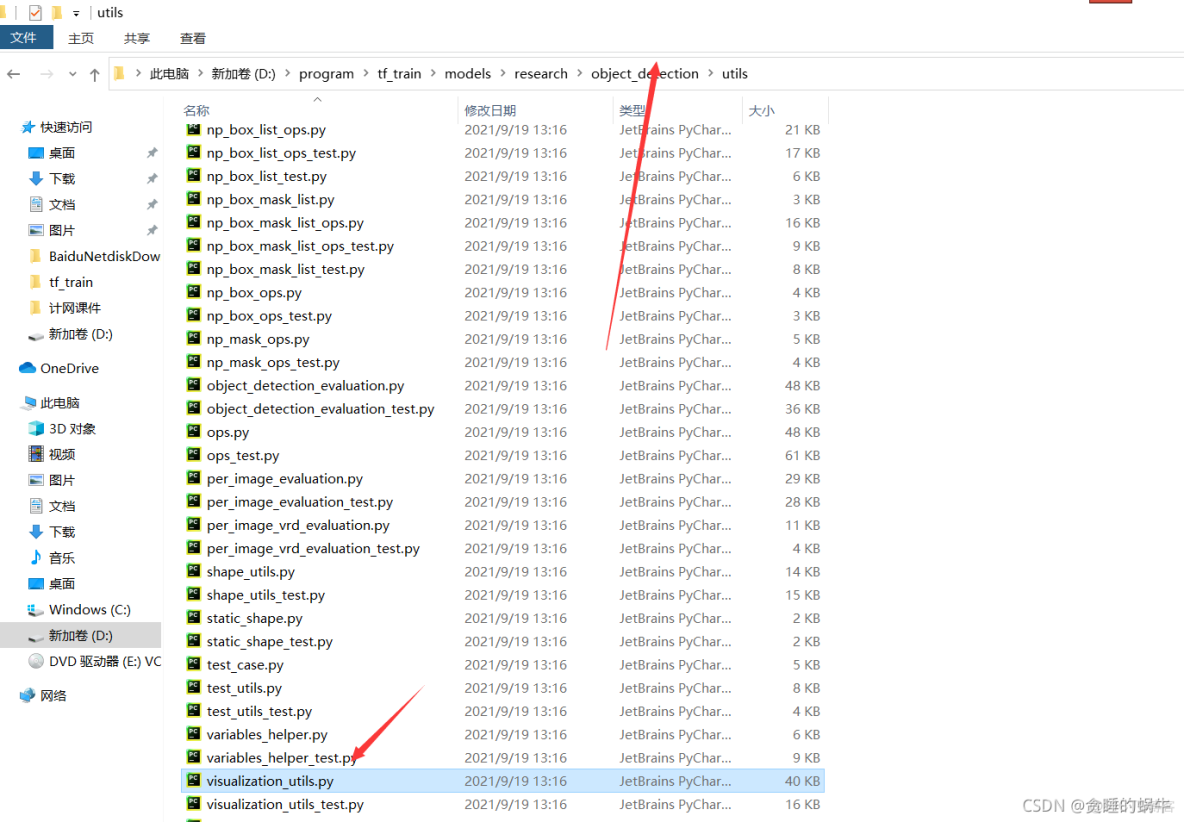
from utils import label_map_util
from utils import visualization_utils as vis_util
from utils import ops as utils_ops
# 檢查tensorflow 版本,須≥1.12.0
from pkg_resources import parse_version
if parse_version(tf.__version__) < parse_version('1.12.0'):
raise ImportError("parse_version:Please upgrade your TensorFlow to V1.12.* or higher")
print("The version of installed TensorFlow is {0:s}".format(tf.__version__))
# -----------------------------------------------------------
# 第二步,導入模型ssd_inception_v2_coco_2018_01_28到內存
# ssd_inception_v2_coco_2018_01_28文件夾應與本程序放在models\research\object_detection文件夾下
# -----------------------------------------------------------
MODEL_NAME = 'ssd_inception_v2_coco_2018_01_28'
PATH_TO_FROZEN_GRAPH = MODEL_NAME + '/frozen_inference_graph.pb'
PATH_TO_LABELS = os.path.join('data', 'mscoco_label_map.pbtxt')
detection_graph = tf.Graph()
with detection_graph.as_default():
od_graph_def = tf.GraphDef()
with tf.gfile.GFile(PATH_TO_FROZEN_GRAPH, 'rb') as fid:
serialized_graph = fid.read()
od_graph_def.ParseFromString(serialized_graph)
tf.import_graph_def(od_graph_def, name='')
# -----------------------------------------------------------
# 第三步,導入標籤映射文件(Label map),這樣假如神經網絡輸出'5',我
# 們就知道對應的是'airplane'
# -----------------------------------------------------------
category_index = label_map_util.create_category_index_from_labelmap(PATH_TO_LABELS, use_display_name=True)
# -----------------------------------------------------------
# 第四步,執行推理(Inference),檢測圖片中的對象
# -----------------------------------------------------------
# ## 導入圖像數據到numpy array 子程序
def load_image_into_numpy_array(image):
(im_width, im_height) = image.size
return np.array(image.getdata()).reshape((im_height,im_width,3)).astype(np.uint8)
# ## 從單張圖片中檢測對象子程序
# ## 圖片名稱:image1.jpg, image2.jpg,存放在
# ## models\research\object_detection\test_images文件夾下
PATH_TO_IMAGES_DIR = 'test_images'
TEST_IMAGE_PATHS = [os.path.join(PATH_TO_IMAGES_DIR, 'image{0:d}.jpg'.format(i)) for i in range(1,3)]
# 顯示圖像的尺寸,單位inches
IMAGE_SIZE = (12, 8)
def run_inference_for_single_image(image, graph):
with graph.as_default():
with tf.Session() as sess:
ops = tf.get_default_graph().get_operations()
all_tensor_names = {output.name for op in ops for output in op.outputs}
tensor_dict = {}
for key in ['num_detections', 'detection_boxes', 'detection_scores',
'detection_classes', 'detection_masks']:
tensor_name = key + ':0'
if tensor_name in all_tensor_names:
tensor_dict[key] = tf.get_default_graph().get_tensor_by_name(tensor_name)
if 'detection_masks' in tensor_dict:
detection_boxes = tf.squeeze(tensor_dict['detection_boxes'], [0])
detection_masks = tf.squeeze(tensor_dict['detection_masks'], [0])
real_num_detection = tf.cast(tensor_dict['num_detections'][0], tf.int32)
detection_boxes = tf.slice(detection_boxes, [0, 0], [real_num_detection, -1])
detection_masks = tf.slice(detection_masks, [0, 0, 0], [real_num_detection, -1, -1])
detection_masks_reframed = utils_ops.reframe_box_masks_to_image_masks(
detection_masks, detection_boxes, image.shape[1], image.shape[2])
detection_masks_reframed = tf.cast(tf.greater(detection_masks_reframed, 0.5), tf.uint8)
tensor_dict['detection_masks'] = tf.expand_dims(detection_masks_reframed, 0)
image_tensor = tf.get_default_graph().get_tensor_by_name('image_tensor:0')
# 運行推理(Inference)
output_dict = sess.run(tensor_dict,feed_dict={image_tensor: image})
output_dict['num_detections'] = int(output_dict['num_detections'][0])
output_dict['detection_classes'] = output_dict['detection_classes'][0].astype(np.int64)
output_dict['detection_boxes'] = output_dict['detection_boxes'][0]
output_dict['detection_scores'] = output_dict['detection_scores'][0]
if 'detection_masks' in output_dict:
output_dict['detection_masks'] = output_dict['detection_masks'][0]
return output_dict
for image_path in TEST_IMAGE_PATHS:
image = Image.open(image_path)
image_np = load_image_into_numpy_array(image)
# 擴展維度,因為模型要求圖像的形狀為:[1, None, None, 3]
image_np_expanded = np.expand_dims(image_np, axis=0)
# 運行檢測程序.
output_dict = run_inference_for_single_image(image_np_expanded, detection_graph)
# 可視化檢測結果.
vis_util.visualize_boxes_and_labels_on_image_array(
image_np,
output_dict['detection_boxes'],
output_dict['detection_classes'],
output_dict['detection_scores'],
category_index,
instance_masks=output_dict.get('detection_masks'),
use_normalized_coordinates=True,
line_thickness=8)
plt.figure(figsize=IMAGE_SIZE)
plt.imshow(image_np)
plt.show()然後報錯
原因是 Numpy版本過高
pip install numpy==1.16.4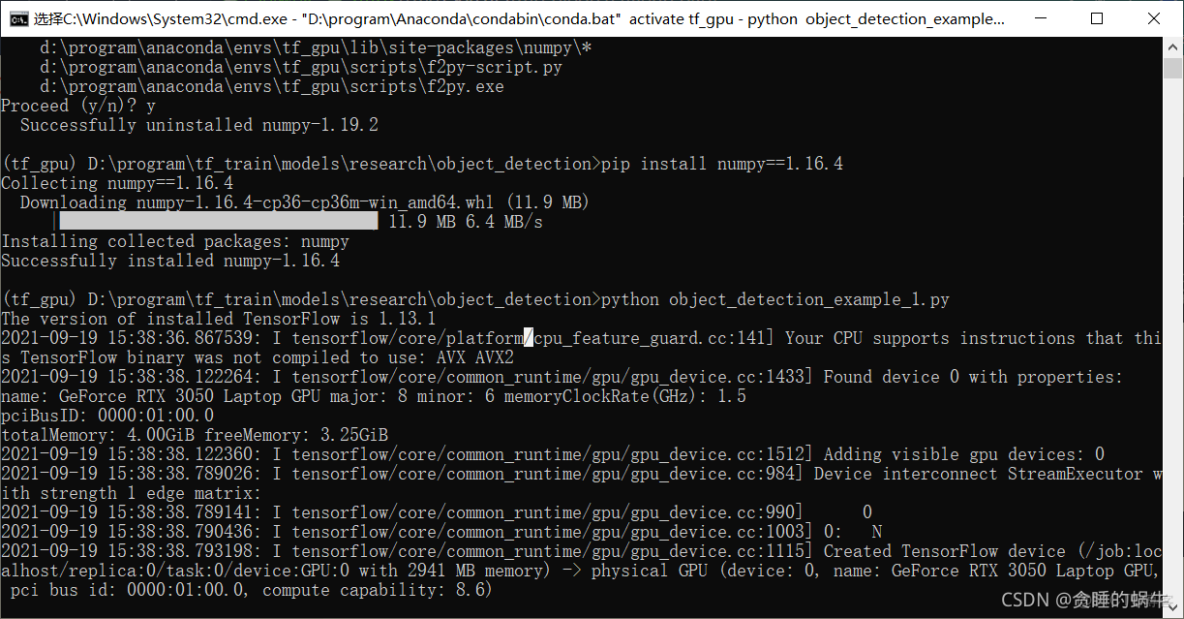
安裝LabelImag
labelImage是一個用python寫的開源免費的圖像標註工具,其標註結果會以PASCALVOC格式存成XML文件。LabelImg也支持YOLO格式
下載地址 http://tzutalin.github.io/labelImg
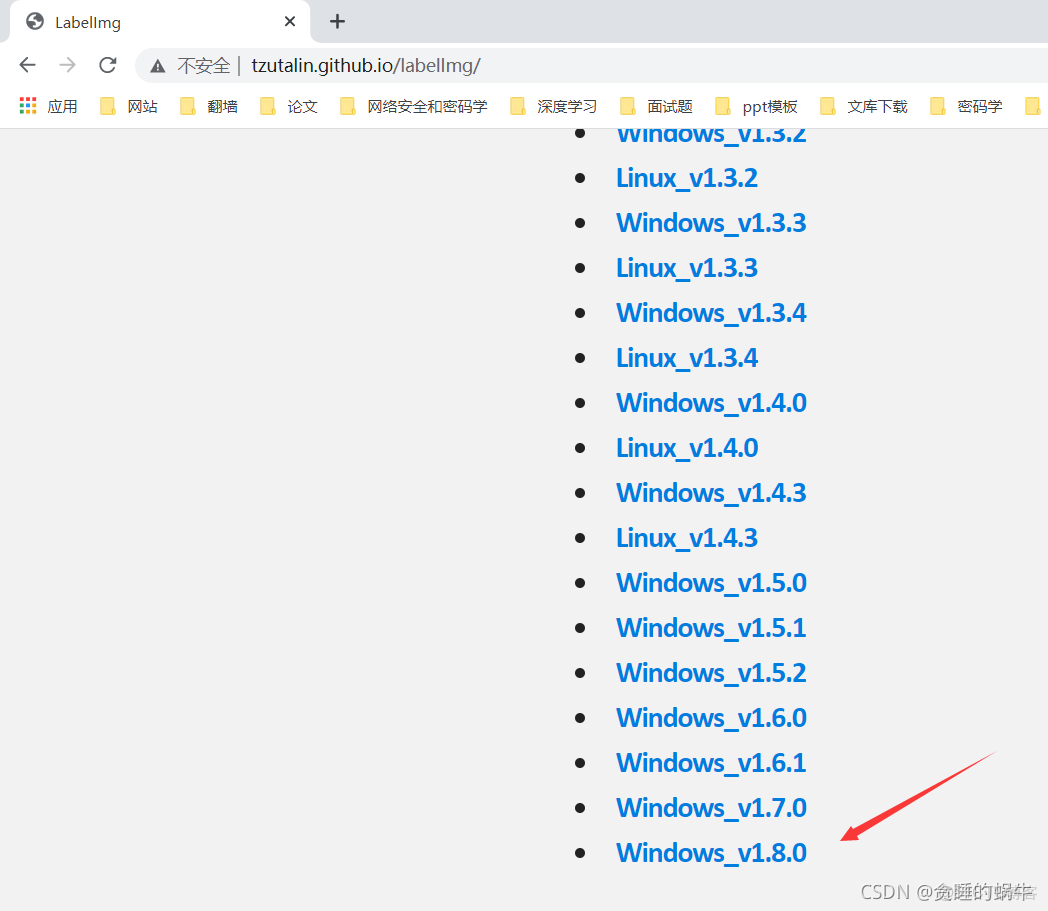
解壓到addons裏面
雙擊labelImg.exe 運行,單擊open dir按鈕,如果能成功打開存放圖片的文件夾並能加載圖片成功,則説明已經安裝成功。