


本文介紹GraphQL中的Authenication和Authorication
參考:
- https://graphql.org/learn/authorization/
- https://www.apollographql.com/docs/apollo-server/security/authentication/
Authenication和Authorication的區別
Authenication 和 Authorication 的概念十分容易混淆,兩者的定義如下:
- Authenication 指用户認證,即是否有用户登錄,哪個用户登錄
- Authorication 指用户權限認證,再具體的操作中決定用户是否有權利使用查看數據或調用方法
Authenication
提供用户的authenication有多種方式,包括HTTP header和JSON web token。
下面給出一個創建Authenication的示例
創建用户組的schema
分別創建一個用户信息的type,並定義創建用户和登錄的方法
type AuthPayload {
	token: String!
	name: String!
}

input UserCreateInput {
	name: String!
	password: String!
}

type Mutation {
	createUser(data: UserCreateInput): String
	login(data: UserCreateInput): AuthPayload
	logout(data: UserCreateInput, param: Int!): Int
}
定義本地CreateUser和Login的Resolver
通常情況下,用户在用前端創建用户時,會傳入用户名和密碼,後端不會直接保存用户密碼,而是將用户信息加密為webtoken儲存起來,而login的情況下,也是會將用户用户名和密碼的信息與weebtoken進行比對。
可以在context中,設置一個用户組緩存來儲存數據,同樣適用於將用户信息儲存於數據庫或雲端。
const resolver = {
	Mutation: {
		createUser: async (parent: any, args: any, ctx: any, info: any) => {
		  if (args.data.password.length < 8) {
			throw new Error('Password must be 8 characters or longer.')
		  }
		  const password = await bcrypt.hash(args.data.password, 10);
		  const id = uuidv4();
		  const token = jwt.sign({ userId: id }, 'password');
		  ctx.users.push({
			id,
			name: args.data.name,
			password,
			token
		  });
		  return token;
		},
		login: async (parent: any, args: any, ctx: any, info: any) => {
		  const user = ctx.users.find(u => u.name === args.data.name);
		  if (!user) throw Error('User not exist');
		  const isMatch = await bcrypt.compare(args.data.password, user.password);
		  if (!isMatch) throw new Error('Password mismatch');
		  return {
			name: user.name,
			token: user.token ? user.token : jwt.sign({ userId: user.id }, 'password'),
		  }
		},
	}
}
Authorization
用上述步驟執行完Authentication的操作以後,需要驗證用户操作函數是否有權限只需要在相應方法的Resolver中進行驗證即可,調用Query或Mutation可以在Header中添加一個由後端返回給前端的token,示例如下:
後端:
const getUserId = (request) => {
  const token = request.headers.authorization;
  if (!token) {
    throw new Error('Authentication required')
  }
  const decoded = jwt.verify(token, 'password')
  return decoded.userId
}

const resolver = {
	Mutation: {
		callFunction: async (parent: any, args: any, ctx: any, info: any) => {
			const id = getUserId(ctx.request);
			if (!id) throw Error('ID not exist');
			// Do operation
		}
	}
}
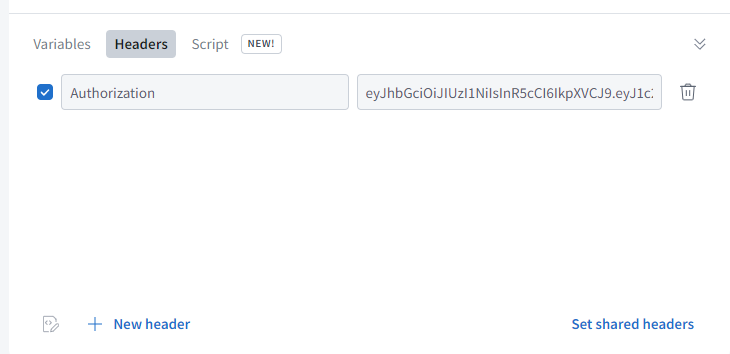
在Apollo GraphQL中可以在前端的header加一個authorication的字段,輸入token:
前端可以在創建Apollo GraohQL Module時,創建一個MidWare包含我們的header:
const authMiddleware = new ApolloLink((operation: any, forward: any) => {
  operation.setContext({
    headers: new HttpHeaders().set(
      "Authorization",
      "eyJhbGciOiJIUzI1NiIsInR5cCI6IkpXVCJ9..."	//Token
    ),
  });
  return forward(operation);
});

export function createApollo(httpLink: HttpLink): ApolloClientOptions<any> {
  return {
    link: httpLink.create({uri}),
    cache: new InMemoryCache(),
  };
}
export function createApolloWithAuth(httpLink: HttpLink): ApolloClientOptions<any> {
  return {
    link:  from([
      authMiddleware,
      httpLink.create({
        uri,
      }),
    ]),
    cache: new InMemoryCache(),
  };
}
