


【HarmonyOS 6】靜態和動態添加應用快捷方式詳解
一、前言
在功能日益複雜的應用中,用户往往需要多步操作才能找到常用功能。而應用快捷方式能讓用户一鍵直達核心功能,既提升操作效率,也能增強用户對應用的粘性。
本文結合實際開發場景,詳細分享 HarmonyOS 中兩種快捷方式的實現方法,包括靜態快捷方式配置和應用內動態添加,全程基於單 HAP 包場景(多 HAP 包配置邏輯一致)。
二、靜態快捷方式:基礎配置與快速跳轉
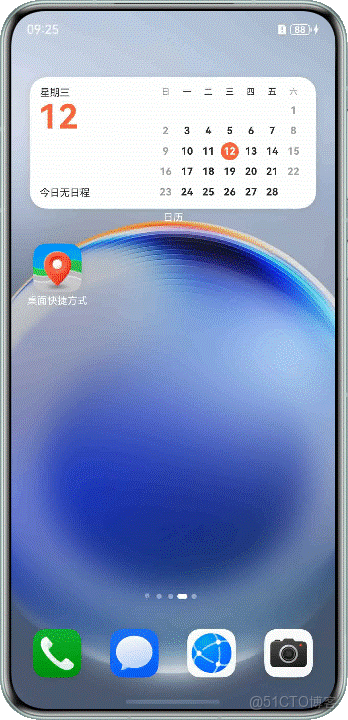
靜態快捷方式是通過配置文件預先定義的快捷方式,用户長按應用圖標即可看到。例如“回家導航”“新建便籤”這類高頻固定功能。效果如下:
1、 創建目標頁面並配置路由
首先創建快捷方式對應的功能頁面(如“回家”“去公司”頁面),頁面需用 @Entry 裝飾。然後在 resources/base/profile/main_pages.json 中添加頁面路由,確保應用能識別頁面路徑:
{
  "src": [
    "pages/Index",  // 應用主頁面
    "pages/GoHouse", // 回家導航頁面
    "pages/GoCompany" // 去公司導航頁面
  ]
}
2、 編寫快捷方式配置文件
在 resources/base/profile/ 目錄下新建 shortcuts_config.json 文件,定義快捷方式的 ID、顯示文本、圖標和跳轉目標。每個快捷方式需包含以下核心參數:
shortcutId:唯一標識,不超過 63 字節label:顯示文本(支持字符串或資源索引)icon:圖標資源索引wants:跳轉配置(包名、模塊名、組件名、自定義參數)
示例配置:
{
  "shortcuts": [
    {
      "shortcutId": "id_company",
      "label": "$string:Go_to_the_Company",
      "icon": "$media:company",
      "wants": [
        {
          "bundleName": "com.example.desktopshortcuts",
          "moduleName": "entry",
          "abilityName": "EntryAbility",
          "parameters": {
            "shortCutKey": "CompanyPage"
          }
        }
      ]
    },
    {
      "shortcutId": "id_house",
      "label": "$string:Go_to_House",
      "icon": "$media:house",
      "wants": [
        {
          "bundleName": "com.example.desktopshortcuts",
          "moduleName": "entry",
          "abilityName": "EntryAbility",
          "parameters": {
            "shortCutKey": "HousePage"
          }
        }
      ]
    }
  ]
}
3、在 module.json5 中關聯配置
在 module.json5 的 abilities 標籤下添加 metadata 配置,指定快捷方式配置文件路徑,讓系統識別快捷方式:
{
  "module": {
    "abilities": [
      {
        "name": "EntryAbility",
        "srcEntry": "./ets/entryability/EntryAbility.ets",
        "skills": [
          {
            "entities": ["entity.system.home"],
            "actions": ["ohos.want.action.home"]
          }
        ],
        "metadata": [
          {
            "name": "ohos.ability.shortcuts",
            "resource": "$profile:shortcuts_config"
          }
        ]
      }
    ]
  }
}
4、實現頁面跳轉邏輯
在主頁面(Index.ets)中定義跳轉方法,通過讀取 wants 中的自定義參數 shortCutKey,判斷用户點擊的快捷方式,進而跳轉到對應頁面:
goToSpecifyPage(want?: Want) {
  let shortCutKey = want?.parameters?.shortCutKey;

  if (shortCutKey === 'CompanyPage') {
    this.getUIContext().getRouter().pushUrl({ url: 'pages/GoCompany' })
      .catch((err: BusinessError) => {
        hilog.error(0x0000, 'testTag', `跳轉失敗:${err.code}, ${err.message}`);
      });
  }
  if (shortCutKey === 'HousePage') {
    this.getUIContext().getRouter().pushUrl({ url: 'pages/GoHouse' })
      .catch((err: BusinessError) => {
        hilog.error(0x0000, 'testTag', `跳轉失敗:${err.code}, ${err.message}`);
      });
  }
}
5、 保存並傳遞 Want 參數
快捷方式跳轉分為冷啓動和熱啓動,需在 EntryAbility.ets 中通過 AppStorage 保存 want 參數,確保頁面能獲取到跳轉信息:
// 冷啓動時保存參數
onCreate(want: Want, launchParam: AbilityConstant.LaunchParam): void {
  this.context.getApplicationContext().setColorMode(ConfigurationConstant.ColorMode.COLOR_MODE_NOT_SET);
  if (want?.parameters?.shortCutKey) {
    AppStorage.setOrCreate('want', want);
  }
}

// 熱啓動時更新參數
onNewWant(want: Want, launchParam: AbilityConstant.LaunchParam): void {
  if (want?.parameters?.shortCutKey) {
    AppStorage.setOrCreate('want', want);
  }
}
6、 頁面顯示時執行跳轉
在主頁面的 onPageShow 方法中,讀取 AppStorage 中保存的 want 參數,調用跳轉方法完成快捷方式響應:
onPageShow(): void {
  if (AppStorage.has('want')) {
    let want: Want | undefined = AppStorage.get('want');
    if (want) {
      this.goToSpecifyPage(want);
      AppStorage.delete('want'); // 跳轉後清除參數,避免重複觸發
    }
  }
}
具體跳轉的處理,通過want中的參數,開發者可以根據自己業務習慣進行跳轉處理,以上處理為參考。
注意事項
(1)靜態快捷方式最多支持配置 4 個,僅能跳轉至 UIAbility 入口頁面,無法直接跳轉到非入口頁面。 (2)多 HAP 包場景無需額外配置,所有操作均在 entry 文件夾下完成。
二、應用內動態添加快捷方式
除了預先配置的靜態快捷方式,還可以在應用內通過代碼動態添加快捷方式(如用户點擊“添加到桌面”按鈕時創建),靈活性更高。
核心實現代碼
創建 ShortcutsUtils 工具類,封裝動態添加快捷方式的邏輯,包含權限校驗、重複判斷和創建請求:
import { hilog } from "@kit.PerformanceAnalysisKit";
import { BusinessError } from "@kit.BasicServicesKit";
import { productViewManager } from "@kit.StoreKit";
import { common, Want } from "@kit.AbilityKit";
import promptAction from '@ohos.promptAction';

export class ShortcutsUtils {
  /**
   * 點擊按鈕添加快捷方式
   */
  static addShortcuts() {
    const uiContext = getContext() as common.UIAbilityContext;
    const shortcutId = "id_test1"; // 需與 shortcuts_config.json 中定義的一致
    const labelResName = "shortcut"; // 對應 label 的資源索引名稱
    const iconResName = "aa_icon"; // 對應 icon 的資源索引名稱
    const want: Want = {
      bundleName: "com.example.appgallery.kit.demo",
      moduleName: "entry",
      abilityName: "EntryAbility",
      parameters: {
        testKey: "testValue" // 自定義參數
      }
    };

    try {
      // 校驗快捷方式是否可添加(是否已存在、是否有權限)
      productViewManager.checkPinShortcutPermitted(uiContext, shortcutId, want, labelResName, iconResName)
        .then((result) => {
          hilog.info(0x0001, 'addShortcuts', `校驗成功:${JSON.stringify(result)}`);
          const tid = result.tid;
          // 發起添加快捷方式請求
          productViewManager.requestNewPinShortcut(uiContext, tid)
            .then(() => {
              hilog.info(0x0001, 'addShortcuts', "快捷方式添加成功!");
            })
            .catch((error: BusinessError) => {
              hilog.error(0x0001, 'addShortcuts', `快捷方式添加失敗:${error.code}, ${error.message}`);
            });
        })
        .catch((error: BusinessError) => {
          hilog.error(0x0001, 'addShortcuts', `err:${error.code}, ${error.message}`);
          // 錯誤碼 1006620003 表示快捷方式已存在
          if (error.code === 1006620003) {
            promptAction.showToast({ message: '桌面已存在此快捷方式!' });
          }
        });
    } catch (err) {
      hilog.error(0x0001, 'TAG', `catch err:${err.code}, ${err.message}`);
    }
  }
}
使用方式
在應用頁面的按鈕點擊事件中調用工具類方法,即可觸發快捷方式添加流程:
// 示例:按鈕點擊事件
Button('添加測試快捷方式')
  .onClick(() => {
    ShortcutsUtils.addShortcuts();
  })
productViewManager允許應用添加快捷方式的數量為兩個。這是鴻蒙官方的設計如此。
三、兩種快捷方式的區別與適用場景
| 類型 | 配置方式 | 靈活性 | 適用場景 |
|---|---|---|---|
| 靜態快捷方式 | 配置文件定義 | 較低(固定功能) | 高頻固定功能,如導航、新建、快速拍照 |
| 動態快捷方式 | 代碼動態添加 | 較高(用户觸發) | 個性化功能,如用户自定義收藏、臨時高頻功能 |