目錄[-]
- Getting Started
- Setting Up Your Cocoapods Libraries
- Creating Your Main View Controller
- Setting Up Your App’s Views
- Retrieving Weather Data
- Creating Your Weather Model
- Where To Go From Here?
每個開發者都有他們自己開發一個應用的好方法?一些開發者使用Auto-Layout,一些開發者使用圖標算法,甚至一些開發者喜歡用Vim編程。
隨着iOS7和Xcode5的發佈,我想利用一個簡單的weather app作為簡單的實踐來使用熟悉最新的工具和概念!
在這個系列的第二個部分,你將會學會下面的技巧來創建你的應用程序
- Cocoapods
- 在你的app中使用自動佈局
- ReactiveCocoa
- OpenWeatherMap
這個輔導是設計給那些知道基礎的中級開發者看的,但是不會涉及太多的高級題目,找個輔導也是去探索Functional Programming in Objective-c 的一個絕佳的開始。
Getting Started
按如下步驟點擊開始你的程序:打開Xcode然後找到File\New\Project 。 選擇Application\Empty Application 然後命名你的項目為SimpleWeather然後點擊Next,選擇一個文件夾保存你的工程,然後點擊Create。
Cocoapods
我們將使用Cocoapods管理下載的code,在你的工程中添加文件,根據項目需求來配置項目設置。讓我們首次包含你將要使用的!
Mantle
Mantle是一個建模框架,實現了多個不同的NSCoding和NSCopying方法,還添加了許多非常便利的方法允許你實現更多的有用的功能,比如返回一個json字典,已代表你的對象。在多數情況下,mantle可以作為Core Data的替代選擇。
LBBlurredImage
LBBlurredImage 是UIImageView的分類,用於設置圖像並進行模糊化處理。可以在這裏看看源代碼
TSMessages
TSMessages 提供了易於使用的類,用於在屏幕頂部顯示小的提醒信息。你可以用這個方法來提醒你的用户一些錯誤。例如下面的圖片的顯示。
ReactiveCocoa
ReactiveCocoa是我們在這個項目中使用的最後一個項目,同樣是來自Github。是一個用於組合和轉換值序列的框架,你可以在這裏看到源代碼。
Setting Up Your Cocoapods Libraries
設置你的Cocoapods的 libraries,首先確定你已經安裝了Cocoapods,照着下面的步驟做,打開終端,然後在Terminal中輸入下面的命令:
which pod
你應該會得到下面的輸出結果:
/usr/bin/pod
這個會根據你安裝的一些文件,例如rbenv 或者RVM,也許你會得到不同的路徑。如果在你輸入命令之後返回的是“pod not found”,那麼你就需要安裝 cocoapods這個管理依賴庫。如果你想要了解更多關於Cocoapods你可以查看tutorial on Cocoapods。
Podfiles是用來告訴Cocoapods要導入什麼開源項目,Pods要導入。
在安裝完成之後按照下面的步驟來安裝我們需要的類庫:
打開Terminal 輸入 cd 找到你當初建立simple weather工程的文件夾,然後在終端中輸入 Pico
然後在打開的pico中,輸入如下的命令:
platform: iOS,’7.0’

        pod ‘Mantle’
        pod ‘LBBlurredImage’
        pod ’TSMessages’
        pod ‘ReactiveCocoa’
上面的命令完成了下面的兩件事情:
- 它告訴Cocoapods要安裝的類庫版本是要適應”iOS7.0”的
- 給了Cocoapods你需要安裝類庫的列表
接下來就是按Control-O來命名這個文件夾為Podfile然後點擊Enter,現在是按Control-X退出 Pico。
下面是怎樣在你的podfile中安裝類庫的步驟:在你的Terminal中輸入下面的命令然後按 Enter
pod install
然後等待一下你會看到在顯示屏上會出現下面的顯示
$pod install
 Analyzing dependencies

 CocoaPods 0.28.0 is available.

 Downloading dependencies
 install HexColors (2.2.1)
 install LBBlurredImage (0.1.0)
 Install Mantle (1.3.1)

 Install ReactiveCocoa (2.1.7)
 Install TSMessages (0.9.4)
 Generating Pods project
 Integrating client project

 [!]From now on use
 ’SimpleWeather.xcoworkspace’.
Cocoapods將會在你的工程中創建一連串的新文件,但是隻是在SimpleWeather.xcworkspace中創建這些新文件。
打開SimpleWeather.xcworkspace,看一下你的工程的設置,這裏會有一個Pods工程,在你的工作空間中,每個文件夾都會倒入到你的Pods文件夾,就像下面顯示的一樣。
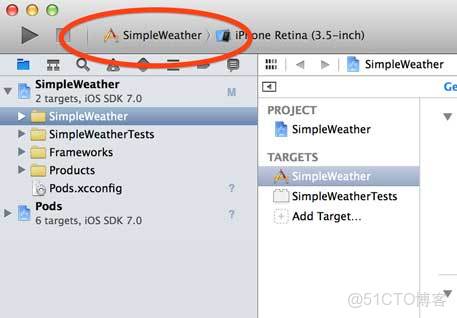
確保你選擇的SimpleWeather工程是下面的顯示的一樣:
然後運行你的程序,你會看到下面的顯示:
這個也許看起來不大對勁,但是我們立刻開始添加一些文件。
Creating Your Main View Controller
這個應用程序看起來很複雜,但是我們一步一步開始。首先創建一個簡單的視圖控制器。現在開始添加。
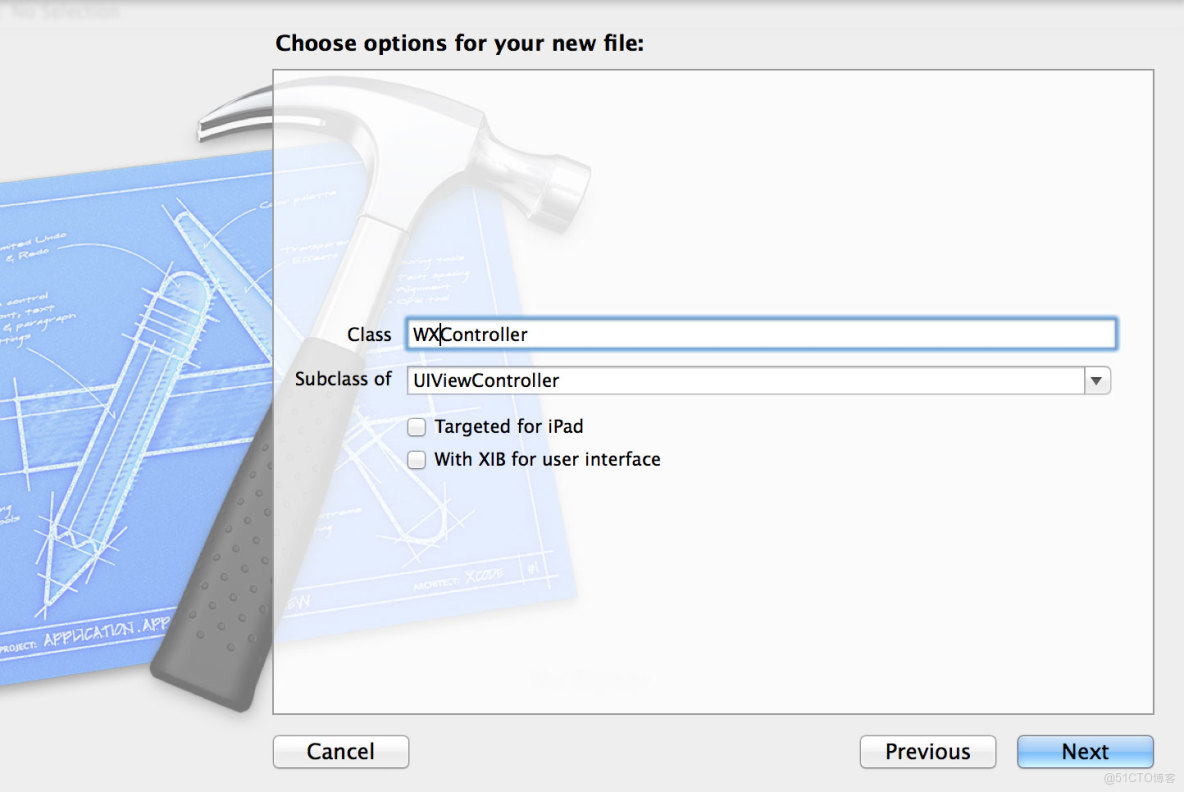
選擇SimpleWeather工程,點擊File\New\File然後選擇Cocoa Touch\Objective-C class,命名你的類:WXController然後繼承自UIViewController。
確保你沒有選擇Targeted for iPad和With XIB for user interface,就像下面顯示的一樣:
打開WXController.m,在-viewDidLoad方法中寫下如下的方法:
- (void)viewDidLoad{
    [super viewDidLoad];
 //稍後要刪除的
    self.view.backgroundColor = [UIColor redColor];
 }
現在打開AppDelegate.m文件,然後導入兩個類:
#import "WXController.h"
   #import <TSMessage.h>
眼尖的讀者會發現WXController 導入和 TSMessage的導入方式不一樣!這是腫麼回事,往回看看你創建podfile 文件的時候,使用的是Cocoapods導入TSMessage 並把它添加到了你的工作空間,所以你可以使用括號代替引號。
在-application:didFinishLaunchingWithOptions:中寫下如下的代碼:
- (BOOL)application:(UIApplication *)application didFinishLaunchingWithOptions:(NSDictionary *)launchOptions{
     self.window = [[UIWindow alloc] initWithFrame:[[UIScreen mainScreen] bounds]];
     //1
     self.window.rootViewController = [[WXController alloc] init];
     self.window.backgroundColor = [UIColor whiteColor];
     [self.window makeKeyAndVisible];
   //2
     [TSMessage setDefaultViewController:self.window.rootViewController];
     return YES;
 }
下面告訴你上面的代碼都在乾點什麼
1.初始化根視圖控制器,然後設置WXController。通常情況下,這個視圖控制器是一個UINavigationController或者UITabBarController,但是在這個案例當中,你是設置WXController作為代替。
2.為了將TSMessages設置為默認的視圖控制器顯示,通過這樣,你不再需要,手動的指定顯示的控制器。
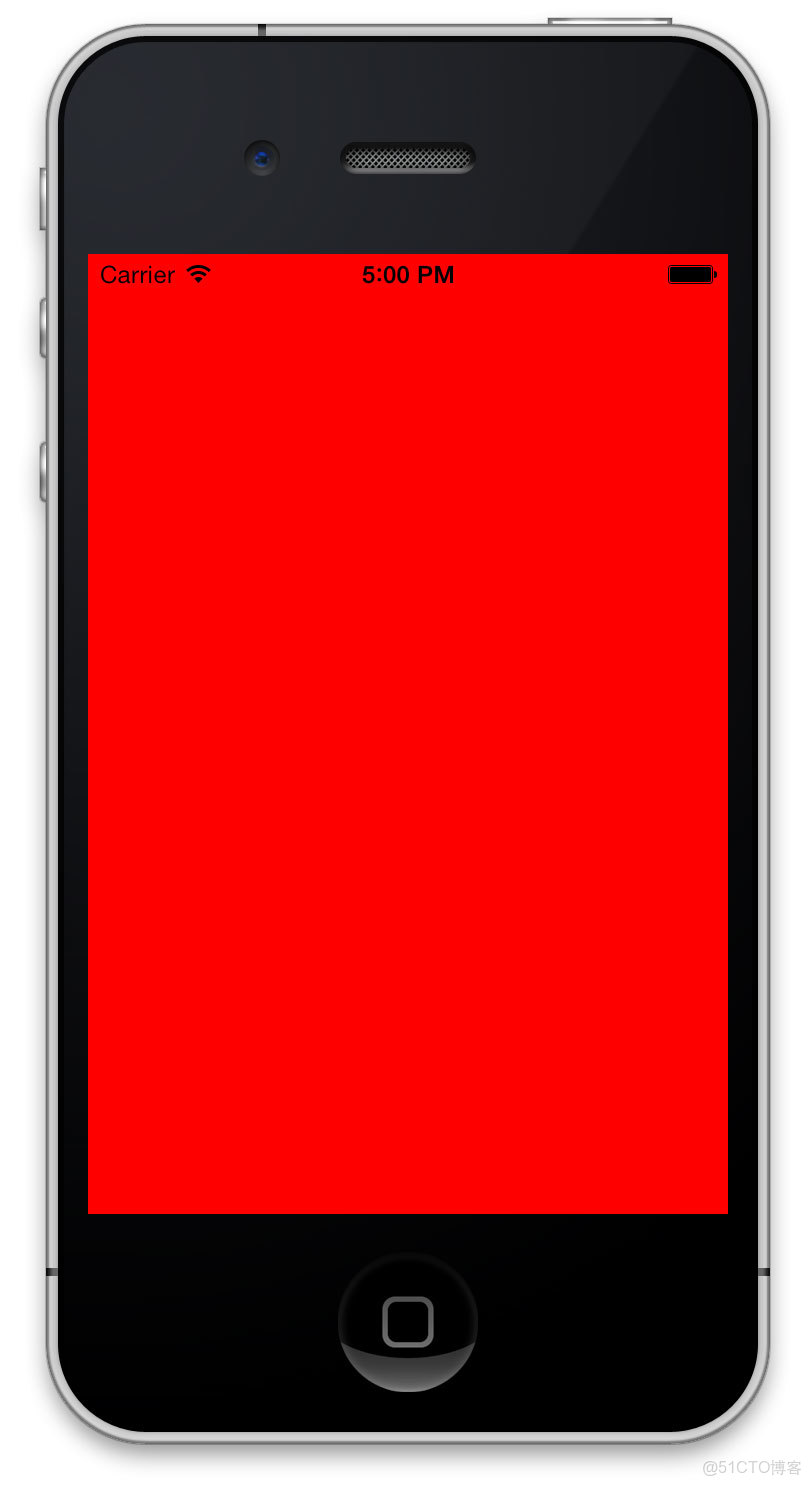
創建好之後,運行你的程序你會看到像下面一樣的顯示
狀態欄是一個有點難以閲讀對紅色背景。還好,有一個簡單的方法,使狀態欄了很多更清晰易讀。
在iOS7 中的UIViewController 中有新的API來控制狀態欄,打開WXController 在-viewDidLoad:方法後直接添加方法,像下面顯示的那樣:
- (UIStatusBarStyle)preferredStatusBarStyle {
      return UIStatusBarStyleLightContent;
 }
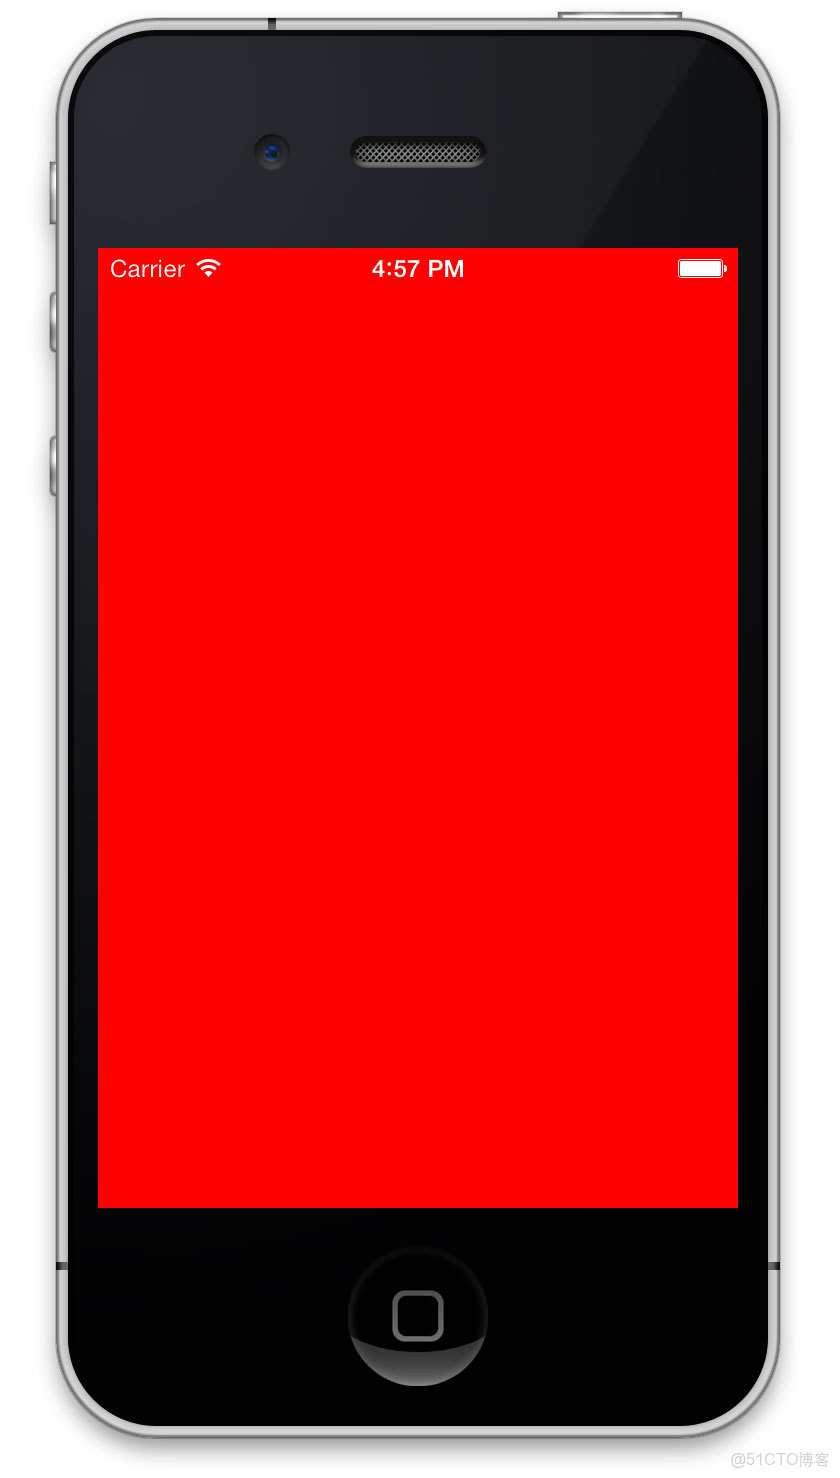
再運行你的程序你會看到如下圖的顯示:
Setting Up Your App’s Views
現在可以為你的應用添加圖片,把圖片下載到本地可以方便使用,在這裏下載。 背景圖片來自Flickr用户idleformat,天氣圖片來自Dribbble用户heeyeun
選擇Xcode ,然後點擊File\Add Files to “SimpleWeather”….找到圖片文件夾,然後xcode會彈出Copy items into destination group’s folder (if needed) 然後點擊添加。
@interface 行寫:
<UITableViewDataSource,UITableViewDelegate,UIScrollViewDelegate>現在打開WXController.m, 您可以使用熱鍵Control-Command-Up 控制指令最多的H和M文件之間快速切換。
在 WXController.m:文件頂部添加下面的導入代碼
#import <LBBlurredImage/UIImageView+LBBlurredImage.h>LBBlurredImage.h是用來鏈接 用Cocoapods導入的LBBlurredImage工程,你可以使用這個Library 來模糊你的背景圖片.
你應該為WXController 創建一個樣板文件導入。填寫屬性
@interface WXController ()
@property (nonatomic,strong) UIImageView *backgroundImageView;
 @property (nonatomic,strong) UIImageView *blurredImageView;
 @property (nonatomic,strong) UITableView *tableView;
 @property (nonatomic,assign) CGFloat screenHeight;
@end
現在開始在你的工程中創建和設置你的視圖,”啥”,你説,哪裏有IBOutlets?
提示:所有的視圖都會在代碼中實現和設置:
堅持住:不要崩潰,每個開發者都有他自己的開發愛好。在這裏有一些談論http://www.youtube.com/watch?v=XciUazpOfFU&feature=c4-overview&list=UUz3cM4qLljXcQ8oWjMPgKZA,每個人用不同的開發方式,Storyboards,NIBs和代碼,都有自己的擁護者和批判者。
如果在非常複雜的構圖應用程序中其實沒有必要自動佈局,這樣有可能會導致性能下降,然而通過這個案例的學習,你將學會如何使用代碼來完成。
你將會創建三個視圖然後彼此影響,就像你看到的GIF顯示的那樣
打開WXController.m文件,然後在-viewDidLoad中設置背景顏色,就像下面代碼顯示的那樣:
//1
 self.screenHeight = [UIScreen mainScreen].bounds.size.height;

 UIImage *background = [UIImage imageNamed:@“bg”];

 //2
 self.backgroundImageView = [[UIImageView alloc] initWithImage:background];
 self.backgroundImageView.contentMode = UIViewContentModeScaleAspectFill;
 [self.view addSubview:self.backgroundImageView];

 //3
 self.blurredImageView = [[UIImageView alloc] init];
 self.blurredImageView.contentMode = UIViewContentModeScaleAspectFill;
 self.blurredImageView.alpha = 0;
 [self.blurredImageView setImageToBlur:background blurRadius:10 completionBlock:nil];
 [self.view addSubView:self.blurredImageView];

 //4
 self.tableView = [[UITableView alloc] init];
 self.tableView.backgroundColor = [UIColor clearColor];
 self.tableView.delegate = self;
 self.tableView.dataSource = self;
 self.tableView.separatorColor = [UIColor colorWithWhite:1 alpha:0.2];
 self.tableView.pagingEnabled = YES;
 [self.view addSubView:self.tableView];
這是一段簡單易懂的代碼:
1.得到和儲存屏幕的高,最後在主頁上顯示,你將會需要他們
2.創建一個靜態的背景圖片,然後添加到視圖上
3.利用LBBlurredImage創建一個模糊的圖片,從零開始初始化,以便backgroundImageView從一開始可見。
4.利用提供的數據創建一個容易操控的tableView 。WXController將會設置代理和數據源,除了scroll view代理。注意:你將會設置pagingEnabled為YES。
在WXController.m:文件@implementation塊中添加UITableView的代理和數據源
//1
 #pragma mark -UITableViewDataSource

 //2
 - (NSInteger)numberOfSectionsInTableView:(UITableView *)tableView{

   return 2;
 }

 - (NSInteger)tableView:(UITableView *)tableView numberOfRowsInSection:(NSInteger)section{


   //TODO:Return count of forecast
 return 0;
 }

 - (UITableViewCell *)tableView:(UITableView *)tableView cellForRowAtIndexPath:(NSIndexPath *)indexPath{

      static NSString *CellIdentifier = @“CellIdentifier”;
    UITableViewCell *cell = [tableView dequeueReusableCellWithIdentifier:CellIdentifier];

 if (!cell){

     cell = [[UITableViewCell alloc] initWithStyle:UITableViewCellStyleValue1 reuseIdentifier:CellIdentifier];
 }

 //3
 cell.selectionStyle = UITableViewCellSelectionStyleNone;
 cell.backgroundColor = [UIColor colorWithWhite:0 alpha:0.2];
 cell.textLabel.textColor = [UIColor whiteColor];
 cell.detailTextLabel.textColor = [UIColor whiteColor];

 // TODO:Setup the cell

 return cell;
 }

 #pragma mark -UITableViewDelegate

 - (CGFloat)tableView:(UITableView *)tableView heightForRowAtIndexPath:(NSIndexPath *)indexPath{
 //TODO:Determine cell height based on screen

 return 44;

 }
儘管在上面的代碼中有很多的佔位符,告訴你到了哪裏
1.Pragma 標記是幫助你組織你的代碼的一個很好的方法。
2.你的表視圖有兩個部分,一個是每小時的天氣預報,另一個是每天的天氣預報。你需要總是返回這兩個部分。
3.天氣預報Cells不應該被選擇,給他們一個半透明的黑色背景和白色文本。
最後,我們需要在WXController.m:文件中添加下面的方法:
- (void)viewWillLayoutSubviews{

 [super viewWillLayoutSubviews];

 CGRect bounds = self.view.bounds;
 self.backgroundImage.frame = bounds
 self.blurredImageView.frame = bounds;
 self.tableView.frame = bounds;
 }
接下來,運行你的程序你就會看到下面的顯示:
仔細看這個程序,你會看到有一條一條的,很不爽是不是!
-viewDidLoad,添加代碼來設置你的佈局框架和邊緣
 //1
 CGRect headerFrame = [UIScreen mainScreen].bounds;
 //2
 CGFloat inset = 20;
 //3
 CGFloat temperatureHeight = 110;
 CGFloat hiloHeight = 40;
 CGFloat iconHeight = 30;
 //4
 CGRect hiloFrame = CGRectMake(inset, headerFrame.size.height - hiloHeight,headerFrame.size.width - (2*inset),hiloHeight);
 CGRect temperatureFrame = CGRectMake(inset, headerFrame.size - (temperatureHeight + hiloHeight), headerFrame.size.width - (2 * inset), temperatureHeight);

 CGRect iconFrame = CGRectMake(inset , temperatureFrame.origin.y - iconHeigh, iconHeight, iconHeight);

 //5
 CGRect conditionFrame = iconFrame;
 conditionsFrame.size.width = self.view.bounds.size.width - (((2 * inset) + iconHeight) +10);
 conditionsFrame.origin.x = iconFrame.origin.x +(iconHeight +10);
這個相當於例行的代碼,但是這將起到下面的效果
1.設置了你的每個表的頭,都擁有相同的尺寸,你將利用UITableView 的分頁的到時間段的和每天的天氣預報的部分。
2.創建一個可以嵌入均勻地隔開和正中顯示
3.為你地多種多樣地視圖創建和初始化高度。設置配置標準
4.為你的標籤和圖標設置標準
5.拷貝icon框架,調整文本空間的擴張,並且把圖標移動到對的位置,你將會看見怎樣
-viewDidLoad:方法中
// 1
UIView *header = [[UIView alloc] initWithFrame:headerFrame];
header.backgroundColor = [UIColor clearColor];
self.tableView.tableHeaderView = header;

// 2
// bottom left
UILabel *temperatureLabel = [[UILabel alloc] initWithFrame:temperatureFrame];
temperatureLabel.backgroundColor = [UIColor clearColor];
temperatureLabel.textColor = [UIColor whiteColor];
temperatureLabel.text = @"0°";
temperatureLabel.font = [UIFont fontWithName:@"HelveticaNeue-UltraLight" size:120];
[header addSubview:temperatureLabel];

// bottom left
UILabel *hiloLabel = [[UILabel alloc] initWithFrame:hiloFrame];
hiloLabel.backgroundColor = [UIColor clearColor];
hiloLabel.textColor = [UIColor whiteColor];
hiloLabel.text = @"0° / 0°";
hiloLabel.font = [UIFont fontWithName:@"HelveticaNeue-Light" size:28];
[header addSubview:hiloLabel];

// top
UILabel *cityLabel = [[UILabel alloc] initWithFrame:CGRectMake(0, 20, self.view.bounds.size.width, 30)];
cityLabel.backgroundColor = [UIColor clearColor];
cityLabel.textColor = [UIColor whiteColor];
cityLabel.text = @"Loading...";
cityLabel.font = [UIFont fontWithName:@"HelveticaNeue-Light" size:18];
cityLabel.textAlignment = NSTextAlignmentCenter;
[header addSubview:cityLabel];

UILabel *conditionsLabel = [[UILabel alloc] initWithFrame:conditionsFrame];
conditionsLabel.backgroundColor = [UIColor clearColor];
conditionsLabel.font = [UIFont fontWithName:@"HelveticaNeue-Light" size:18];
conditionsLabel.textColor = [UIColor whiteColor];
[header addSubview:conditionsLabel];

// 3
// bottom left
UIImageView *iconView = [[UIImageView alloc] initWithFrame:iconFrame];
iconView.contentMode = UIViewContentModeScaleAspectFit;
iconView.backgroundColor = [UIColor clearColor];
[header addSubview:iconView];
看到這麼大塊 的代碼,很不淡定了,但是這個可以用來顯示各種各樣 的控制器在你的視圖中。總結:
1.你的表的頭部設置
2.創建顯示必須的天氣標籤
3.為每個天氣圖標添加圖片
運行你的程序,你將會看到下面的截屏顯示的圖片
用手指推動找個表,你會看到有一種回彈的效果。
Retrieving Weather Data
你肯定注意到了都不顯示的”Loading......”,但是這裏並沒有做什麼,是時候來讓它做些什麼了。
接下來就是我們要做的事情:
1.找到當地的圖案
2.從API endpoint下載JSON 數據
WXConditions和WXDailyForecasts的JSON圖譜
4.通知UI我們獲取新的數據
讓我們開始吧,點擊File\New\File…選擇Cocoa Touch\Objective-C class命名為WXClient然後是繼承自NSObject。
按照上面的步驟創建下面的三個類:
- WXManager繼承自NSObject
- WXCondition 繼承自MTLModel
- WXDailyForecast繼承自WXCondition
都完成了,那麼現在就讓我們改變這個不會東的東東吧
Creating Your Weather Model
你的模型會使用Mantle來時刻獲取數據的變化
打開WXCondition.h文件來修改,完成下面的代碼
// 1
@interface WXCondition : MTLModel <MTLJSONSerializing>

// 2
@property (nonatomic, strong) NSDate *date;
@property (nonatomic, strong) NSNumber *humidity;
@property (nonatomic, strong) NSNumber *temperature;
@property (nonatomic, strong) NSNumber *tempHigh;
@property (nonatomic, strong) NSNumber *tempLow;
@property (nonatomic, strong) NSString *locationName;
@property (nonatomic, strong) NSDate *sunrise;
@property (nonatomic, strong) NSDate *sunset;
@property (nonatomic, strong) NSString *conditionDescription;
@property (nonatomic, strong) NSString *condition;
@property (nonatomic, strong) NSNumber *windBearing;
@property (nonatomic, strong) NSNumber *windSpeed;
@property (nonatomic, strong) NSString *icon;

// 3
- (NSString *)imageName;
@end
這是一段進階的代碼,來看看下面的解釋
1.MTLJSONSerializing協議告訴Mantle serializer,這個對象如何映射JSON到Objective-c 屬性中
2.這些都是你的天氣屬性,你將使用它們使得你的數據將更好的展現在你的顯示屏上
3.這是一個簡單的幫助方法,來便利天氣狀況的圖片文件
運行你的軟件,但是失敗了,為啥?猜猜看,如果你需要小小的幫助那你就看看下面
|
Solution Inside: Solution
|
Show
|
|
|
運行你的軟件,成功了,但你你hi看到警告,切,忽略它。
首先你需要通過-imageName實現保存
打開WXCondition.m然後添加下面的方法
+(NSDictionary*)imageMap{
 // 1
 staticNSDictionary*_imageMap=nil;
 if(! _imageMap){
 // 2
 _imageMap= @{
 @"01d":@"weather-clear",
 @"02d":@"weather-few",
 @"03d":@"weather-few",
 @"04d":@"weather-broken",
 @"09d":@"weather-shower",
 @"10d":@"weather-rain",
 @"11d":@"weather-tstorm",
 @"13d":@"weather-snow",
 @"50d":@"weather-mist",
 @"01n":@"weather-moon",
 @"02n":@"weather-few-night",
 @"03n":@"weather-few-night",
 @"04n":@"weather-broken",
 @"09n":@"weather-shower",
 @"10n":@"weather-rain-night",
 @"11n":@"weather-tstorm",
 @"13n":@"weather-snow",
 @"50n":@"weather-mist",
 };
 }

 return _imageMap;
 }
 // 3
 -(NSString*)imageName{
 return[WXCondition imageMap][self.icon];
 }
這是上面的代碼要幹啥:
1.創建一個靜態的NSDictionary 使得每個WXCondition使用同樣的數據地圖
2.用代碼獲取圖片文件
3.清除普通信息獲得圖片文件名
下面是一段見的獲取JSON數據響應的事例
|
你需要嵌入JSON的值映射到Objective-c屬性。被嵌入的JSON值,例如温度:是你可以看到的一個主要的子類。
做到這一點,你將利用Objective-c的Key-Value Coding 和Mantle的MTLJSONAdapter。
仍然是在WXCondition.m文件中,設置你的"JSON to model properties"通過添加+JSONKeyPathsByPropertyKey方法來映射到MTLJSONSerializing協議要求
|
WXCondition的屬性名稱,而詞典的值是從JSON機碼路徑。
您可能已經注意到,有一個與JSON數據被映射到Objective-C的性能的方式突出問題。該物業的日期是類型的NSDate ,但JSON有作為Unix的時間存儲一個NSInteger 。你需要兩個莫名其妙之間進行轉換。
Mantle剛剛的功能來解決這個問題給你:MTLValueTransformer。此類允許你聲明一個塊,詳細説明如何從值轉換。
為一個特定的屬性創建一個transformer,你可以添加一個類方法作為屬性的開頭以JSONTransformer作為結束。
它可能比解釋的更能夠讓你明白,所以為WXCondition.m中NSDate添加下面的transformer。
|
告訴你上面都幹了啥:
1.你可以使用獲得變換值,並通過Objective-c屬性返回MTLValueformer。
2.您只需要詳細説明如何一次Unix時間和的NSDate之間進行轉換,所以才重用,-dateJSONTransformer日出和日落
這下價值轉型是有點討厭,但它只是使用OpenWeatherMap的API和他們自己的格式JSON響應方式的結果。weather 關鍵是一個JSON數組,但你“再只關注單一的天氣狀況。
在 WXCondition.m使用相同的結構,-dateJSONTransformer ,您可以創建一個NSArray和NSString的之間的轉換?該解決方案提供如下,如果你不能完全得到它。
|
Solution Inside: Solution
|
Show
|
|
|
最終的transform只是一個形式而已。 OpenWeatherAPI使用米每秒的風速。由於您的應用程序使用英制系統,你需要將其轉換為英里每小時
在WXCondition.m添加以下的方法和宏定義。
|
有一個小的差異與OpenWeatherMap的API ,你就必須處理。看一看在位於current conditions response和daily forecast response:之間的温度部分:
|
max.
温度關鍵分歧放在一邊,其他都一樣。所以,你真正需要做的是改變日常預報的鍵映射
打開WXDailyForecast.m並重寫+JSONKeyPathsByPropertyKey如下:
|
請注意,這也將覆蓋WXCondition的方法。下面是上面的方法做概括地説:
1.得到WXCondition映射,並創建它的可變副本。
2.改變最大和最小的鍵映射到你所需要的日常預測
3.返回新的映射
生成並運行您的應用程序,有沒有什麼新的東西,看看自從上次運行,但這是一個好地方,檢查你的應用程序編譯和運行沒有任何錯誤。
Where To Go From Here?
你可以在這裏獲得這個部分的源代碼,在第二部分我們將完成這個應用!


