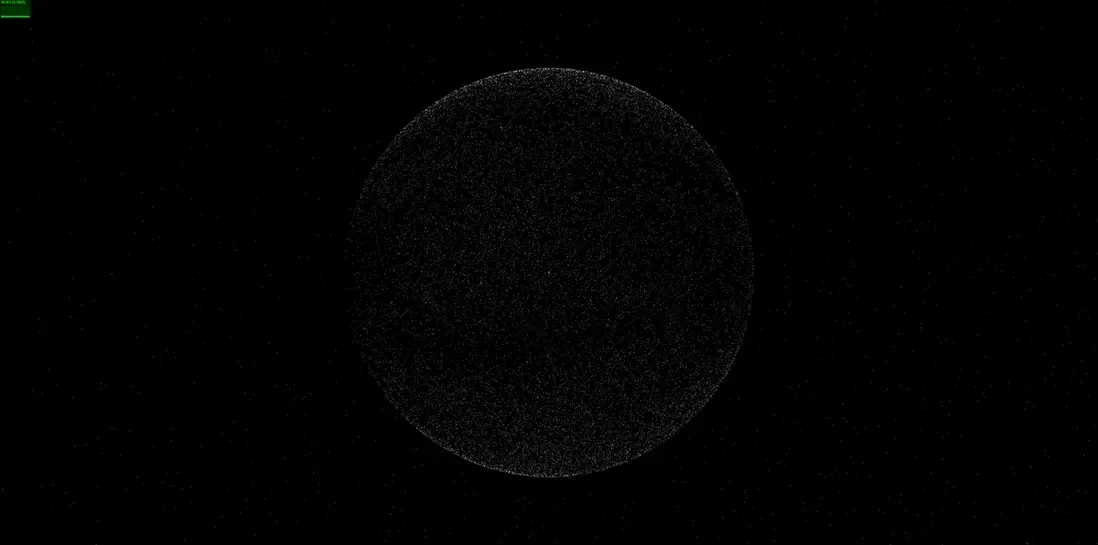
基於vue3+threejs實現太陽系與奧爾特雲層(結尾附源碼)
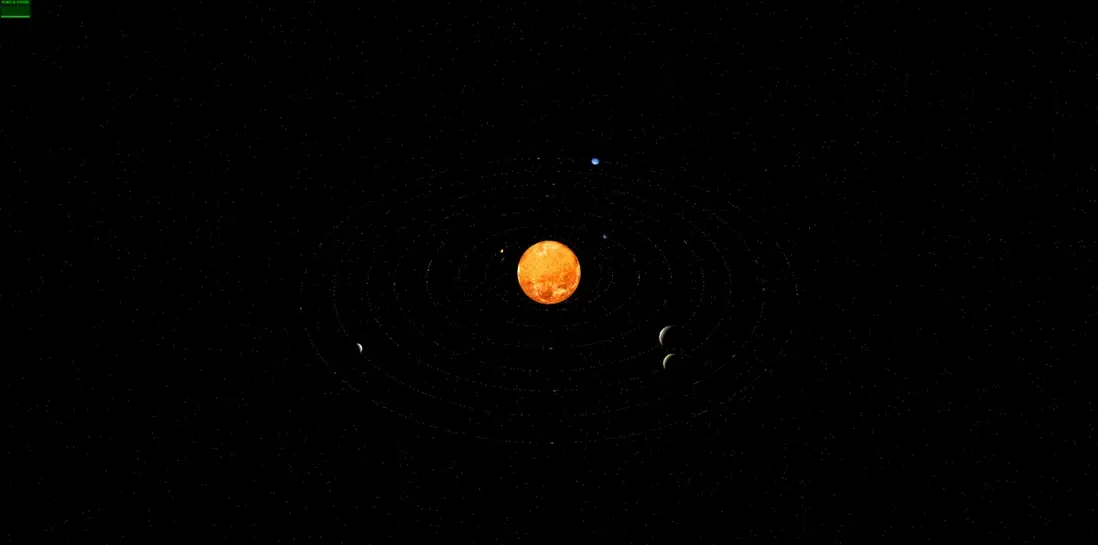
先看效果,附源碼地址,看完覺得還不錯的還望不吝一個小小的star
- 在線預覽:預覽
1 快速上手
1.1 在項目中使用 npm 包引入
Step 1: 使用命令行在項目目錄下執行以下命令
npm install three@0.148.0 --saveStep 2: 在需要用到 three 的 JS 文件中導入
import * as THREE from 'three'
import {OrbitControls} from 'three/addons/controls/OrbitControls.js';
配置
- node 版本 18.17.0
- 調用three方法生創建three基礎功能
Step 1: 新建場景
// 首先定義之後需要用到的參數
let scene, mesh, camera, stats, renderer, geometry, material, width, height;
// 場景
const initScene = () => {
  width = webGlRef.value.offsetWidth; //寬度
  height = webGlRef.value.offsetHeight; //高度
  scene = new THREE.Scene()
  renderer = new THREE.WebGLRenderer();
  renderer.setSize(width, height);
  document.getElementById('webgl').appendChild(renderer.domElement);
}
Step 2: 新建相機
-
相機有多個參數,最後一個參數是相機拍攝距離
cemear.position.set可以設置相機位置// 相機 const initCamera = () => { // 實例化一個透視投影相機對象 camera = new THREE.PerspectiveCamera(30, width / height, 1, 50000000); //相機在Three.js三維座標系中的位置 // 根據需要設置相機位置具體值 camera.position.set(3500, 1000, 100000); camera.lookAt(0, 10, 0); //y軸上位置10 // camera.lookAt(mesh.position);//指向mesh對應的位置 renderer.render(scene, camera); }Step 3: 創建點光源
在座標原點創建點光源,之後用太陽覆蓋,模擬太陽光照// 光源 const initPointLight = () => { const pointLight = new THREE.PointLight('#ffeedb', 2.0); pointLight.intensity = 2;//光照強度 pointLight.decay = 2;//設置光源不隨距離衰減 pointLight.position.set(0, 0, 0); scene.add(pointLight); //點光源添加到場景中 // 光源輔助觀察 const pointLightHelper = new THREE.PointLightHelper(pointLight, 10); scene.add(pointLightHelper); // pointLight.position.set(100, 200, 150); }
最終的結果
由於相機位置拉的比較遠,若頁面未顯示光源,滑動鼠標滾輪即可顯示。
const initThree = () => {
  initScene() // 場景
  initCamera() // 相機
  initPointLight() // 光源
  initRender()
}
// 監聽性能
const initRender = () => {
  const controls = new OrbitControls(camera, renderer.domElement);
  controls.addEventListener('change', function () {
    renderer.render(scene, camera); //執行渲染操作
  });//監聽鼠標、鍵盤事件
}
nextTick(() => {
  initThree()
})
2 生成太陽系(太陽和八大行星貼圖全部會放在最後面)
Step 1: 生成太陽
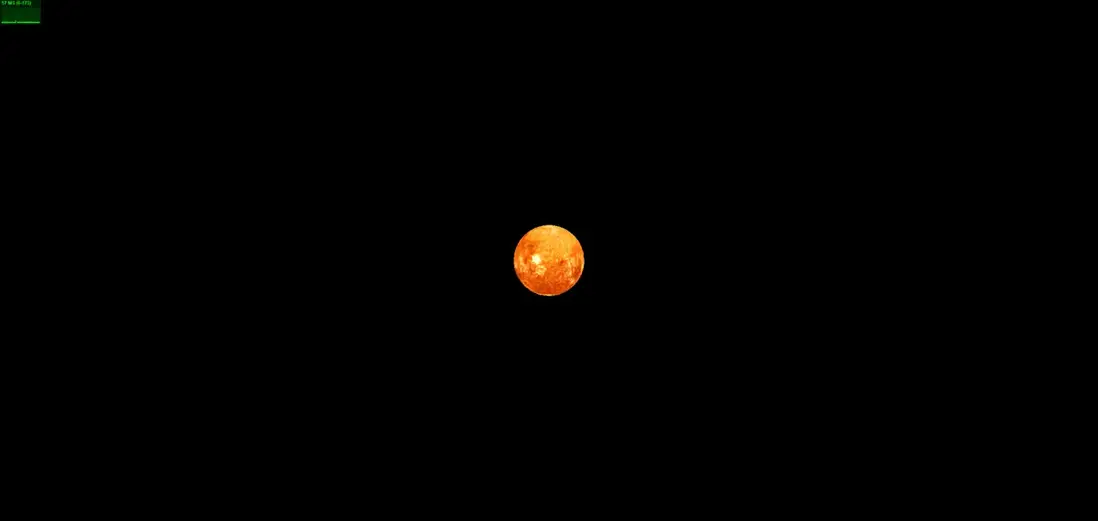
設置太陽的形狀SphereGeometry(球體),材質MeshBasicMaterial(不受光照影響)。導入sun.jpg為太陽貼圖,讓太陽看起來更真實。
// sun
const initSun = () => {
  geometry = new THREE.SphereGeometry(300, 32, 16);
  // 添加紋理加載器
  const texLoader = new THREE.TextureLoader();
  const texture = texLoader.load('./public/sun.jpg');
  const material = new THREE.MeshBasicMaterial({
    // color:0x0000FF,
    map: texture,
    side: THREE.DoubleSide  //默認只渲染正面,這裏設置雙面渲染
  });

  mesh = new THREE.Mesh(geometry, material); //網格模型對象Mesh
  mesh.position.set(0, 0, 0)
  scene.add(mesh);
}
Step 2: 引入性能監視器stats
//引入性能監視器stats.js
import Stats from 'three/addons/libs/stats.module.js';
// stats對象
const initStats = () => {
stats = new Stats();
stats.setMode(1);
//stats.domElement:web頁面上輸出計算結果,一個div元素,
document.body.appendChild(stats.domElement);
}Step 3: 太陽自轉
// 自轉
const initSunRotate = () => {
  stats.update();
  renderer.render(scene, camera); //執行渲染操作
  mesh.rotateY(0.01);//每次繞y軸旋轉0.01弧度
  requestAnimationFrame(initSunRotate);//請求再次執行渲染函數render,渲染下一幀
}
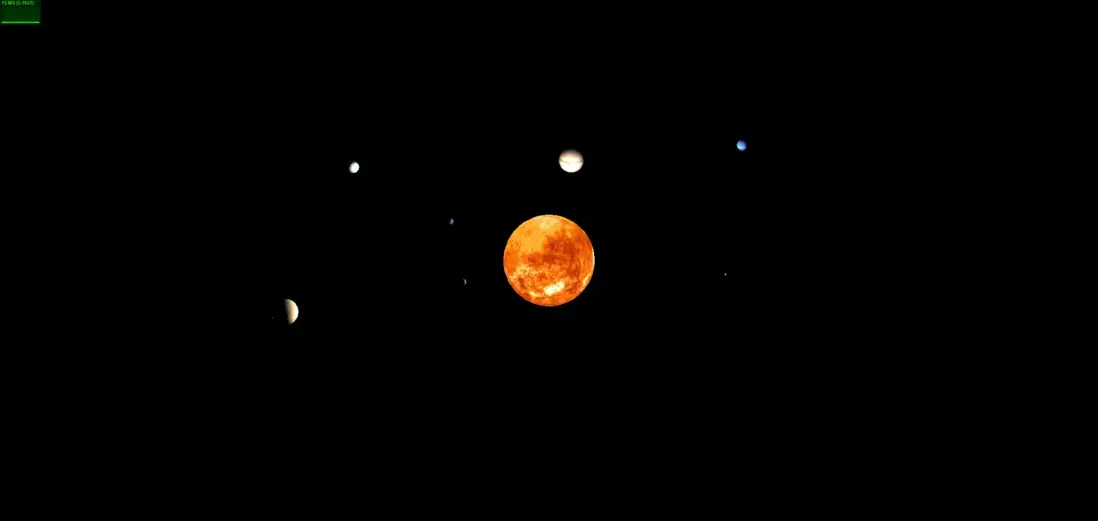
最終效果
3 生成八大行星
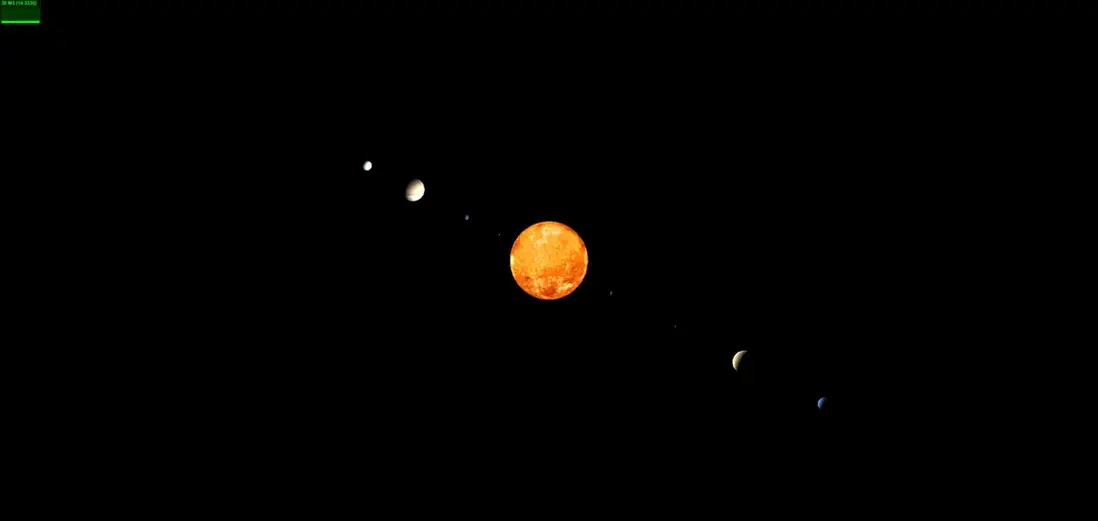
八大行星按照與太陽之間的距離分為:水星, 金星, 地球, 火星, 木星, 土星, 天王星, 海王星
- 水星
- 金星
- 地球
- 火星
- 木星
- 土星
- 天王星
- 海王星
Step 1: 創建八大行星,實現行星自轉
依照太陽的創建方法,依次創建八大行星,並實現行星自轉
// 水星
const initMercury = () => {
  const geometrys = new THREE.SphereGeometry(5, 32, 16);
  const texLoader = new THREE.TextureLoader();
  const texture = texLoader.load('./public/mercury.jpg');
  const materials = new THREE.MeshPhysicalMaterial({
    map: texture,
    side: THREE.DoubleSide  //默認只渲染正面,這裏設置雙面渲染
  });

  const meshs = new THREE.Mesh(geometrys, materials); //網格模型對象Mesh
  meshs.position.set(-500, 0, 0)
  scene.add(meshs);

  function renderTemp() {
    renderer.render(scene, camera); //執行渲染操作
    meshs.rotateY(0.05);//每次繞y軸旋轉0.01弧度
    requestAnimationFrame(renderTemp);//請求再次執行渲染函數render,渲染下一幀
  }

  renderTemp()
  initPlanet(500)
  // 公轉
  let angle = 0, speed = 0.025, distance = 500;

  function rotationMesh() {
    renderer.render(scene, camera); //執行渲染操作
    angle += speed;
    if (angle > Math.PI * 2) {
      angle -= Math.PI * 2;
    }

    meshs.position.set(distance * Math.sin(angle), 0, distance * Math.cos(angle));

    requestAnimationFrame(rotationMesh);//請求再次執行渲染函數render,渲染下一幀
  }

  rotationMesh()
}
// 金星
const initVenus = () => {
  const geometrys = new THREE.SphereGeometry(20, 32, 16);
  const texLoader = new THREE.TextureLoader();
  const texture = texLoader.load('./public/venus.jpg');
  const materials = new THREE.MeshPhysicalMaterial({
    map: texture,
    side: THREE.DoubleSide  //默認只渲染正面,這裏設置雙面渲染
  });

  const meshs = new THREE.Mesh(geometrys, materials); //網格模型對象Mesh
  meshs.position.set(600, 0, 0)
  scene.add(meshs);

  function renderTemp() {
    renderer.render(scene, camera); //執行渲染操作
    meshs.rotateY(0.05);//每次繞y軸旋轉0.01弧度
    requestAnimationFrame(renderTemp);//請求再次執行渲染函數render,渲染下一幀
  }

  renderTemp()
}

// 地球
const initEarth = () => {
  const geometrys = new THREE.SphereGeometry(21, 32, 16);
  const texLoader = new THREE.TextureLoader();
  const texture = texLoader.load('./public/earth.jpg');
  const materials = new THREE.MeshPhysicalMaterial({
    map: texture,
    side: THREE.DoubleSide  //默認只渲染正面,這裏設置雙面渲染
  });

  const meshs = new THREE.Mesh(geometrys, materials); //網格模型對象Mesh
  meshs.position.set(-850, 0, 0)
  scene.add(meshs);

  function renderTemp() {
    renderer.render(scene, camera); //執行渲染操作
    meshs.rotateY(0.05);//每次繞y軸旋轉0.01弧度
    requestAnimationFrame(renderTemp);//請求再次執行渲染函數render,渲染下一幀
  }

  renderTemp()
}

// 火星
const initMars = () => {
  const geometrys = new THREE.SphereGeometry(11, 32, 16);
  const texLoader = new THREE.TextureLoader();
  const texture = texLoader.load('./public/mars.jpg');
  const materials = new THREE.MeshPhysicalMaterial({
    map: texture,
    side: THREE.DoubleSide  //默認只渲染正面,這裏設置雙面渲染
  });

  const meshs = new THREE.Mesh(geometrys, materials); //網格模型對象Mesh
  meshs.position.set(1150, 0, 0)
  scene.add(meshs);

  function renderTemp() {
    renderer.render(scene, camera); //執行渲染操作
    meshs.rotateY(0.05);//每次繞y軸旋轉0.01弧度
    requestAnimationFrame(renderTemp);//請求再次執行渲染函數render,渲染下一幀
  }

  renderTemp()
}

// 木星
const initJupiter = () => {
  const geometrys = new THREE.SphereGeometry(100, 32, 16);
  const texLoader = new THREE.TextureLoader();
  const texture = texLoader.load('./public/jupiter.jpg');
  const materials = new THREE.MeshPhysicalMaterial({
    map: texture,
    side: THREE.DoubleSide  //默認只渲染正面,這裏設置雙面渲染
  });

  const meshs = new THREE.Mesh(geometrys, materials); //網格模型對象Mesh
  meshs.position.set(-1450, 0, 0)
  scene.add(meshs);

  function renderTemp() {
    renderer.render(scene, camera); //執行渲染操作
    meshs.rotateY(0.05);//每次繞y軸旋轉0.01弧度
    requestAnimationFrame(renderTemp);//請求再次執行渲染函數render,渲染下一幀
  }

  renderTemp()
}

// 土星
const initSaturn = () => {
  const geometrys = new THREE.SphereGeometry(80, 32, 16);
  const texLoader = new THREE.TextureLoader();
  const texture = texLoader.load('./public/saturn.jpg');
  const materials = new THREE.MeshPhysicalMaterial({
    map: texture,
    side: THREE.DoubleSide  //默認只渲染正面,這裏設置雙面渲染
  });

  const meshs = new THREE.Mesh(geometrys, materials); //網格模型對象Mesh
  meshs.position.set(1700, 0, 0)
  scene.add(meshs);

  function renderTemp() {
    renderer.render(scene, camera); //執行渲染操作
    meshs.rotateY(0.05);//每次繞y軸旋轉0.01弧度
    requestAnimationFrame(renderTemp);//請求再次執行渲染函數render,渲染下一幀
  }

  renderTemp()
}

// 天王星
const initUranus = () => {
  const geometrys = new THREE.SphereGeometry(45, 32, 16);
  const texLoader = new THREE.TextureLoader();
  const texture = texLoader.load('./public/uranus.jpg');
  const materials = new THREE.MeshPhysicalMaterial({
    map: texture,
    side: THREE.DoubleSide  //默認只渲染正面,這裏設置雙面渲染
  });

  const meshs = new THREE.Mesh(geometrys, materials); //網格模型對象Mesh
  meshs.position.set(-2000, 0, 0)
  scene.add(meshs);

  function renderTemp() {
    renderer.render(scene, camera); //執行渲染操作
    meshs.rotateY(0.05);//每次繞y軸旋轉0.01弧度
    requestAnimationFrame(renderTemp);//請求再次執行渲染函數render,渲染下一幀
  }

  renderTemp()
}

// 海王星
const initNeptune = () => {
  const geometrys = new THREE.SphereGeometry(45, 32, 16);
  const texLoader = new THREE.TextureLoader();
  const texture = texLoader.load('./public/neptune.jpg');
  const materials = new THREE.MeshPhysicalMaterial({
    map: texture,
    side: THREE.DoubleSide  //默認只渲染正面,這裏設置雙面渲染
  });

  const meshs = new THREE.Mesh(geometrys, materials); //網格模型對象Mesh
  meshs.position.set(2300, 0, 0)
  scene.add(meshs);
  meshs.rotation.y = 100;//每次繞y軸旋轉0.01弧度

  function renderTemp() {
    renderer.render(scene, camera); //執行渲染操作
    meshs.rotateY(0.05);//每次繞y軸旋轉0.01弧度
    requestAnimationFrame(renderTemp);//請求再次執行渲染函數render,渲染下一幀
  }

  renderTemp()
}
最終效果圖
Step 2: 實現行星公轉
自轉都有了,那麼公轉能少了嗎?
以水星為例子,在initMercury方法中添加
let angle = 0, speed = 0.025, distance = 500;

  function rotationMesh() {
    renderer.render(scene, camera); //執行渲染操作
    angle += speed;
    if (angle > Math.PI * 2) {
      angle -= Math.PI * 2;
    }

    meshs.position.set(distance * Math.sin(angle), 0, distance * Math.cos(angle));

    requestAnimationFrame(rotationMesh);//請求再次執行渲染函數render,渲染下一幀
  }

  rotationMesh()
其中需要注意的是distance 參數,與上面方法中的meshs.position.set(600, 0, 0)必須相等,相當於公轉半徑。speed 參數是公轉角度,不同行星儘量設置不同的公轉角度,相當於公轉速度。
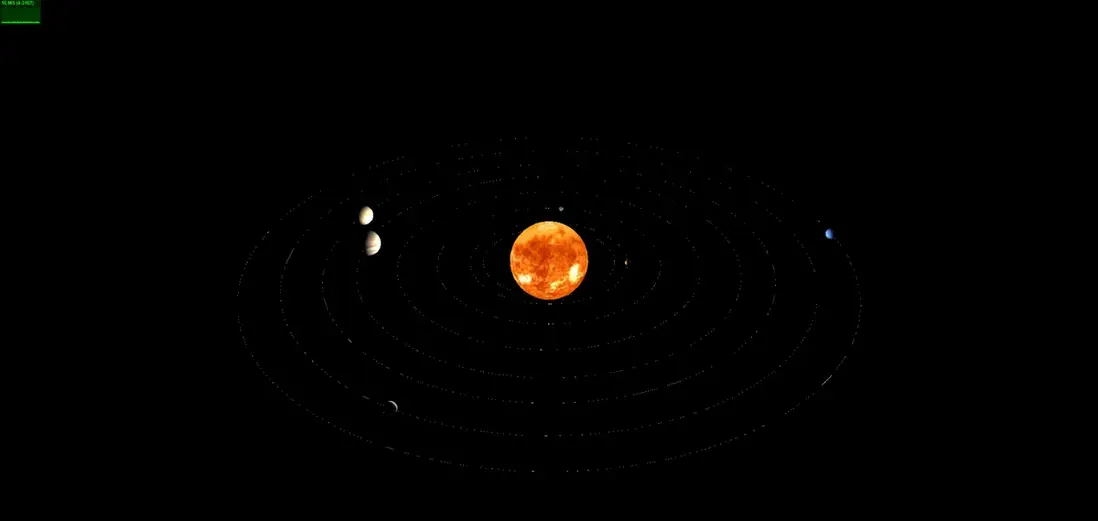
依照同樣的方法,在其餘七大行星中設置公轉,最終的結果
Step 3: 公轉軌跡
雖然行星都轉起來了,但是是不是感覺少了點什麼,於是加上公轉軌跡看下效果
// 公轉軌跡
const initPlanet = (distance) => {
  /*軌道*/
  let track = new THREE.Mesh(new THREE.RingGeometry(distance - 0.2, distance + 0.2, 64, 1),
      new THREE.MeshBasicMaterial({color: 0xffffff, side: THREE.DoubleSide})
  );
  track.rotation.x = -Math.PI / 2;
  scene.add(track);
}
在每個創建行星的方法中調用,依舊以水星為例
// 水星
const initMercury = () => {
  const geometrys = new THREE.SphereGeometry(5, 32, 16);
  const texLoader = new THREE.TextureLoader();
  const texture = texLoader.load('./public/mercury.jpg');
  const materials = new THREE.MeshPhysicalMaterial({
    map: texture,
    side: THREE.DoubleSide  //默認只渲染正面,這裏設置雙面渲染
  });

  const meshs = new THREE.Mesh(geometrys, materials); //網格模型對象Mesh
  meshs.position.set(-500, 0, 0)
  scene.add(meshs);

  function renderTemp() {
    renderer.render(scene, camera); //執行渲染操作
    meshs.rotateY(0.05);//每次繞y軸旋轉0.01弧度
    requestAnimationFrame(renderTemp);//請求再次執行渲染函數render,渲染下一幀
  }

  renderTemp()
  initPlanet(500)
  // 公轉
  let angle = 0, speed = 0.025, distance = 500;

  function rotationMesh() {
    renderer.render(scene, camera); //執行渲染操作
    angle += speed;
    if (angle > Math.PI * 2) {
      angle -= Math.PI * 2;
    }

    meshs.position.set(distance * Math.sin(angle), 0, distance * Math.cos(angle));

    requestAnimationFrame(rotationMesh);//請求再次執行渲染函數render,渲染下一幀
  }

  rotationMesh()
}
最終效果,感覺有點樣子了
4.奧爾特雲層
// 奧爾特雲層
const atStars = () => {
  /*背景星星*/
  const particles = 30000;  //星星數量
  /*buffer做星星*/
  const bufferGeometry = new THREE.BufferGeometry();

  /*32位浮點整形數組*/
  let positions = new Float32Array( particles * 3 );
  let colors = new Float32Array( particles * 3 );

  let color = new THREE.Color();

  const gap = 80000; // 定義星星的最近出現位置
  for ( let i = 0; i < positions.length; i += 3 ) {
    // positions

    /*-gap < x < gap */
    let x = ( Math.random() * gap )* (Math.random()<.5? -1 : 1);
    let y = ( Math.random() * gap )* (Math.random()<.5? -1 : 1);
    let z = ( Math.random() * gap )* (Math.random()<.5? -1 : 1);

    /*找出x,y,z中絕對值最大的一個數*/
    let biggest = Math.abs(x) > Math.abs(y) ? Math.abs(x) > Math.abs(z) ? 'x' : 'z' :
        Math.abs(y) > Math.abs(z) ? 'y' : 'z';

    let pos = { x, y, z};

    /*如果最大值比n要小(因為要在一個距離之外才出現星星)則賦值為n(-n)*/
    if(Math.abs(pos[biggest]) < gap) pos[biggest] = pos[biggest] < 0 ? -gap : gap;

    x = pos['x'];
    y = pos['y'];
    z = pos['z'];

    positions[ i ]     = x;
    positions[ i + 1 ] = y;
    positions[ i + 2 ] = z;

    // colors
    /*70%星星有顏色*/
    let hasColor = Math.random() > 0.3;
    let vx, vy, vz;

    if(hasColor){
      vx = (Math.random()+1) / 2 ;
      vy = (Math.random()+1) / 2 ;
      vz = (Math.random()+1) / 2 ;
    }else{
      vx = 1 ;
      vy = 1 ;
      vz = 1 ;
    }

    color.setRGB( vx, vy, vz );

    colors[ i ]     = color.r;
    colors[ i + 1 ] = color.g;
    colors[ i + 2 ] = color.b;
  }
  // console.log(positions, "positions >>>>>>>>>>>>>>>")
  bufferGeometry.setAttribute( 'position', new THREE.BufferAttribute( positions, 3 ) );
  bufferGeometry.setAttribute( 'color', new THREE.BufferAttribute( colors, 3 ) );
  bufferGeometry.computeBoundingSphere();

  /*星星的material*/
  let material = new THREE.PointsMaterial( { size: 6, vertexColors: THREE.VertexColors } );
  const particleSystem = new THREE.Points( bufferGeometry, material );
  scene.add( particleSystem );

}
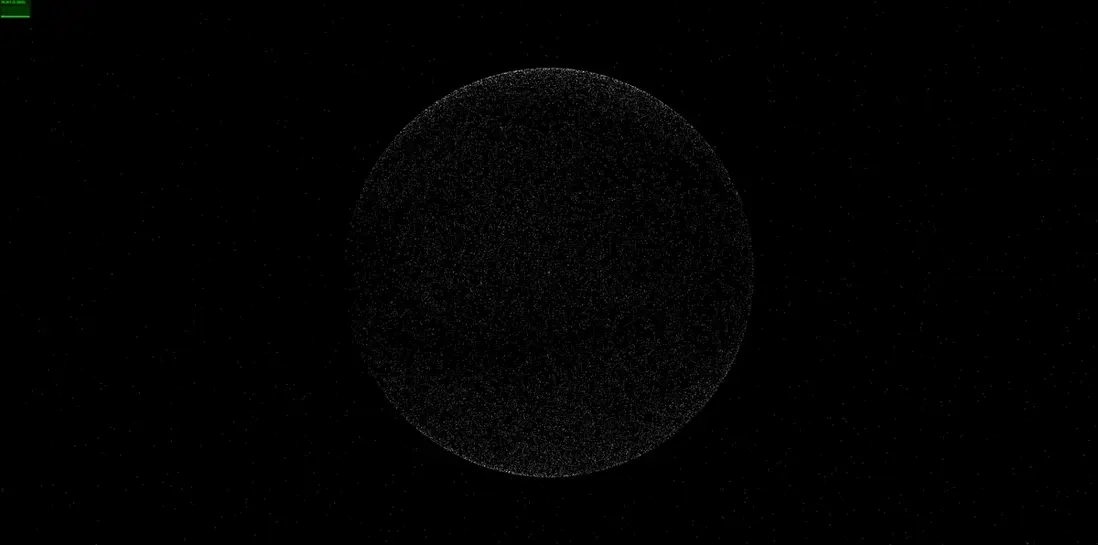
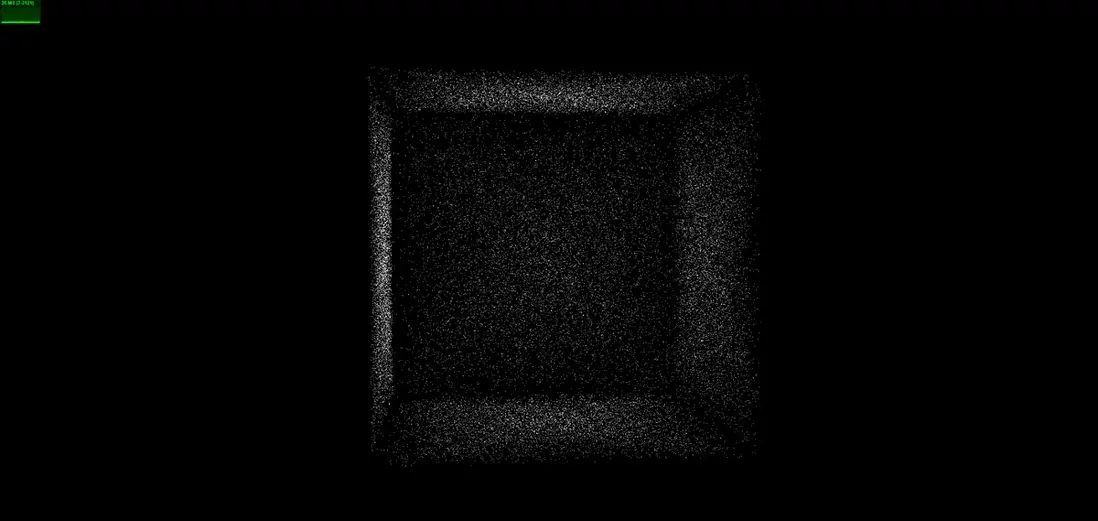
最終效果
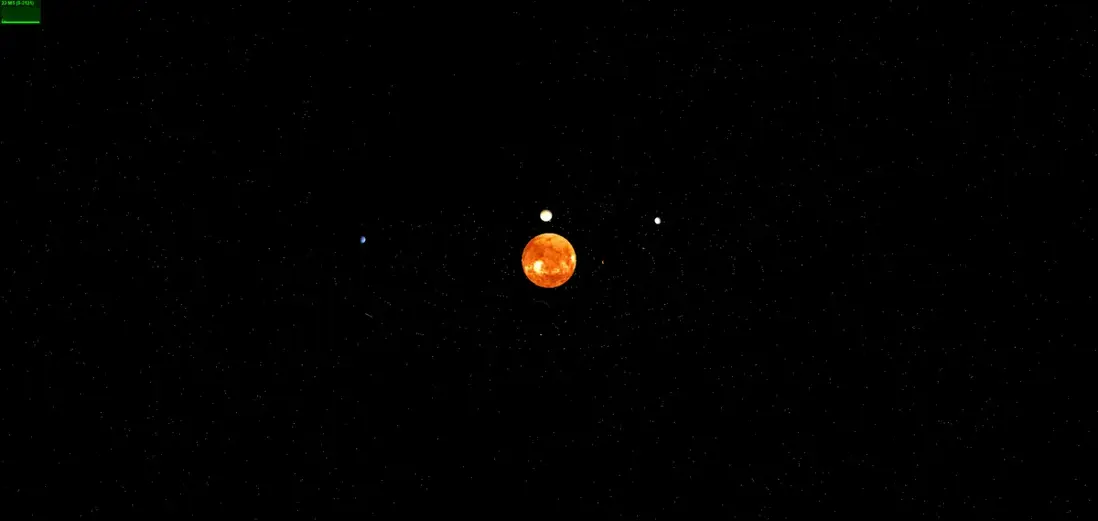
竟然是正方體形狀的雲層,是因為上面x,y,z座標緣故。因此下面就要把正方體表面的行星座標變換成球面座標。正方體表面座標(x, y, z)和球面半徑R的座標都是已知的,那麼將之全部轉換為球面座標(a, b, c)。
- x = rsinθcosΦ
- y = rsinθsinΦ
- z = r*cosθcos
其中r = gap,θ = Math.acos(Math.abs(z) / gap),Φ = Math.atan(Math.abs(y) / Math.abs(x))。因此可得出: - a = gap Math.sin(Math.acos(Math.abs(z) / gap)) Math.cos(Math.atan(Math.abs(y) / Math.abs(x)))
- b = gap Math.sin(Math.acos(Math.abs(z) / gap)) Math.sin(Math.atan(Math.abs(y) / Math.abs(x)))
- c = gap * Math.cos(Math.acos(Math.abs(z) / gap))
帶入公式,此時渲染的結果並不理想,是因為空間座標分為八個象限,a, b, c的正負值出錯。最後公式改為: - a = gap Math.sin(Math.acos(Math.abs(z) / gap)) Math.cos(Math.atan(Math.abs(y) / Math.abs(x))) * (x/Math.abs(x));
- b = gap Math.sin(Math.acos(Math.abs(z) / gap)) Math.sin(Math.atan(Math.abs(y) / Math.abs(x))) * (y/Math.abs(y));
-
c = gap Math.cos(Math.acos(Math.abs(z) / gap)) (z/Math.abs(z));
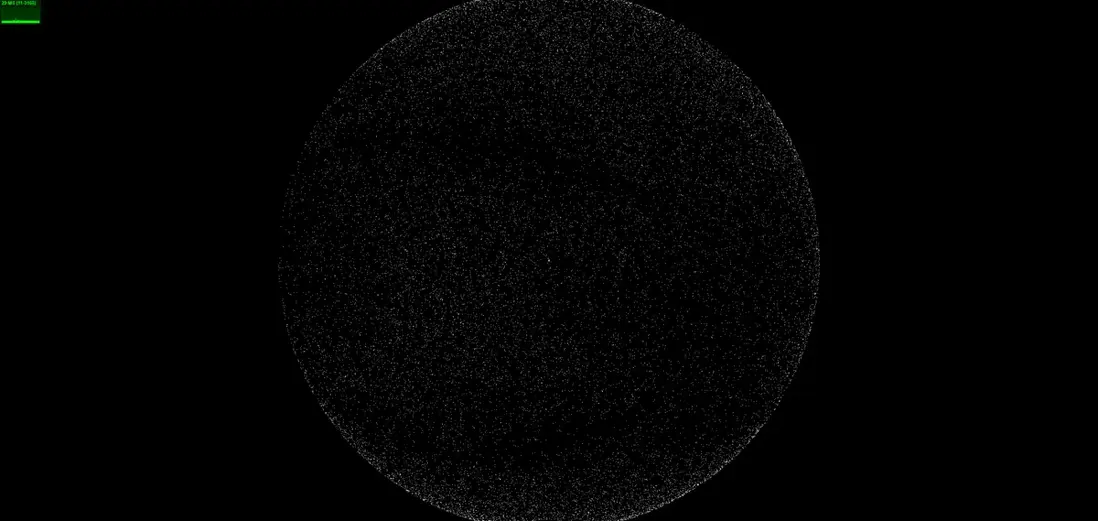
將的出來的結果帶入上面position數組替換x, y, z的值positions[ i ] = gap * Math.sin(Math.acos(Math.abs(z) / gap)) * Math.cos(Math.atan(Math.abs(y) / Math.abs(x))) * (x/Math.abs(x)); positions[ i + 1 ] = gap * Math.sin(Math.acos(Math.abs(z) / gap)) * Math.sin(Math.atan(Math.abs(y) / Math.abs(x))) * (y/Math.abs(y)); positions[ i + 2 ] = gap * Math.cos(Math.acos(Math.abs(z) / gap)) * (z/Math.abs(z));是不是很簡單,隨便來個初中生就會做了,不知道大學生的你會不會做?話不多説,來看下效果
搞定收工!
開玩笑的,沒有,後面的星空背景太空曠了,沒有星空的感覺,那麼最後加個星空背景吧。
用的是跟奧爾特雲層同樣的方法,不過星體不是放在球面了,而是分佈到球體裏面散開。
// 背景星體
const backStars = () => {
  /*背景星星*/
  const particles = 50000;  //星星數量
  /*buffer做星星*/
  const bufferGeometry = new THREE.BufferGeometry();

  /*32位浮點整形數組*/
  let positions = new Float32Array( particles * 3 );
  let colors = new Float32Array( particles * 3 );

  let color = new THREE.Color();

  const gap = 10000000; // 定義星星的最近出現位置
  for ( let i = 0; i < positions.length; i += 3 ) {
    // positions

    /*-gap < x < gap */
    let x = ( Math.random() * 6 * gap ) * (Math.random()<.5? -1 : 1);
    let y = ( Math.random() * 6 * gap ) * (Math.random()<.5? -1 : 1);
    let z = ( Math.random() * 6 * gap ) * (Math.random()<.5? -1 : 1);

    /*找出x,y,z中絕對值最大的一個數*/
    let biggest = Math.abs(x) > Math.abs(y) ? Math.abs(x) > Math.abs(z) ? 'x' : 'z' :
        Math.abs(y) > Math.abs(z) ? 'y' : 'z';

    let pos = { x, y, z};

    /*如果最大值比n要小(因為要在一個距離之外才出現星星)則賦值為n(-n)*/
    if(Math.abs(pos[biggest]) <  (gap)) pos[biggest] = pos[biggest] < 0 ? - gap :  gap;

    x = pos['x'];
    y = pos['y'];
    z = pos['z'];

    // positions[ i ]     = x;
    // positions[ i + 1 ] = y;
    // positions[ i + 2 ] = z;
    let tempGap = Math.sqrt(x * x + y * y + z * z) >  6 * gap ?  6 * gap : Math.sqrt(x * x + y * y + z * z)

    positions[ i ]     = tempGap * Math.sin(Math.acos(Math.abs(z) / tempGap)) * Math.cos(Math.atan(Math.abs(y) / Math.abs(x))) * (x/Math.abs(x));
    positions[ i + 1 ] = tempGap * Math.sin(Math.acos(Math.abs(z) / tempGap)) * Math.sin(Math.atan(Math.abs(y) / Math.abs(x))) * (y/Math.abs(y));
    positions[ i + 2 ] = tempGap * Math.cos(Math.acos(Math.abs(z) / tempGap)) * (z/Math.abs(z));

    // positions[ i ]     = Math.atan(y/x) * (x/Math.abs(x));
    // positions[ i + 1 ] = Math.sqrt(gap * gap - (Math.atan(y/x)) * Math.atan(y/x) + gap * Math.sin(Math.atan((y / x))) * gap * Math.sin(Math.atan((y / x)))) * (z/Math.abs(z));
    // positions[ i + 2 ] = gap * Math.sin(Math.atan((y / x))) * (y/Math.abs(y));

    // colors
    // colors
    /*70%星星有顏色*/
    let hasColor = Math.random() > 0.3;
    let vx, vy, vz;

    if(hasColor){
      vx = (Math.random()+1) / 2 ;
      vy = (Math.random()+1) / 2 ;
      vz = (Math.random()+1) / 2 ;
    }else{
      vx = 1 ;
      vy = 1 ;
      vz = 1 ;
    }

    color.setRGB( vx, vy, vz );

    colors[ i ]     = color.r;
    colors[ i + 1 ] = color.g;
    colors[ i + 2 ] = color.b;
  }
  // console.log(positions, "positions >>>>>>>>>>>>>>>")
  bufferGeometry.setAttribute( 'position', new THREE.BufferAttribute( positions, 3 ) );
  bufferGeometry.setAttribute( 'color', new THREE.BufferAttribute( colors, 3 ) );
  bufferGeometry.computeBoundingSphere();

  /*星星的material*/
  let material = new THREE.PointsMaterial( { size: 6, vertexColors: THREE.VertexColors } );
  const particleSystem = new THREE.Points( bufferGeometry, material );
  scene.add( particleSystem );

}
最終效果,這下是真搞定了!
- 倉庫地址:Github(點擊跳轉Github源碼地址)
- 倉庫地址:Gitee(點擊跳轉Gitee源碼地址)


